ATH TIRE CARRIER INSTALL INSTRUCTIONS
*NOTE* It is important to mask all threads and the inside of the bearing housing prior to paint. If using a bed liner coating, do not coat the inside of the hinge bracket on the bumper. Tolerances are very tight in that area and the high build coating could make fitting the bearing housing difficult.
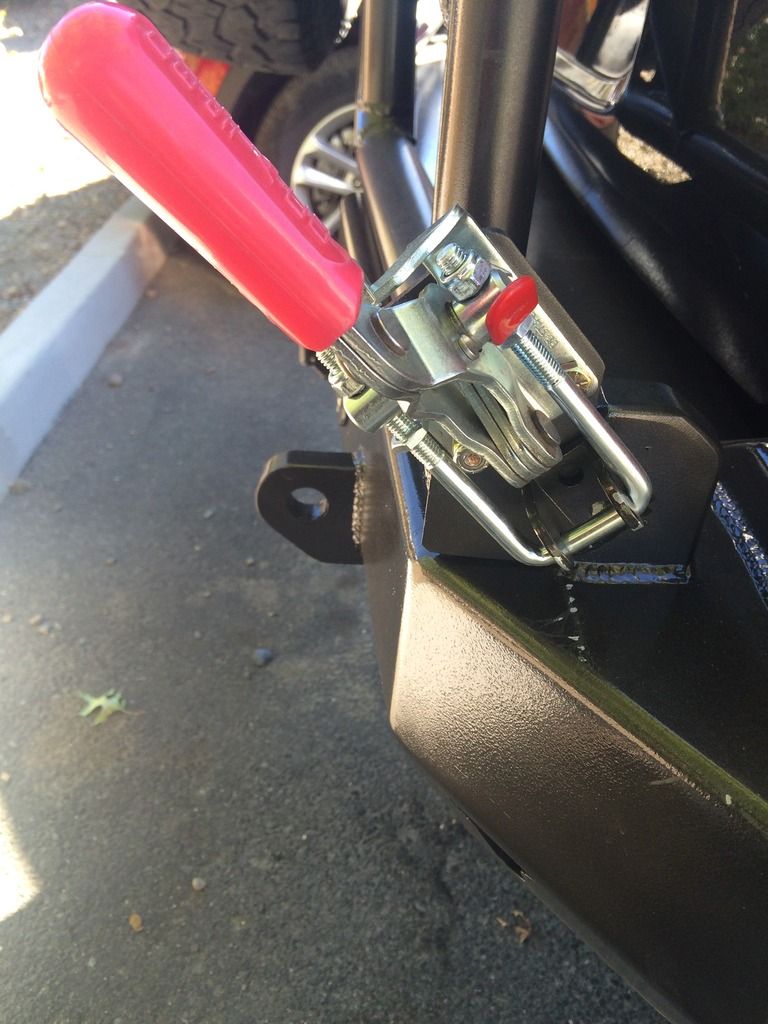
Install the latch using the provided 5/16"-18 nuts and bolts. The latch will sit at an angle to pull the arm forward and down. Replacement parts are available from De-Sta-Co, latch # 341-R. Latch should be shipped pre-adjusted to correct tension. If it needs to be readjusted, simply back off the 5/16" nyloc nuts on the U bolt, adjust jamb nuts, then tighten nyloc nuts. The small thumb tab can be placed on either side of the U bolt, whichever is most comfortable.
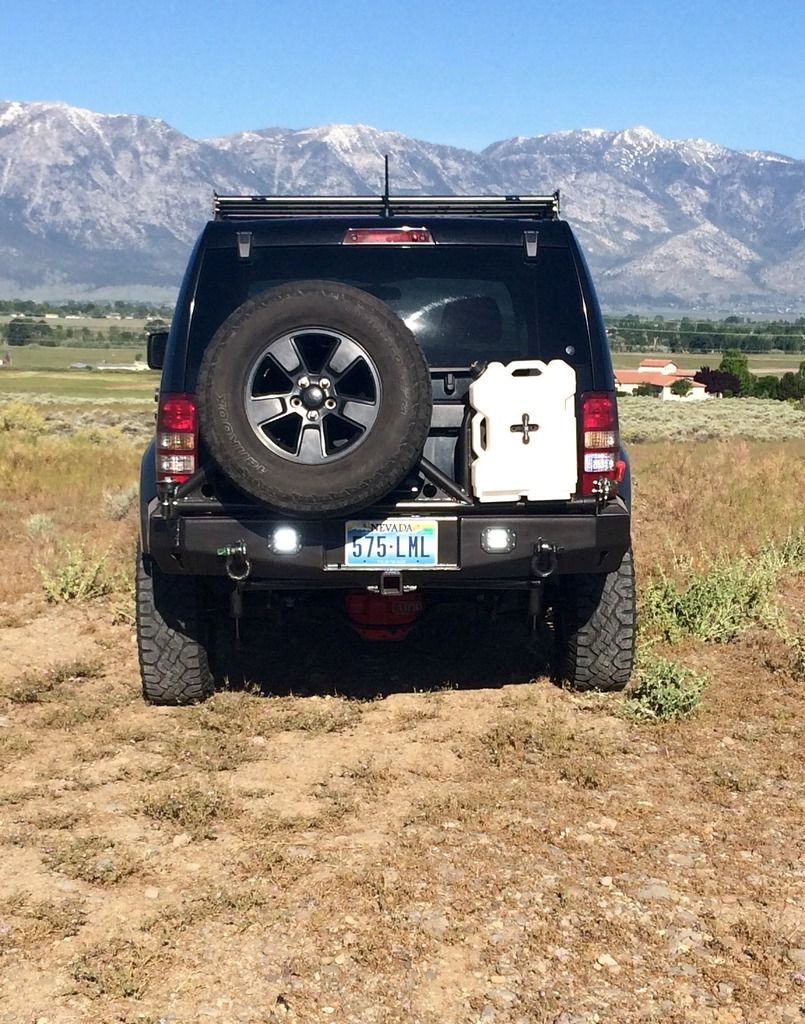
Install license plate onto bumper using the rubber expansion nuts and bolts. Insert rubber nuts into the holes in the bumper, then position license plate and thread in screws and tighten. The purpose of the expansion nuts is so you don't need to remove the entire bumper to change plates should the occasion arise. If plate theft is a concern, use regular bolts and nuts.
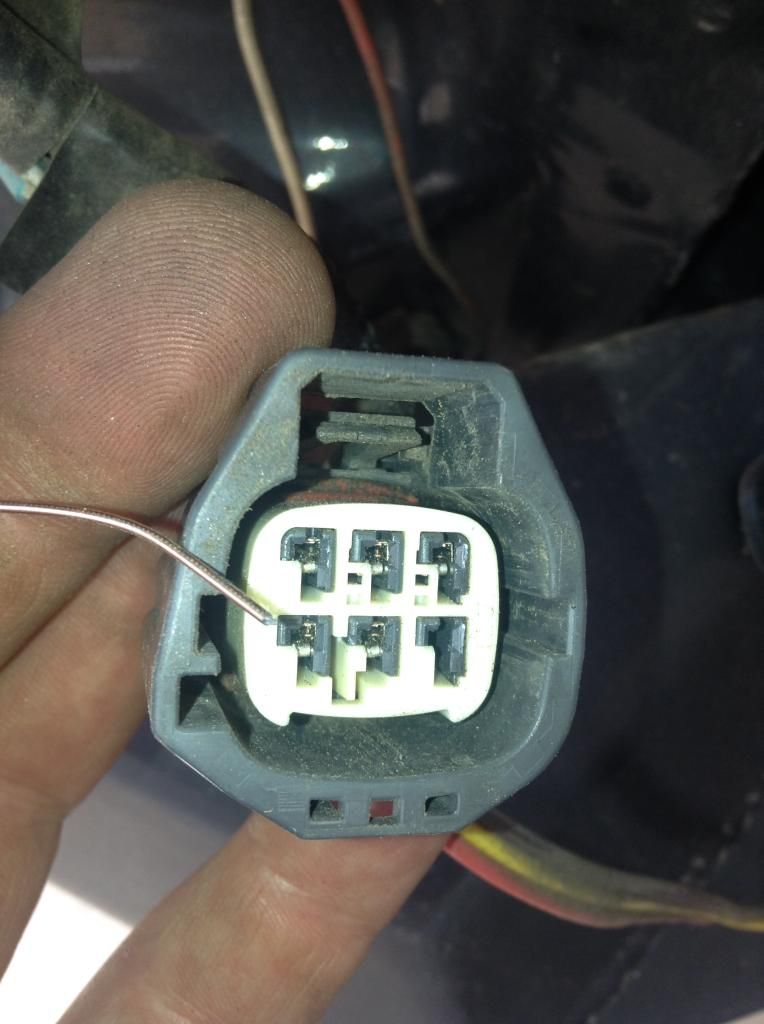
Install license plate lights on bumper. Using the provided materials, splice into the wire connected to #6 on the driver side plug. The numbers are labeled on the back of the plug. Make a quick disconnect using the 2 conductor plug provided, that way if necessary you can remove the bumper later and not cut any wires. Ground to the unibody where it is convenient.
Pic shows #6 pin on the driver side plug:
Install bumper, following these instructions:
viewtopic.php?f=104&t=80105Install stainless steel pop pin slider plate onto the huge bracket (on bumper) using the provided machine screws with a short handle Phillips screwdriver.
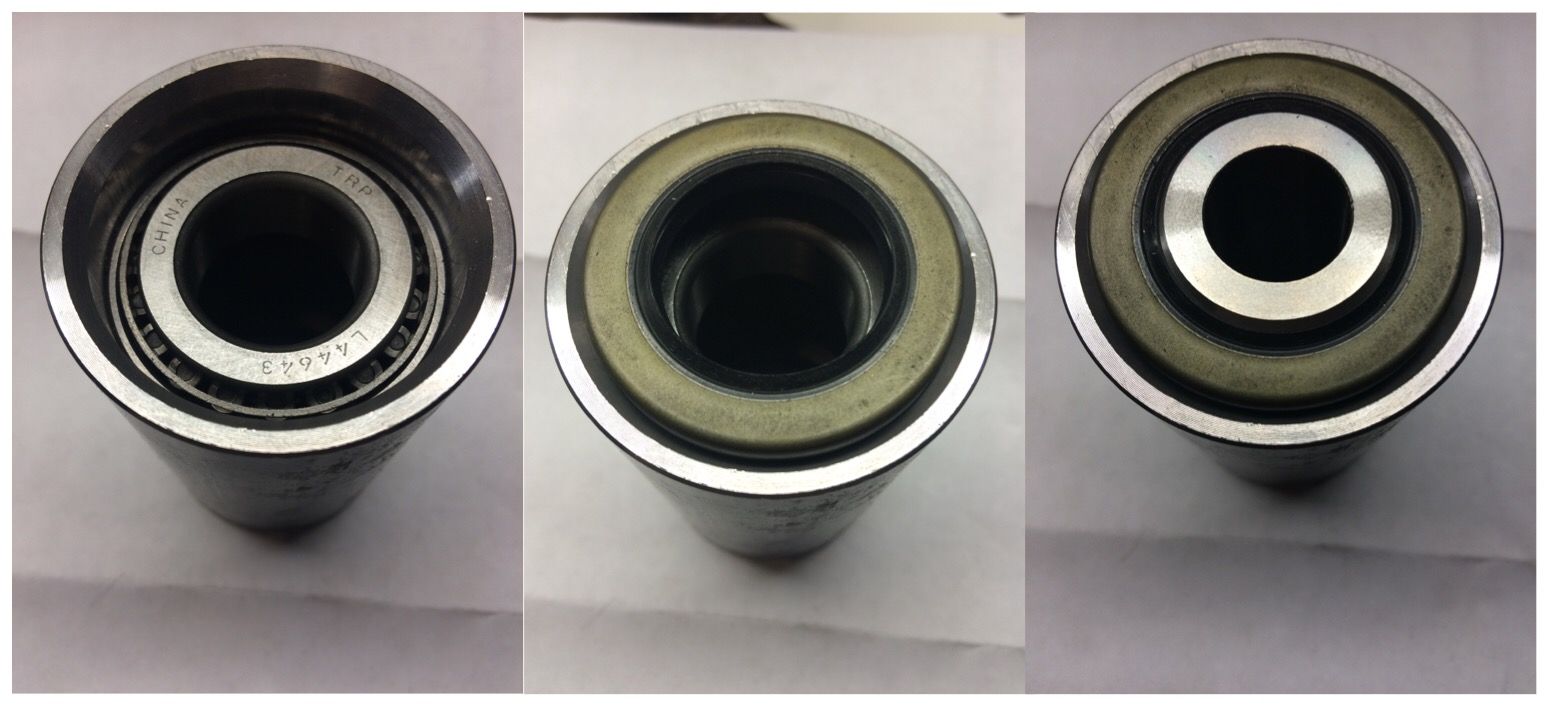
Prepare the bearing assembly for the hinge. The bearings are tapered to match the races pre pressed into the housing. Lubricate the bearings with extra grease before inserting into the bearing housing. Install the grease seals after bearings are inserted by GENTLY tapping in evenly with a hammer. The spacers are then inserted into the assembly as shown. It may be helpful to have a buddy around to insert the tire carrier bearing housing into the bracket but it can be done solo. Insert as shown in the pics below.
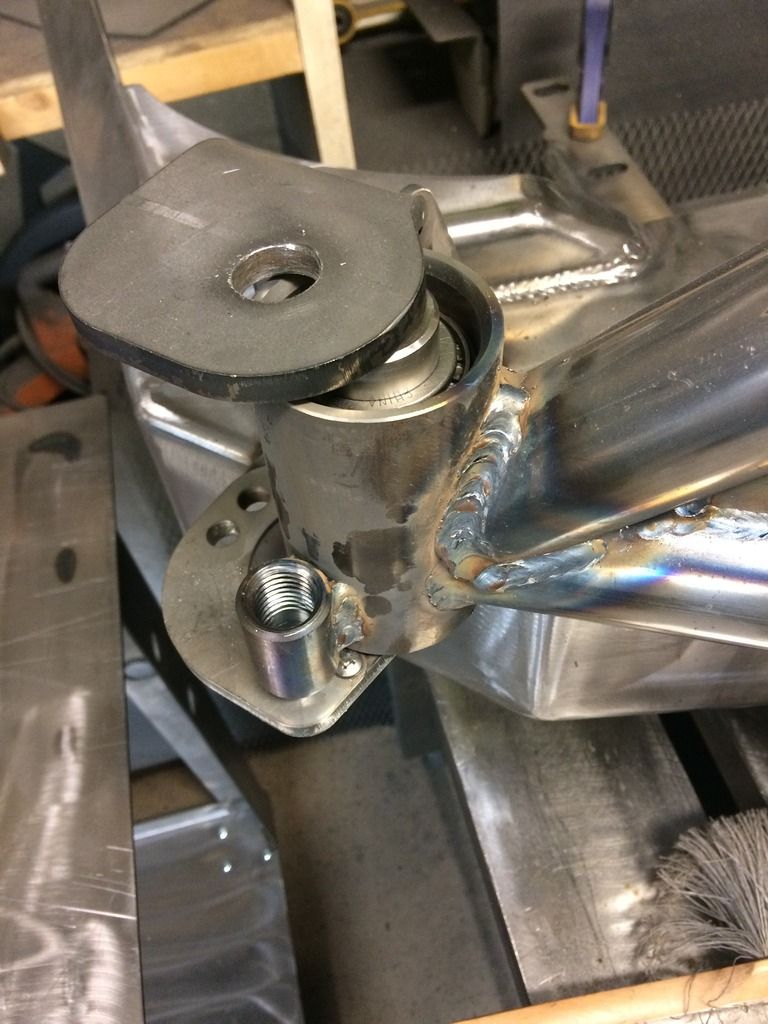
Insert bolt and large washer and feed it through the bearing assembly down to the nut welded to the bottom of the bracket. This may take some patience and manipulation of tire carrier to get the holes lined up. Tighten the bolt down firm using a 1-1/8" socket or adjustable wrench until tire carrier has zero play and is rattle free.
Install pop pin, handle side up, by threading into the small tube welded to the bearing housing.
***IMPORTANT NOTE*** Be careful when opening the tire carrier. Do not let it swing open at speed so that the pin takes a shock load as it falls into the hole. Doing so can shear the pin.Install spare tire.
The shelf on the arm is sized to fit a variety of Jerry can holders (not included), 50 cal ammo can, or accessory of your choice. Simply drill holes and bolt to it. Grade 8 5/16" bolts should be more than adequate.
Trailer safety chains can be attached to shackles on the the shackle tabs if you chose the recessed high clearance receiver. The chains on most trailers should be long enough to make sharp turns, but extensions may be necessary.