| LOST JEEPS http://www.lostjeeps.com/forum/phpBB3/ |
|
| Rock Lizard Rear Bumper install http://www.lostjeeps.com/forum/phpBB3/viewtopic.php?f=3&t=18880 |
Page 1 of 2 |
| Author: | Signcutter21 [ Fri Mar 23, 2007 3:35 pm ] |
| Post subject: | Rock Lizard Rear Bumper install |
Ok, so I got the new bumper all painted up and ready for the install this weekend. Does anybody have install instructions/ pics from when they did theirs? I'll hopefully remember to take some pics when I do. Thanks. Mike |
|
| Author: | Calvin56 [ Fri Mar 23, 2007 5:00 pm ] |
| Post subject: | |
Hey, Let me know if you get anything- I've got on on order too. Maybe we could have a bumper party lol. |
|
| Author: | JJsTJ [ Fri Mar 23, 2007 5:32 pm ] |
| Post subject: | Re: Rock Lizard Rear Bumper install |
Signcutter21 wrote: Ok, so I got the new bumper all painted up and ready for the install this weekend. Does anybody have install instructions/ pics from when they did theirs? I'll hopefully remember to take some pics when I do. Thanks.
Mike MIne is going on starting tonight or tomorrow. I will be back w/ pics and info. Marty said he was going to post or send out instructions but as busy as he has been, I am not surprised that he hasn't had a chance. |
|
| Author: | Rock Lizard [ Fri Mar 23, 2007 5:40 pm ] |
| Post subject: | |
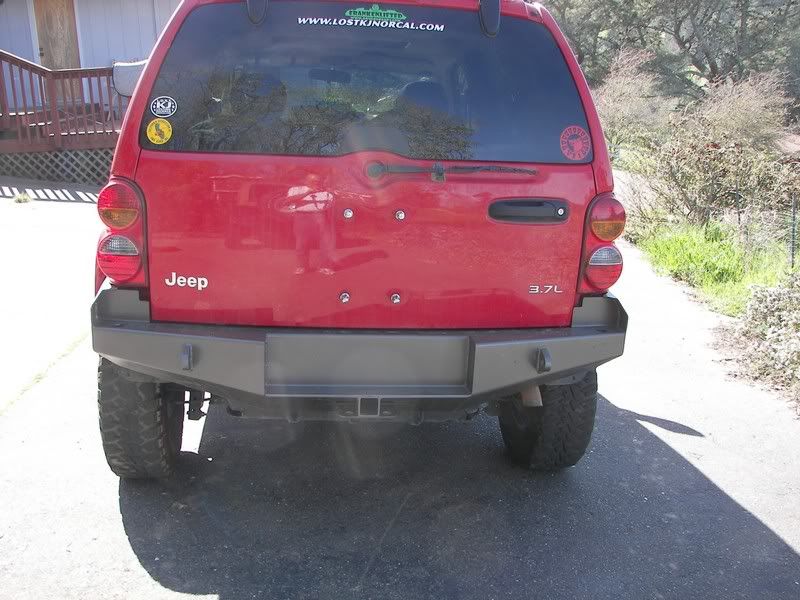
Sorry guys, I'll get those together tonight, although JJ might come up with a very good writeup that may be more complete. All the first batch orders are in the owners' possession, woohoo! I finally got the license plate mounts with lights in, along with the trim for the flares, and will finish putting them together this weekend and ship out Monday, so everyone should have them by the end of next week. Those that ordered from the second batch, I am tacking those all up this weekend and working on them this week, along with all the slider orders. I might take a nap sometime this week too. |
|
| Author: | lilmatty [ Fri Mar 23, 2007 6:10 pm ] |
| Post subject: | |
Here's what Marty sent me. Good stuff I can't find that PM now, so I don't remember all I wrote, but it is pretty simple. Remove stock bumper and flares. Cut slots in rear crossmember pinch weld directly inline with framerails and the same width as shown here: http://www.rocklizardfabrications.com/100_3721.jpg http://www.rocklizardfabrications.com/100_3722.jpg Approximate dimensions of cut although it is a good idea to cut just a hair over to make sure the bumper slides in and out without catching on the pinch seam: http://www.rocklizardfabrications.com/100_3720.jpg http://www.rocklizardfabrications.com/100_3723.jpg Run wiring through notches in bumper mounts, but not between bumper and rear crossmember face (not enough room. Line up holes with holes in framerail (use a round bar/hole finder if slightly off to get bolts lined up with bumper/skid/hitch/framerail). Get the bolts snug but not tight so you can adjust the bumper side to side/front to back for best alignment, then tighten bolts to specs. Put flares back on and mark them in a straight line with lower bend in bumper quarter plate as shown here: http://www.rocklizardfabrications.com/100_2112.jpg http://www.rocklizardfabrications.com/100_3009.jpg Use supplied trim to put on edge of cut flare to give clean finished look. Matt again: I'll say there's an art to mounting it. It can be done with one person. First, use a jack to hold your tank skid in place an center it on the bolt holes. Then lift the bumper and sit it on the 'shelf' of the body. The bumper will just sit there and you can whip a couple of bolts to keep it until you center up all of them. 15 minute job once you prep it ala Marty's instructions above. ps: pound the dents out of your skid first. |
|
| Author: | JJsTJ [ Fri Mar 23, 2007 6:21 pm ] |
| Post subject: | |
Thanks for that info Matt, that will come in handy. |
|
| Author: | lilmatty [ Fri Mar 23, 2007 6:31 pm ] |
| Post subject: | |
JJsKJ wrote: Thanks for that info Matt, that will come in handy.
That 'ledge' part was the grandest revelation. Sure beat wrestling all that weight. |
|
| Author: | DaveKJ02 [ Fri Mar 23, 2007 6:32 pm ] |
| Post subject: | |
Got mine too! So how's everybody surfacing theirs? Powdercoat? Paint? I was going to go with good ol' black hammered and paint the silver flares (limited edition) black while I was at it, but now I dont know. Hammered holds up well on my boulder bars and is easy to touch up, but seeing Seth's Limited with the matching bumper has me second guessing. |
|
| Author: | lilmatty [ Fri Mar 23, 2007 6:43 pm ] |
| Post subject: | |
Gray hammertone for me. Looks great with red.
|
|
| Author: | raceinfan [ Fri Mar 23, 2007 6:49 pm ] |
| Post subject: | |
that thing looks awesome now how about that front one you mentioned |
|
| Author: | lilmatty [ Fri Mar 23, 2007 6:54 pm ] |
| Post subject: | |
raceinfan wrote: that thing looks awesome
now how about that front one you mentioned Sheesh! http://www.lostjeeps.com/forum/phpBB3/vie ... 702#184702 |
|
| Author: | raceinfan [ Fri Mar 23, 2007 7:10 pm ] |
| Post subject: | |
NICE |
|
| Author: | Signcutter21 [ Fri Mar 23, 2007 7:52 pm ] |
| Post subject: | |
cool thanks for the write up Matt/ Marty. A couple more questions. How did you get the rivets out on the inner bumper piece? Drill them out? Second, how about measuring and cutting the rear flares? I have a bagfull of plastic rivets, but broke a couple of the other plasic clamps. oh DaveKJ, I used Hammered. Put on two coats of auto primer then four coats of Hammered. hope that holds up. Did the gas skid too, just so it'd match. thanks mike |
|
| Author: | lilmatty [ Fri Mar 23, 2007 8:34 pm ] |
| Post subject: | |
Signcutter21 wrote: cool thanks for the write up Matt/ Marty. A couple more questions. How did you get the rivets out on the inner bumper piece? Drill them out? Second, how about measuring and cutting the rear flares? I have a bagfull of plastic rivets, but broke a couple of the other plastic clamps.
oh DaveKJ, I used Hammered. Put on two coats of auto primer then four coats of Hammered. hope that holds up. Did the gas skid too, just so it'd match. thanks mike Drilled out the rivets. Took Marty's advice and slipped the bump on first, the marked the cut with tape. See his pic. Then removed the bumper and used a sabre saw with a wood blade (counterintuitive but it gives a better cut) to cut the flare. When I broke some front clamps, NAPA didn't have a replacement (as they do for the rivets) so I had to get them from a dealer. The white springy things, right? Actually the bumper has holes for attaching them back but I did not do so. I found that after putting the rivets back in the flare was tight enough. |
|
| Author: | Troysterr [ Fri Mar 23, 2007 10:40 pm ] |
| Post subject: | |
Rock Lizard wrote: Everyones orders should be done by the end of the first week of April then I can take a breather.
Hey, Marty, just out of curiosity...do the front bumpers come before or after your breather? If the answer is that they come after, don't sweat it--I can wait until you have a chance to catch up. |
|
| Author: | tjkj2002 [ Fri Mar 23, 2007 10:44 pm ] |
| Post subject: | |
Troysterr wrote: Rock Lizard wrote: Everyones orders should be done by the end of the first week of April then I can take a breather. Hey, Marty, just out of curiosity...do the front bumpers come before or after your breather? If the answer is that they come after, don't sweat it--I can wait until you have a chance to catch up. |
|
| Author: | chetos [ Sat Mar 24, 2007 10:59 am ] |
| Post subject: | |
Come on guys, you're killing me here. I can't come up with excuses (for my better half) fast for all this stuff I want to add to my KJ!! I might have to join "LA"--LOST Anonymous. |
|
| Author: | Kugellager [ Sat Mar 24, 2007 3:16 pm ] |
| Post subject: | |
chetos wrote: Do you have a close up of what the area looks like under the stop lights? Looks like it would be perfect for putting/carrying something. It's on the tip of my brain but I can't figure it out!! They are perfect for jars of Peanut Butter!!!!! John ];') |
|
| Author: | Signcutter21 [ Sat Mar 24, 2007 3:57 pm ] |
| Post subject: | |
Install went fairly easy. Probably two hours of work between taking the bumper off and test fitting the new one and tighting it all up. Had a extra set of hands which made a big difference. I'll try to get pics up in the next day. Found it easier not to take the flares all the way off. Just popped the back three rivets out. Used small cheap hacksaw to cut the flares. Used dremmel to get the pinch seam nice and even. later, mike |
|
| Author: | lilmatty [ Sat Mar 24, 2007 4:02 pm ] |
| Post subject: | |
Signcutter21 wrote: Install went fairly easy. Probably two hours of work between taking the bumper off and test fitting the new one and tighting it all up. Had a extra set of hands which made a big difference. I'll try to get pics up in the next day.
Found it easier not to take the flares all the way off. Just popped the back three rivets out. Used small cheap hacksaw to cut the flares. Used dremmel to get the pinch seam nice and even. later, mike Oh yeah. I should have mentioned there was no need to totally remove the flares. |
|
| Page 1 of 2 | All times are UTC - 5 hours [ DST ] |
| Powered by phpBB © 2000, 2002, 2005, 2007 phpBB Group http://www.phpbb.com/ |
|