LOST JEEPS http://www.lostjeeps.com/forum/phpBB3/ |
|
IRO WJ Rear Upper A Arm Install (Completed) http://www.lostjeeps.com/forum/phpBB3/viewtopic.php?f=3&t=81761 |
Page 1 of 12 |
Author: | WhitbyKJ [ Sun Apr 05, 2015 7:10 pm ] |
Post subject: | IRO WJ Rear Upper A Arm Install (Completed) |
First of all, I have to give a shout out to Mr. Joe Kennedy over at Iron Rock Offroad. We had quite the back and forth over this project. Mr. Kennedy gave me quite the deal on their A Arm. To be totally honest, I was chomping on the bit waiting for it to get here. I will let the pictures do the talking. ![]() 
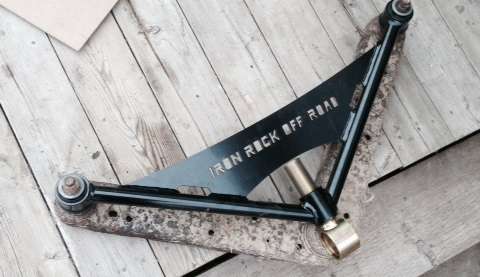
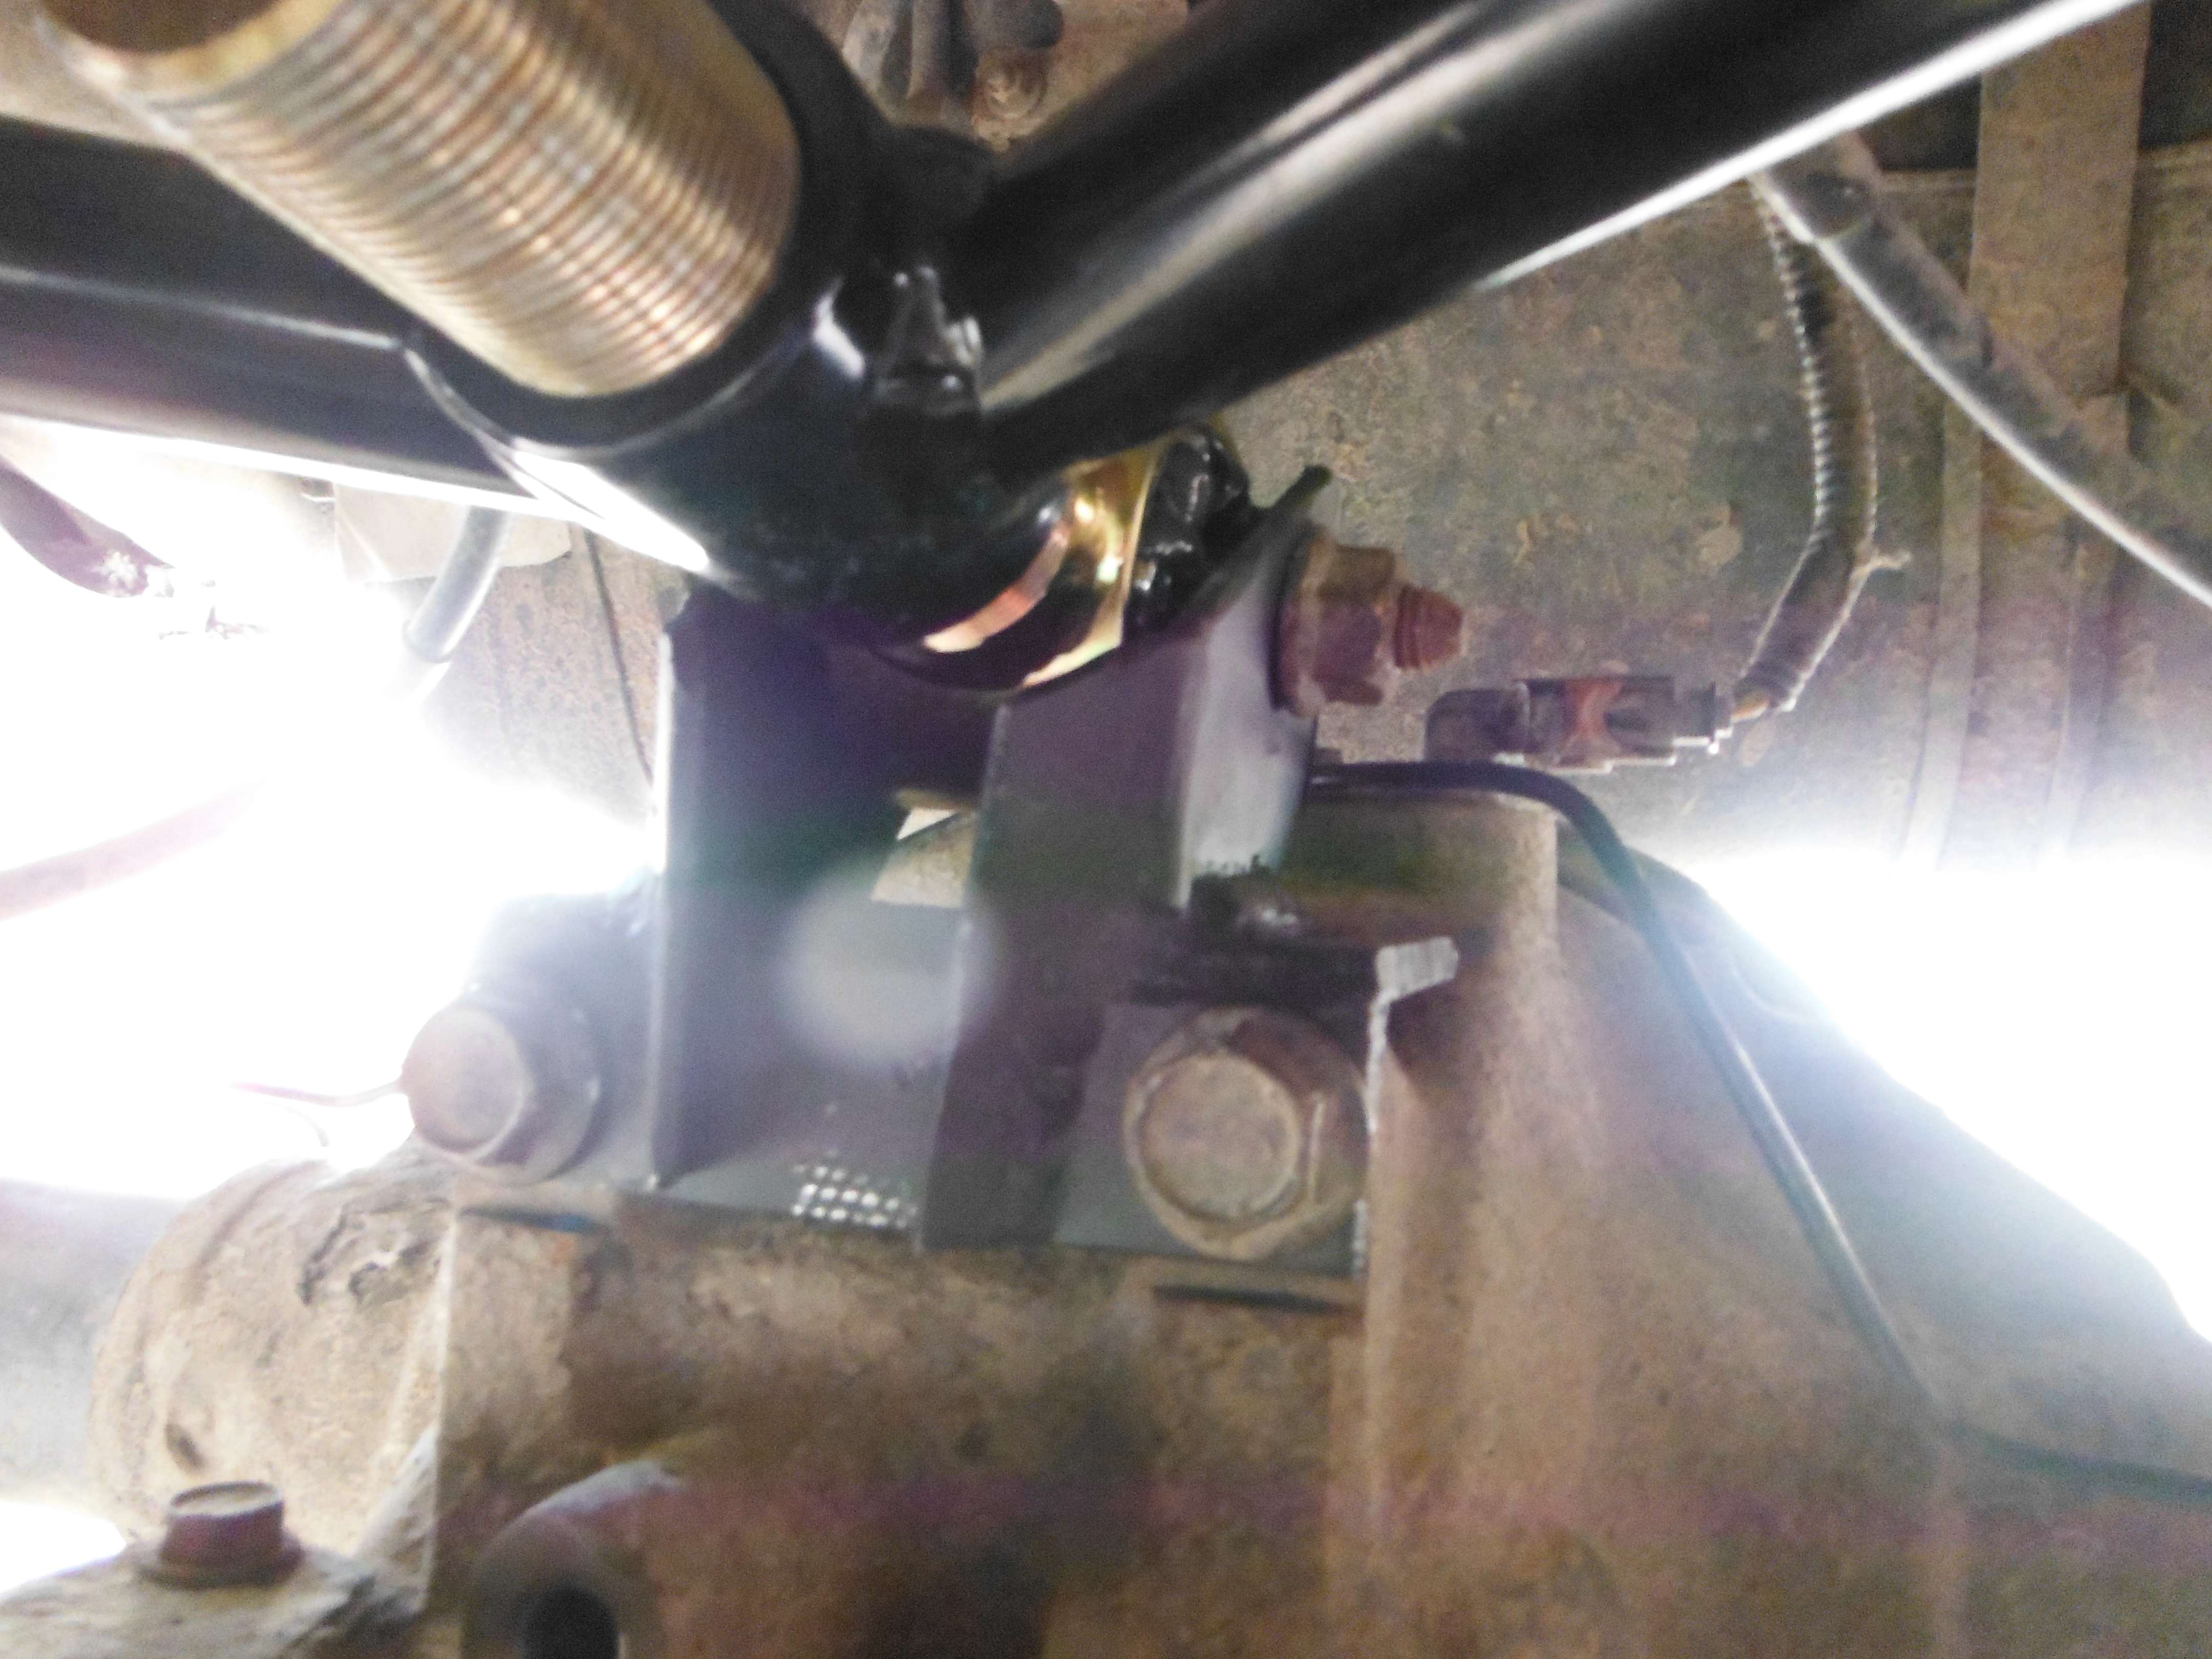
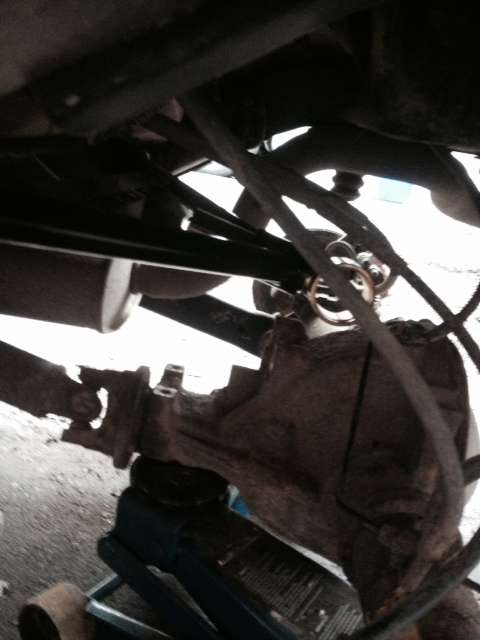
^ As you can see, the eye to eye measurement on the WJ RUA (Rear Upper Arm) is quite literally the exact same as the KJ's. DCX must have used the same "boomerang" body when designing the tri link, but just changed the WJ's BJ mount/hole/taper socket to the BJ itself on the KJ. (I hope your still following) To prove the measurement, I slid the bolts through IRO's A arm and into the KJ tri link. 
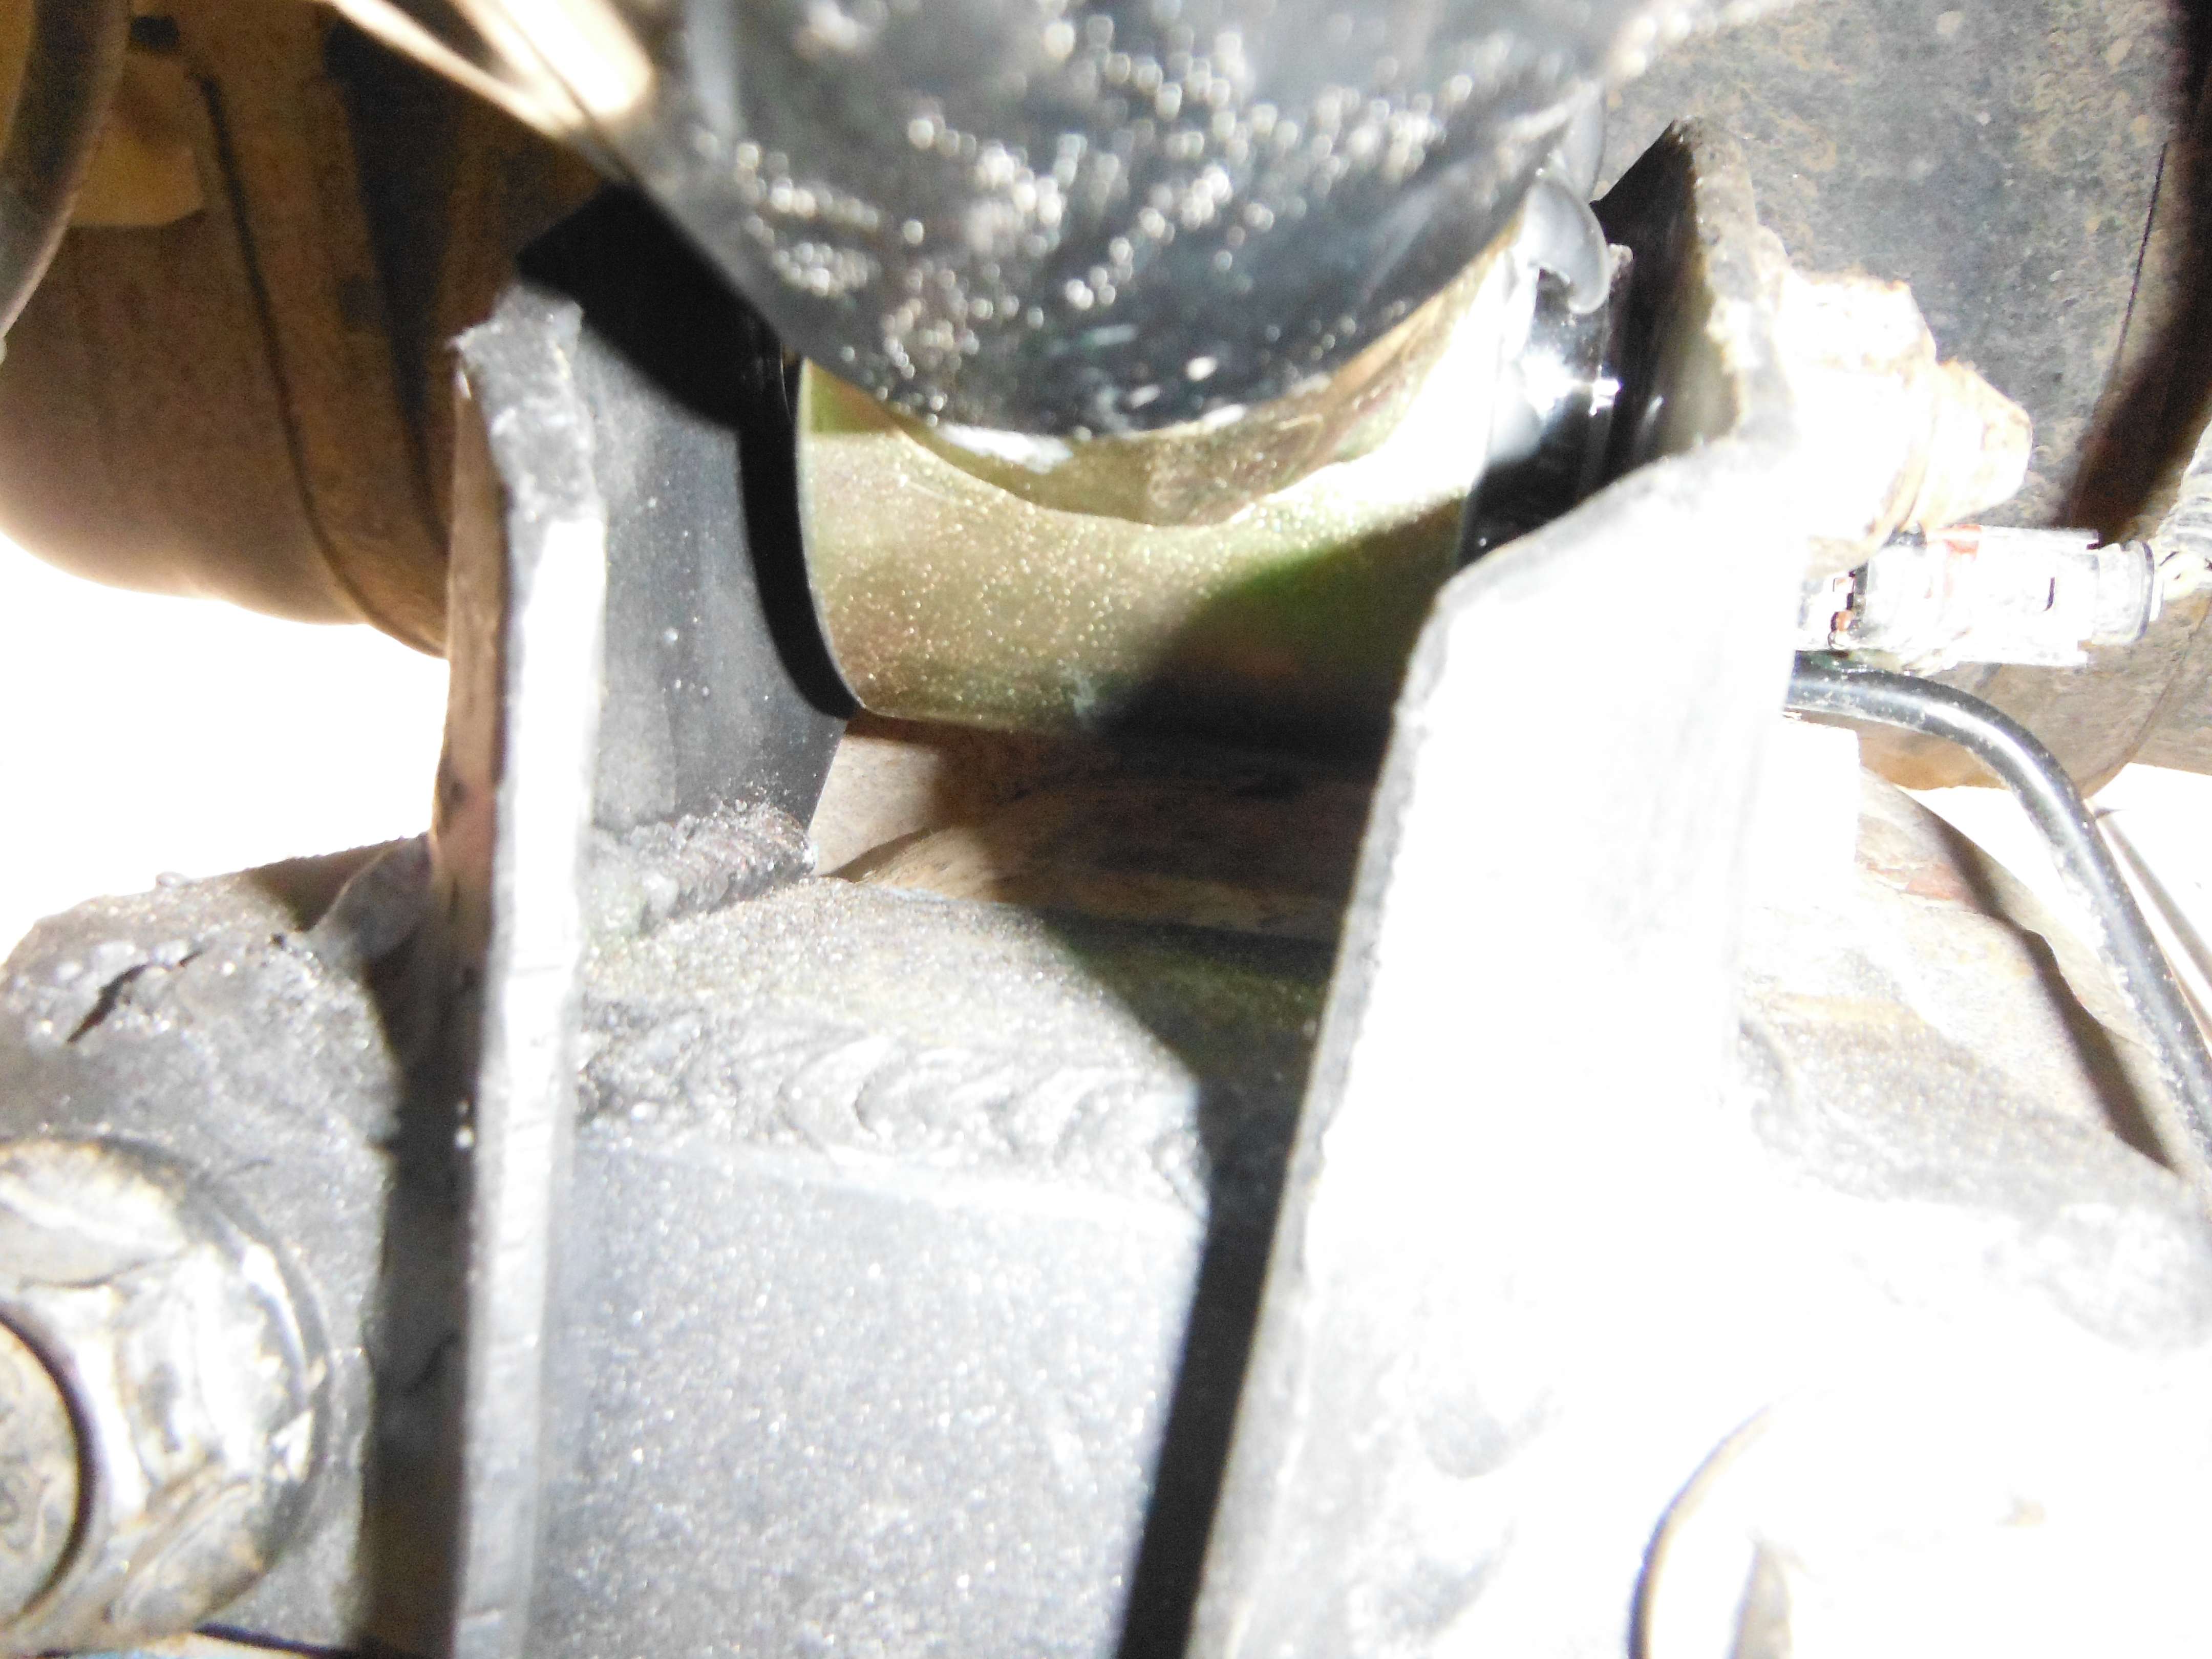
There was also another inherent problem. The actual axle mounting point is 1.5 inches lower on the KJ than on the WJ. (more to follow on that later) But as luck would have it, all three points are relatively close to each other and the arm is adjustable ![]() ![]() 
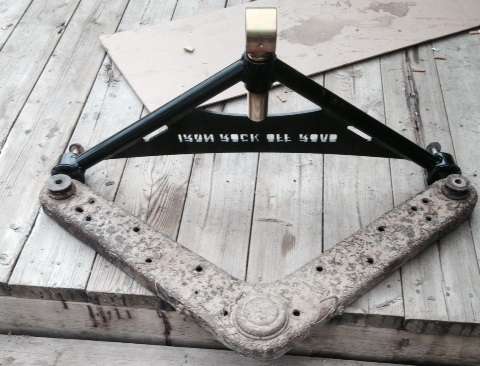
^Another comparison photo ![]() 
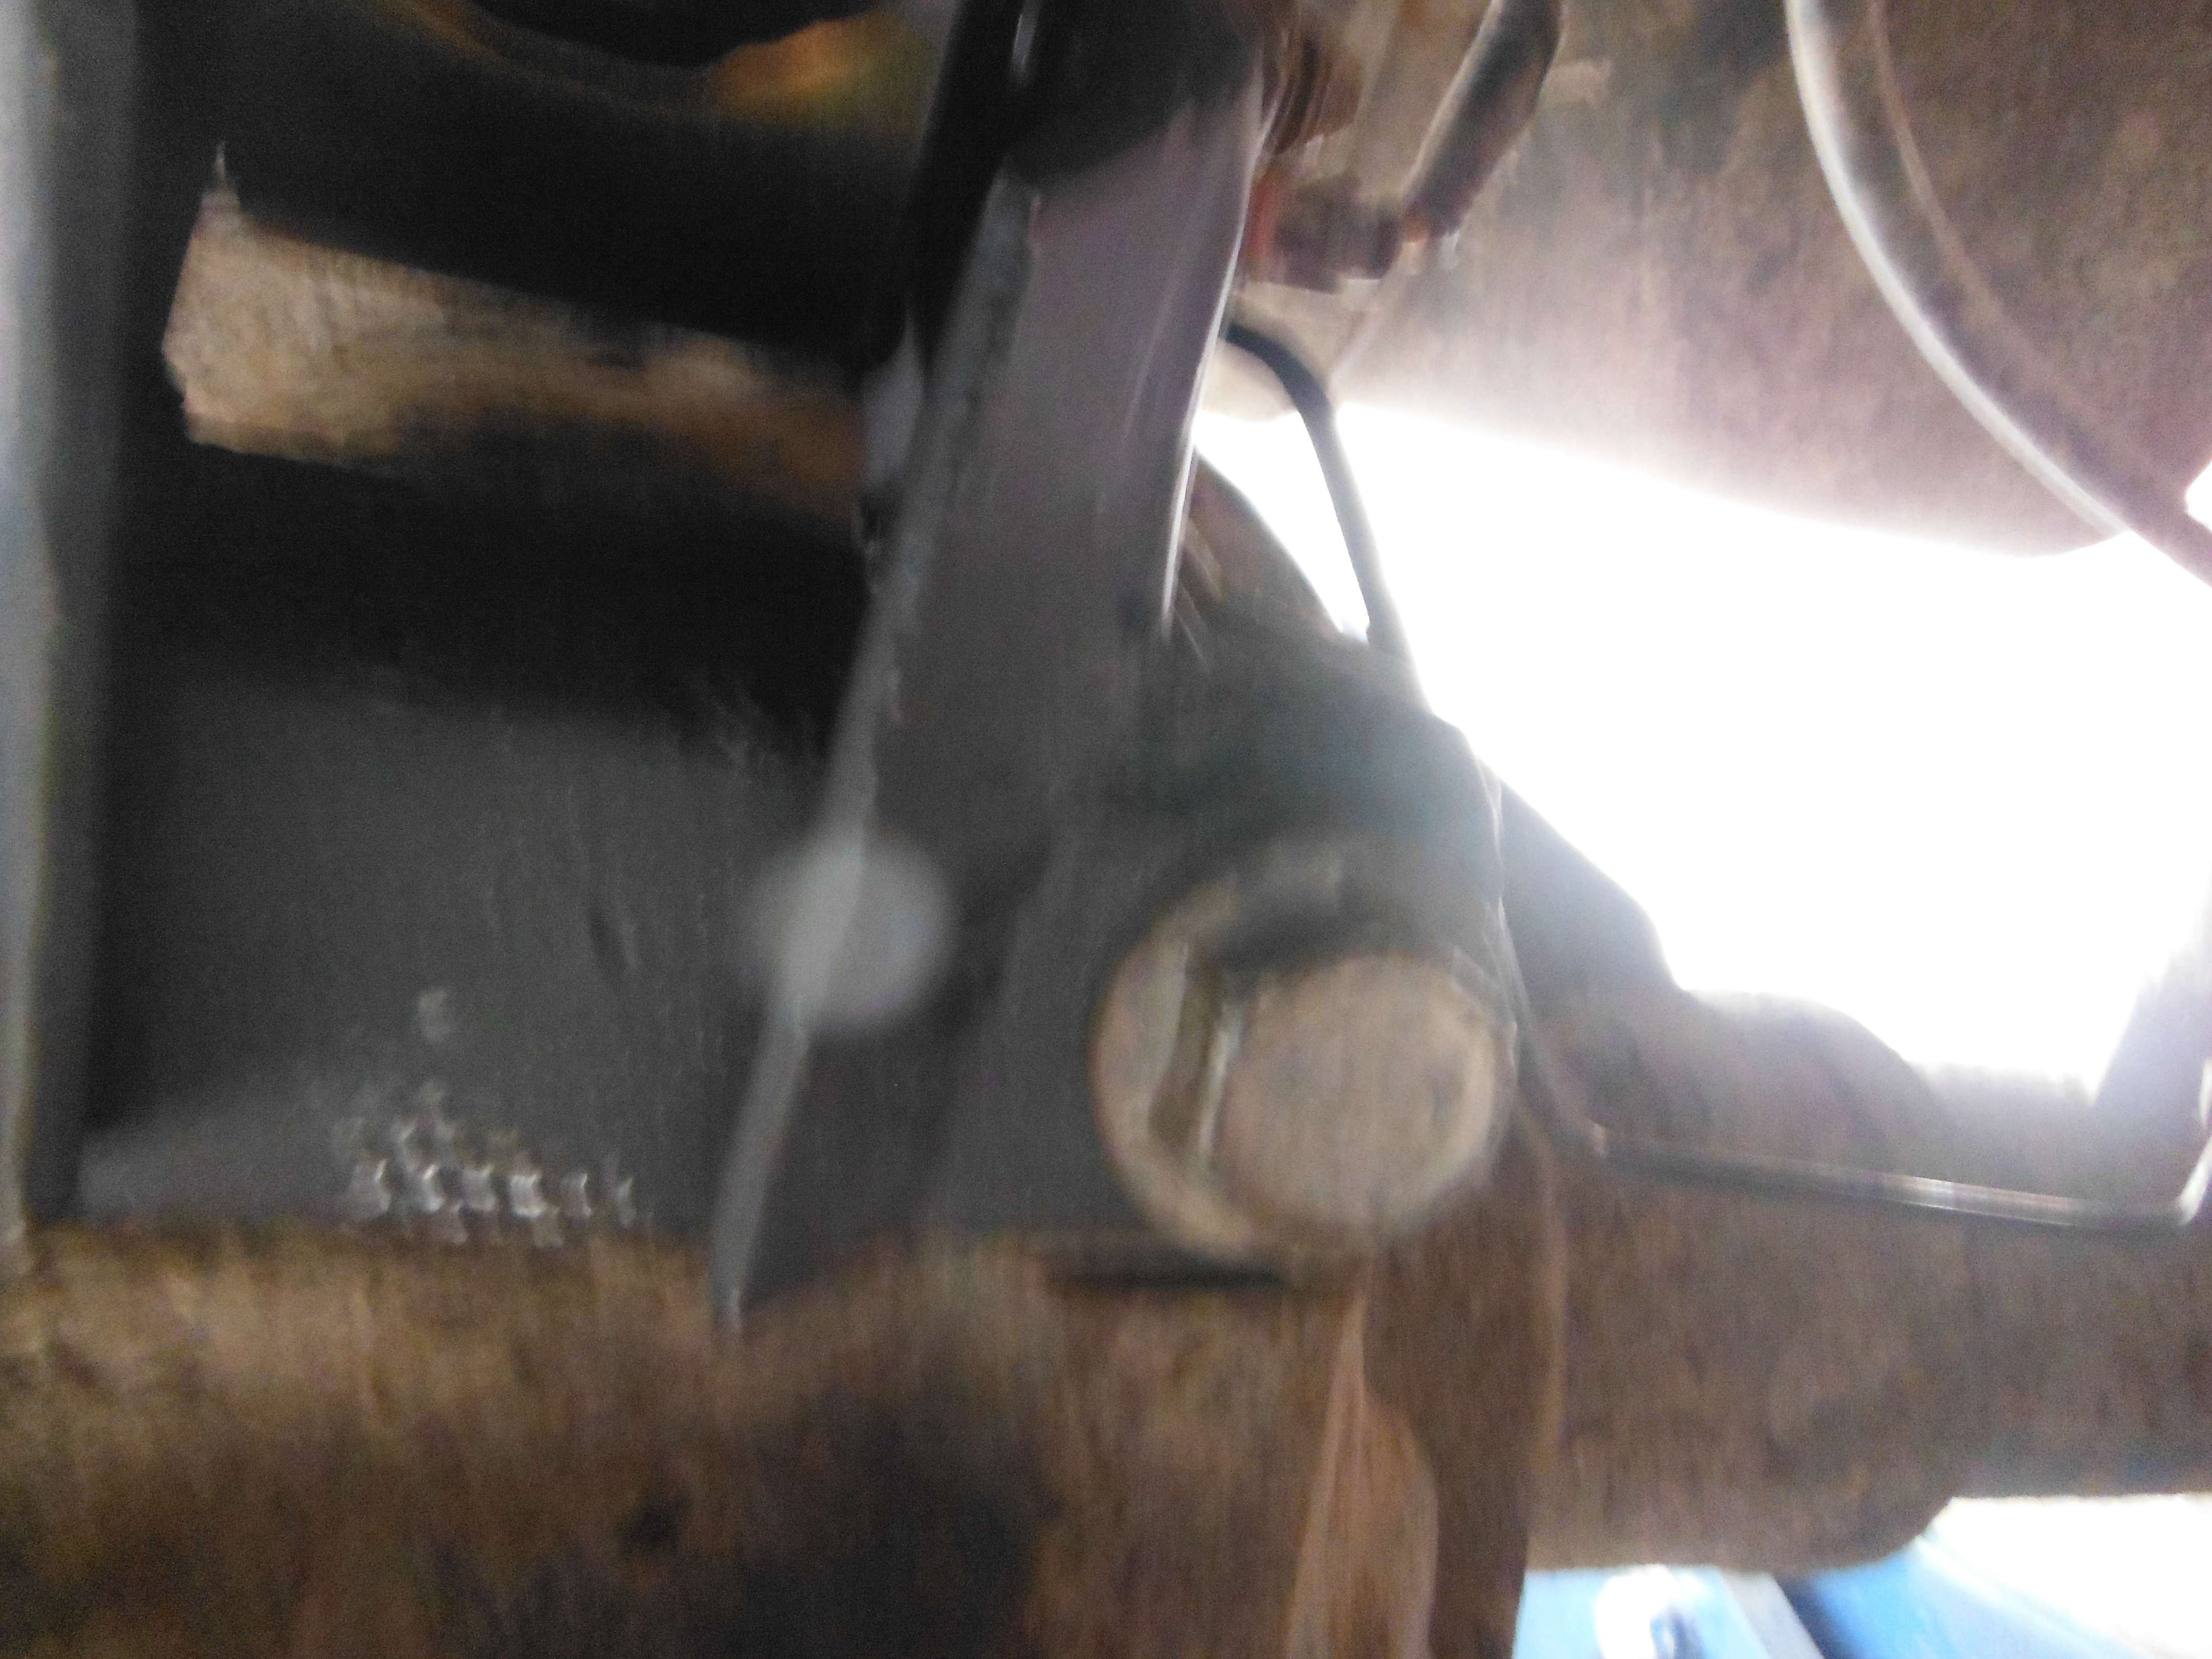
^ Here you can see where I was describing how the KJ mount point sits below where the WJ's would be. So after two days of brainstorming and farting around with AutoCAD on my iphone (Great program BiiCadPro, available in the app store for $10) I came up with the designed for the bracket. It took me several tries with sheetmetal, cardboard paper, and lexan (cause it bends in a brake), mock ups to make it work.. I broke out the caliper to get very accurate measurements of what was needed. I printed out an overlay and transferred it to some 1/4" plate I had laying around. Then I drilled out the mounting holes, and drilled the intersection of the fold lines. Then I oxy/acet cut the lines (with torch guides duh, you should see my cuts... mint, every time . .. woot woot) blaa blaa blaa blaa.. fold, grind, weld, paint. ![]() 
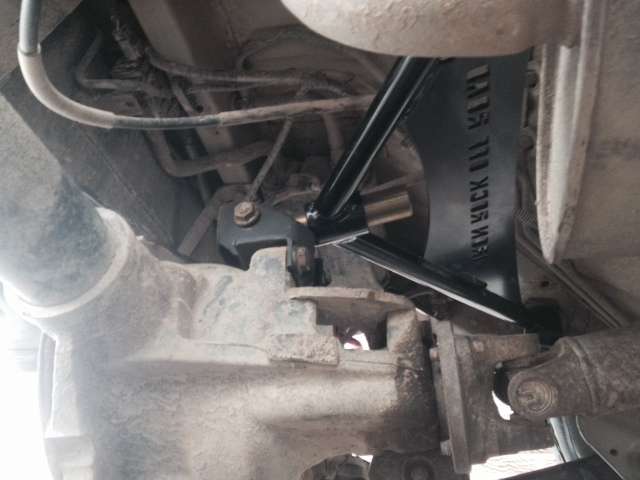
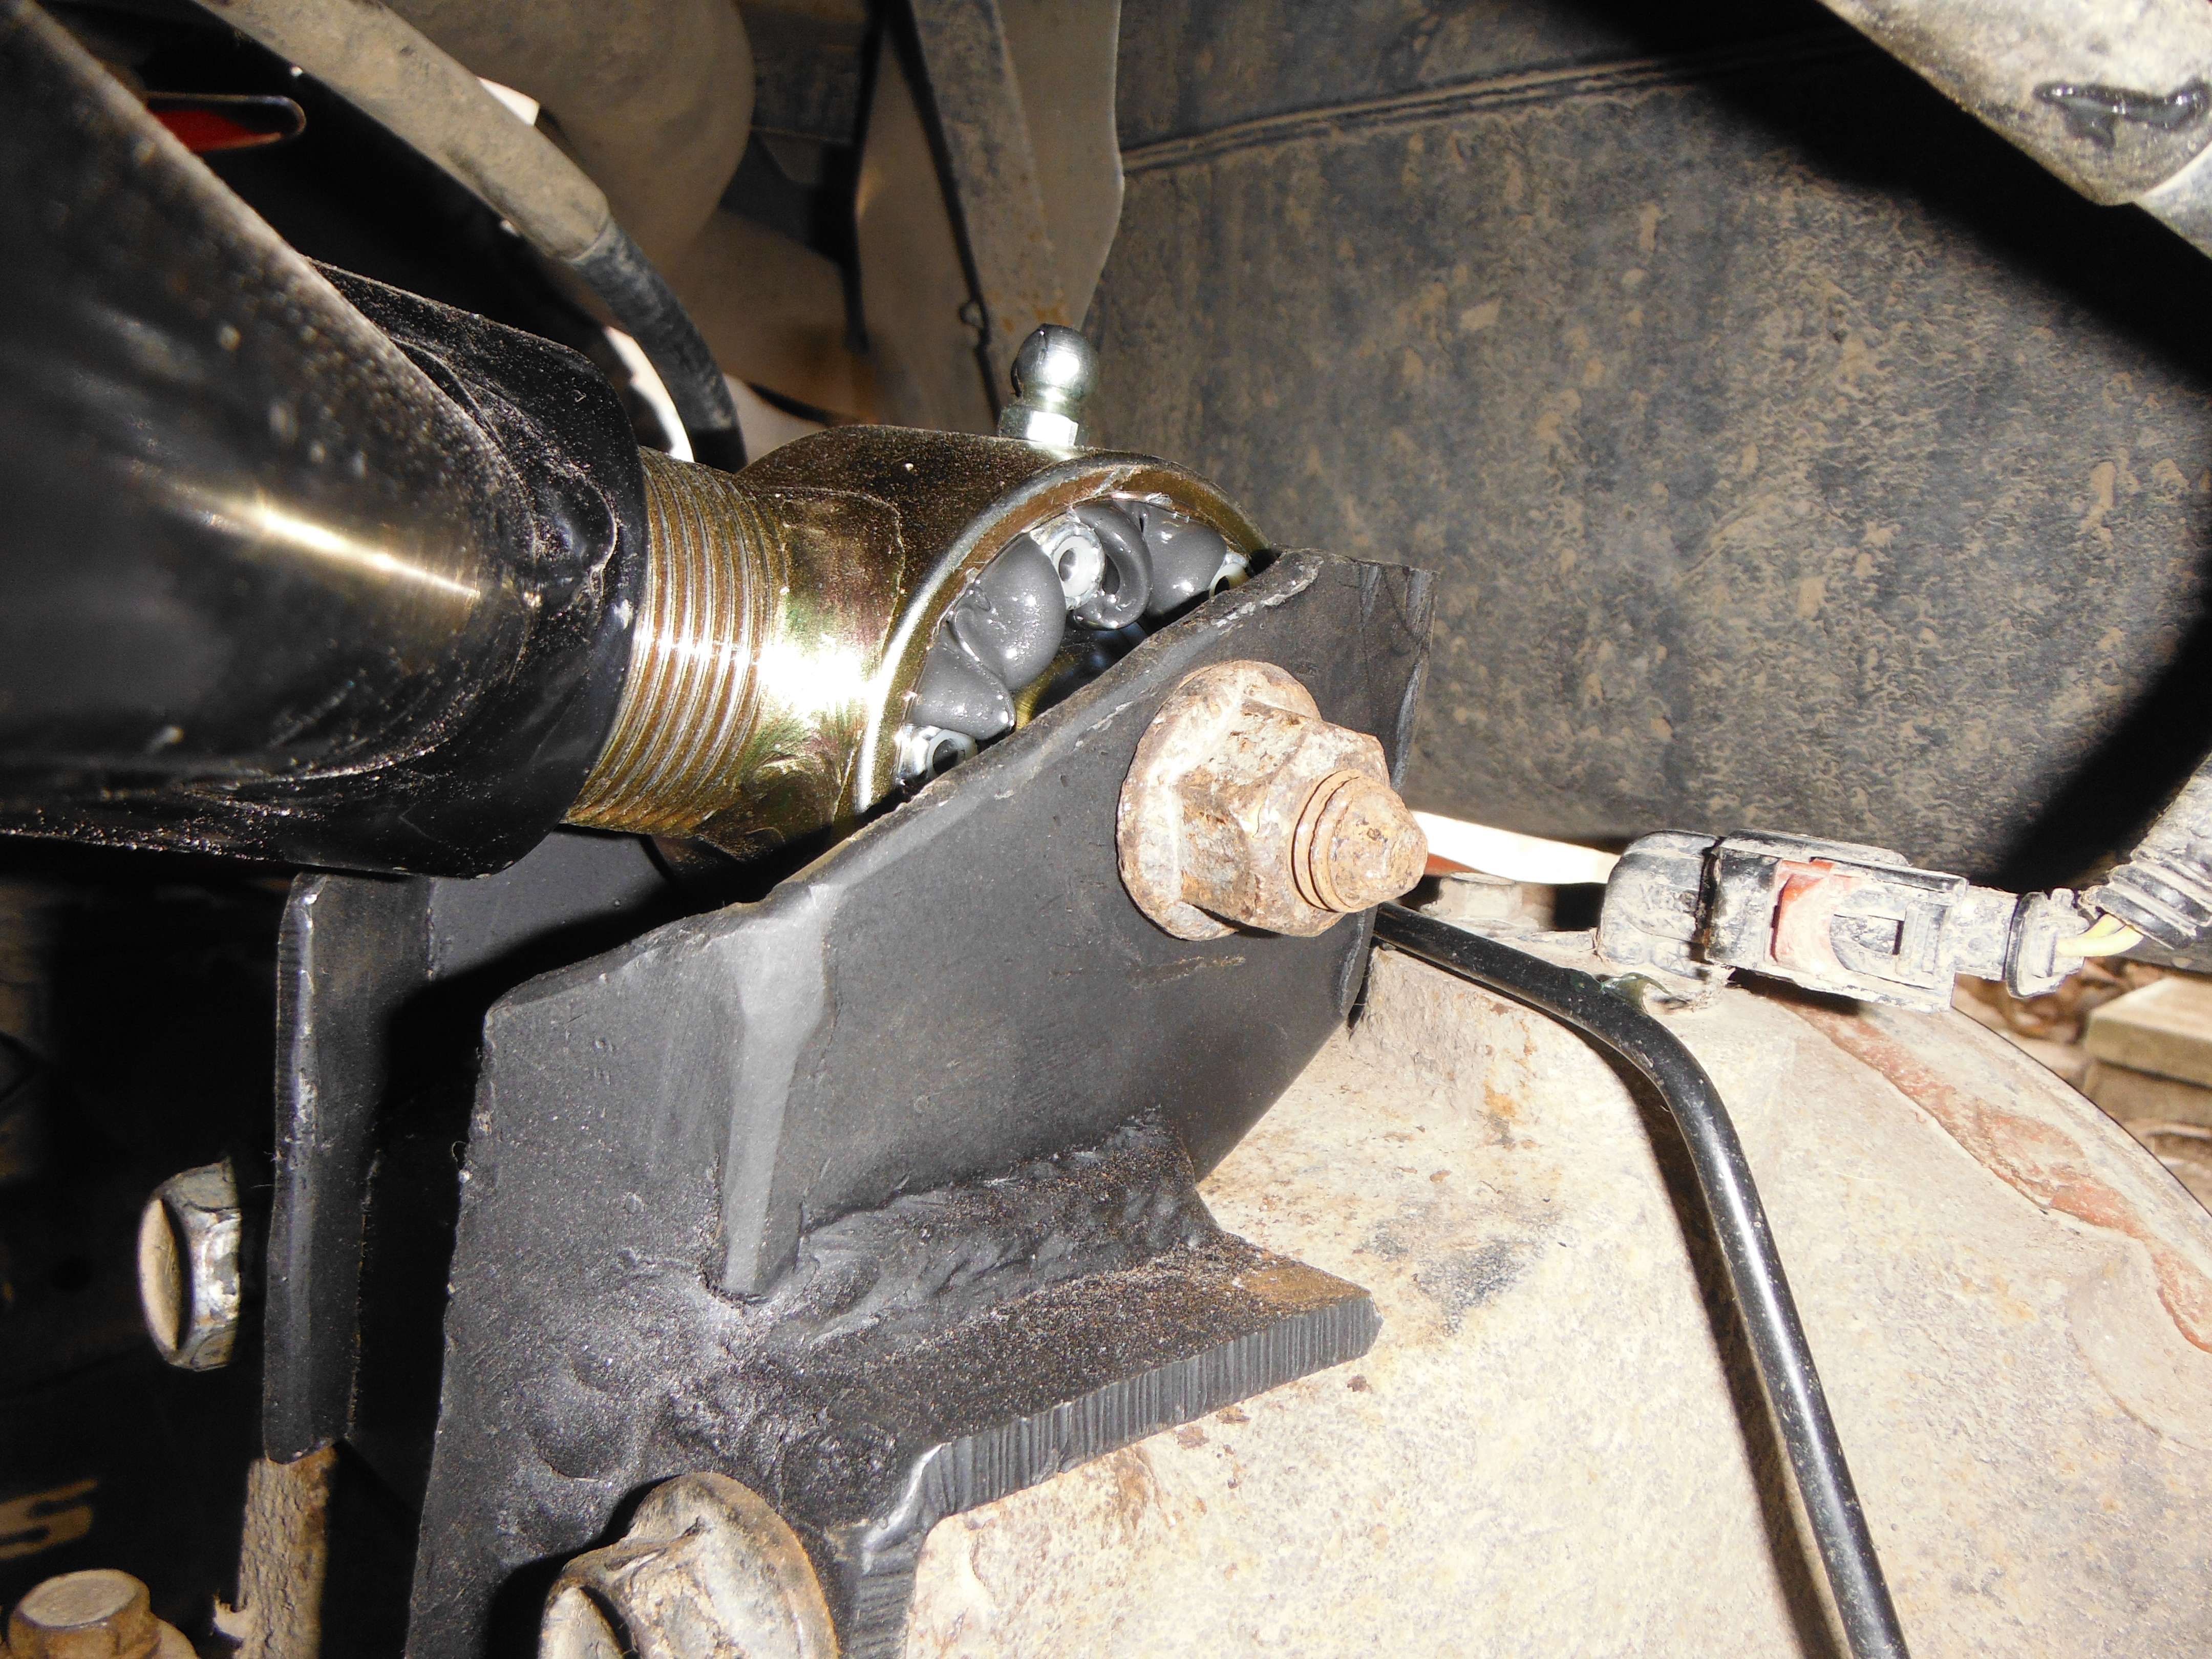
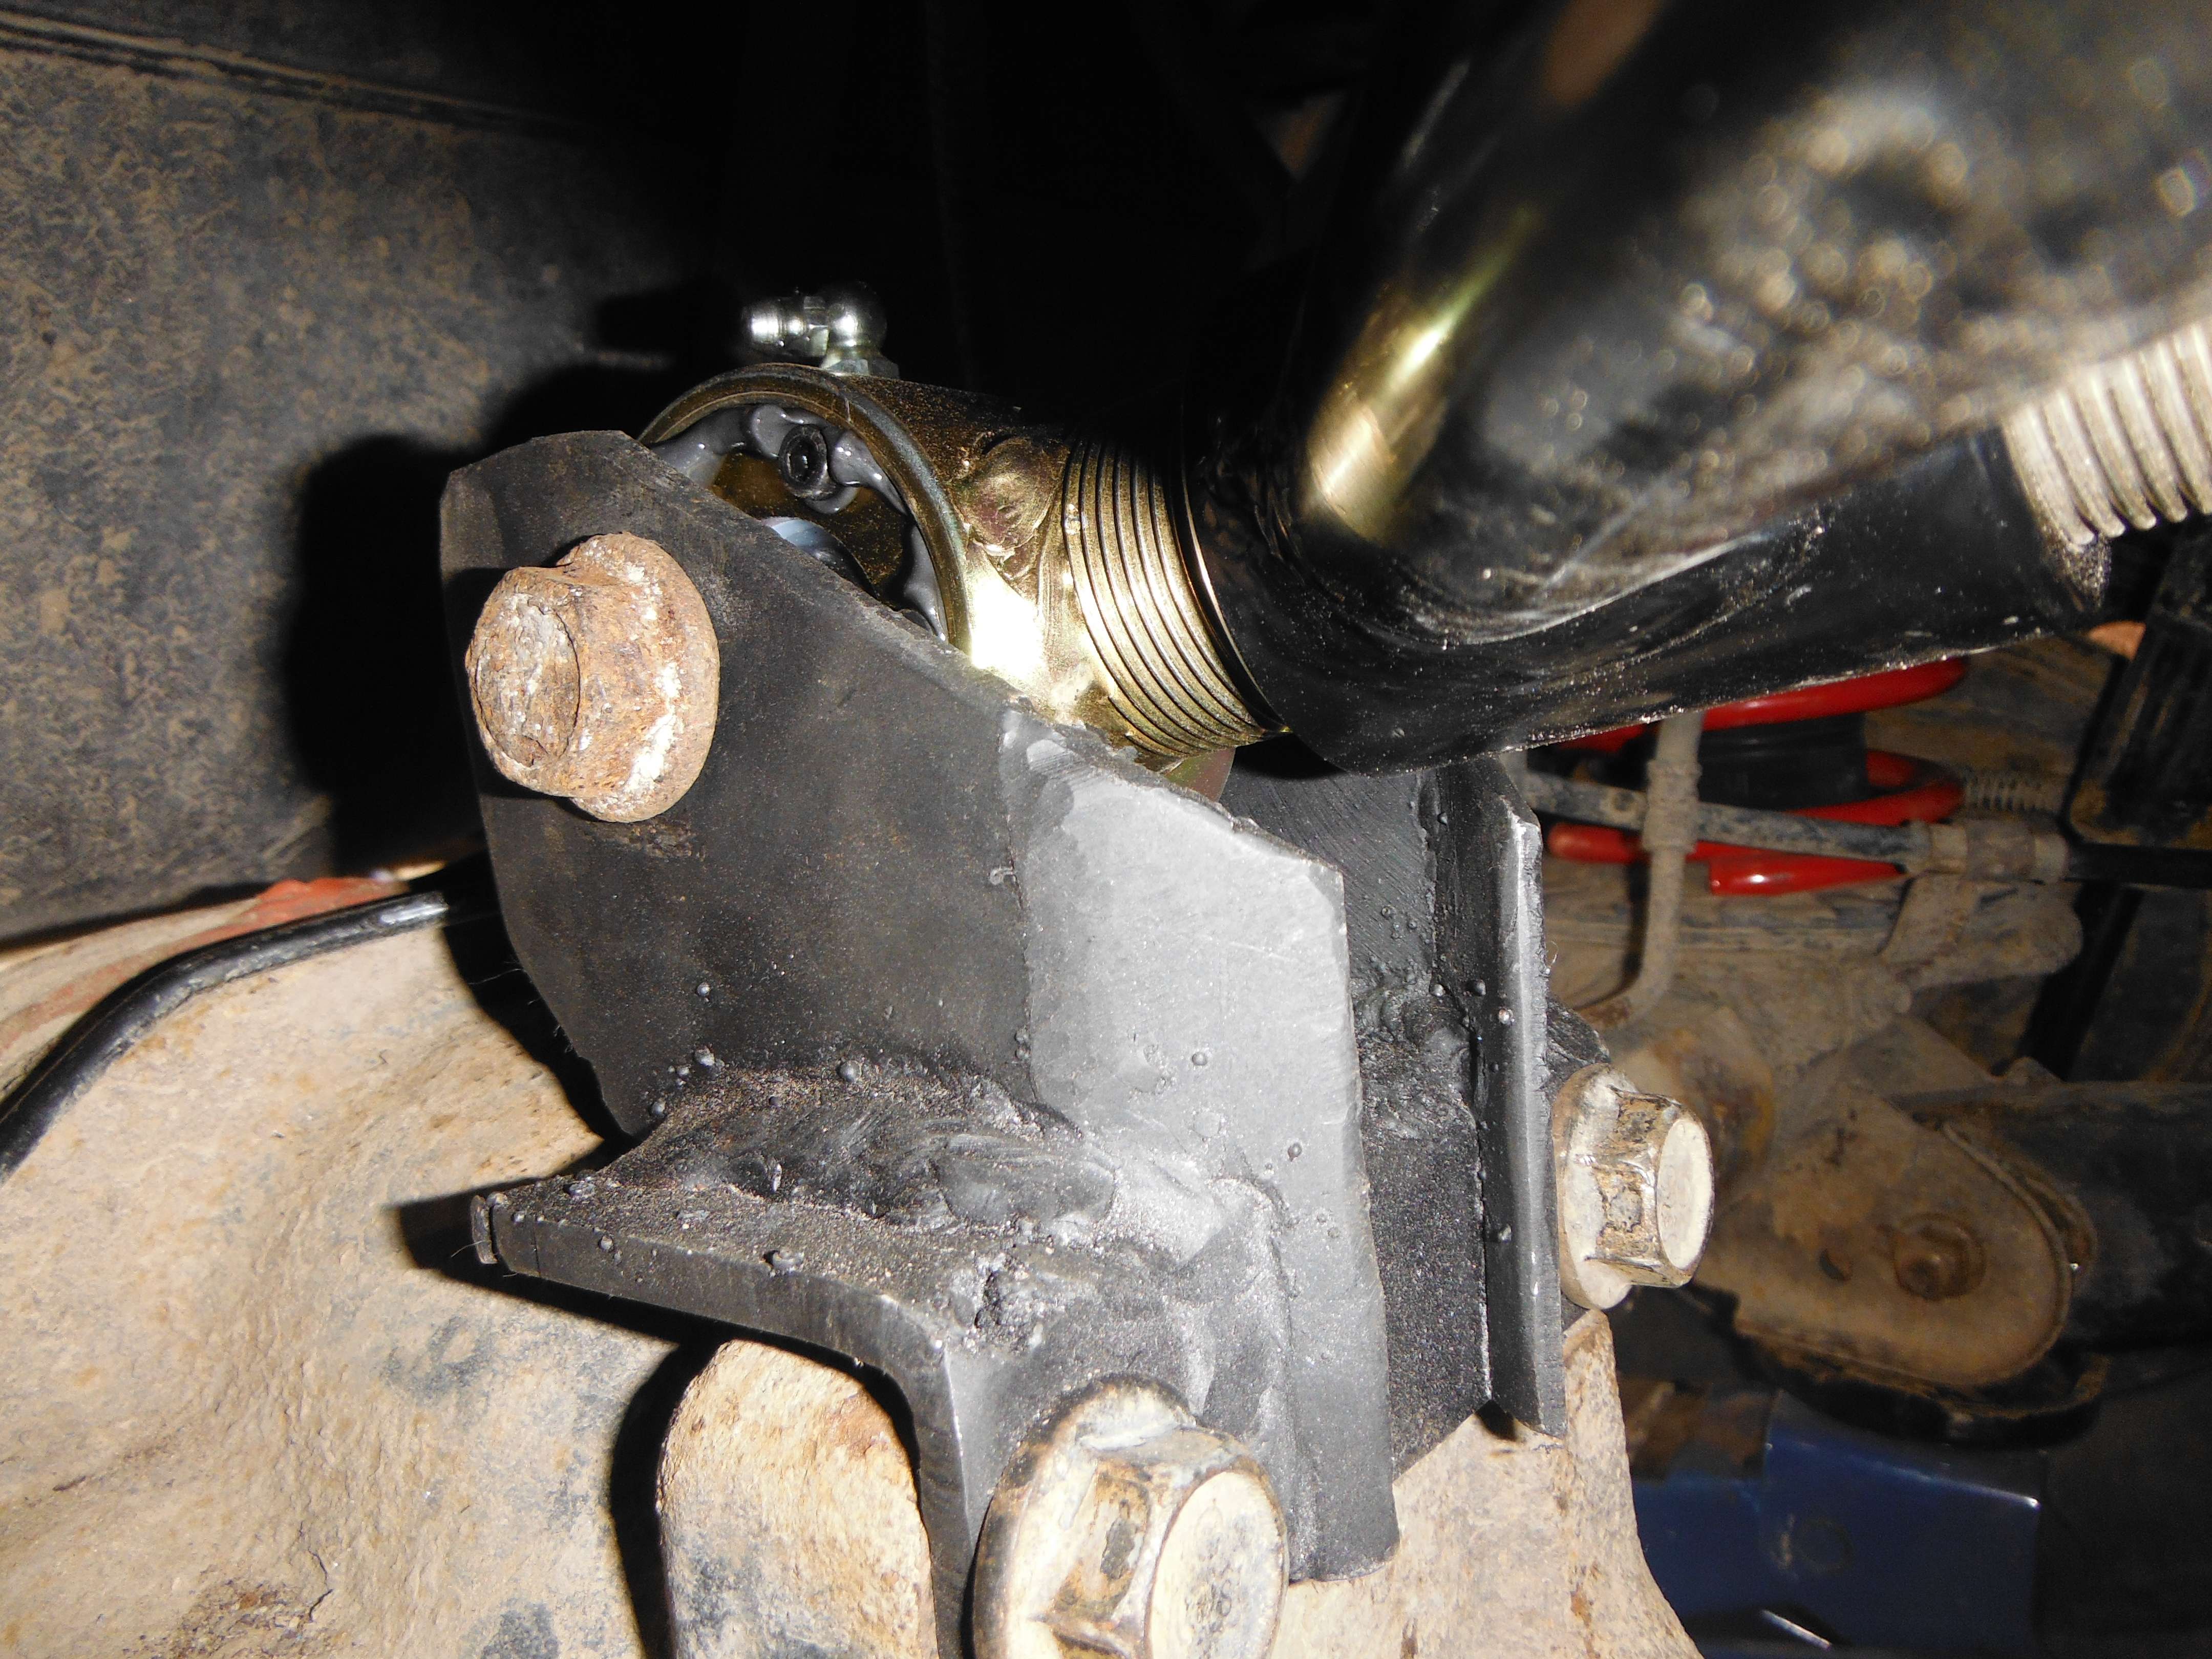
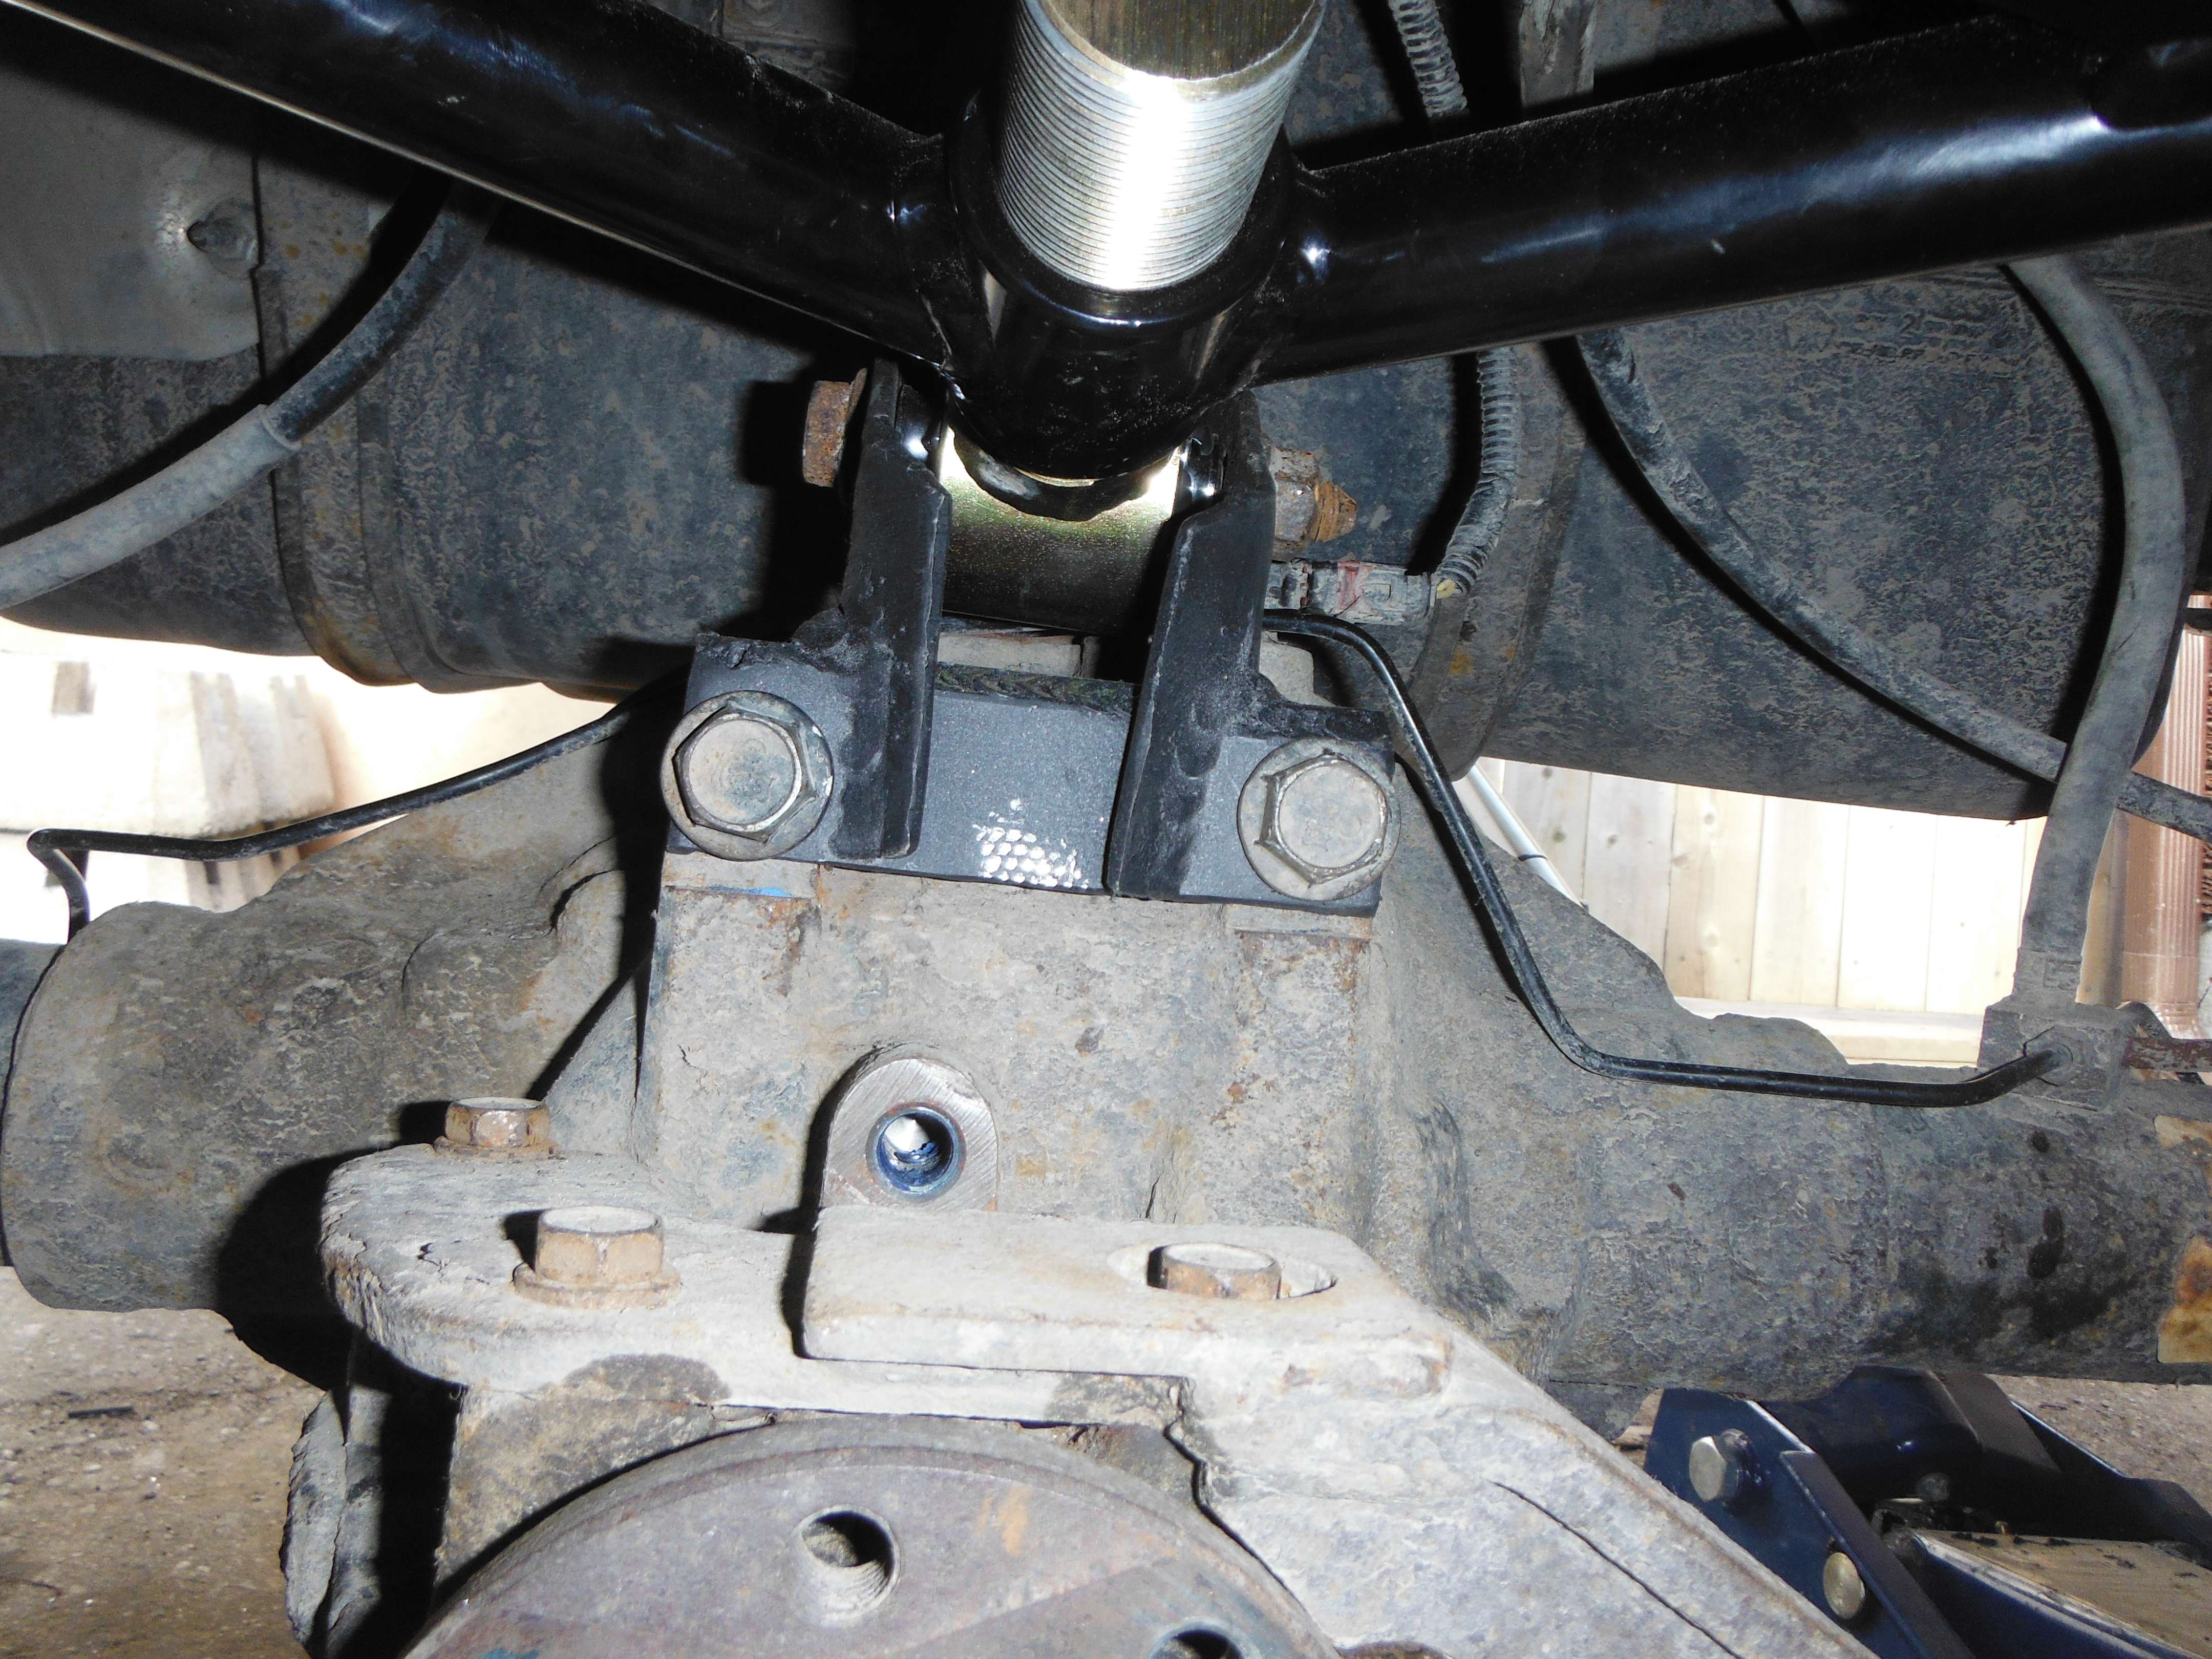
^ Above you can see the bracket sitting in the same place the ubj would be, give or take half to three quarters of an inch. I engineered the bracket so it is two pieces, the lower 90 and the upper is folded in 4 dimensions, gusseted onto itself so the stress, goes directly into the two bolt holes. The amount of weld I put into the bracket is probably equivalent to what I put into my winch bumper (j/k, but its not far off) this bracket wont break. I hope not. lol ![]() 
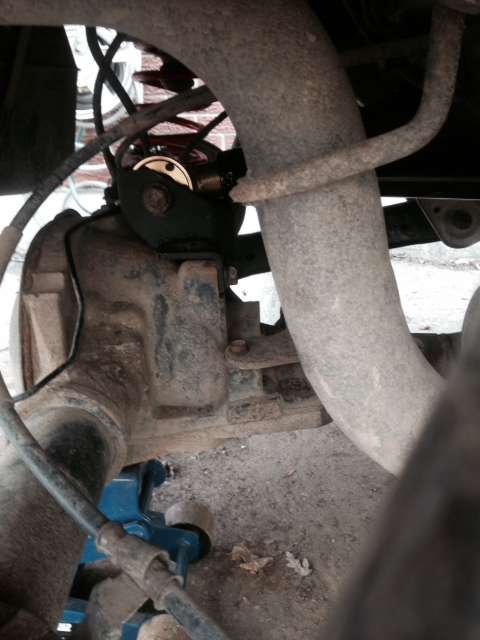
^ The joint itself is insanely beefy. And heavy duty ![]() Again, a giant thanks to Mr. Kennedy from Iron Rock Offroad for the deal on the A Arm. I have a copy of the .dxf file if anybody wants it, I also told Mr. Kennedy that I would be emailing him a copy as well. Why did I do this? I don't trust the UBJ, and I don't have 650 dollars for JBA's rear upper tri link. I do believe some time ago I emailed him about this idea and he never responded to me about the idea. So I took matters into my own hands. I also like how ridiculously simple it is to adjust pinion angle. Sag the suspension, place a jack under the diff at the pinion flange, apply slight pressure, adjust and replace bolt. done. Edited: for liability. This product idea/modification is currently being tested/revised. I advise anyone with a previously acquired dxf file to not use it on their jeep. I will make this available to people as soon as possible. 4x4Kayak, sorry to keep you waiting so long. |
Author: | jeeptorino68 [ Sun Apr 05, 2015 9:40 pm ] |
Post subject: | Re: IRO WJ Rear Upper A Arm Install (Completed) |
awesome, hopefully they start making that bracket and selling the arm for us KJ guys |
Author: | WhitbyKJ [ Mon Apr 06, 2015 8:09 am ] |
Post subject: | Re: IRO WJ Rear Upper A Arm Install (Completed) |
The other interesting thing I noted was how their adjustable lca's for the wj would fit the Libby, provided they switch the flex joint to a 2.63 width. |
Author: | WhitbyKJ [ Mon Apr 06, 2015 8:13 am ] |
Post subject: | Re: IRO WJ Rear Upper A Arm Install (Completed) |
Okay so... Here a wj upper arm and wj lower arms are installed on a Libby... That means with my bracket, technically one could swap a kj 8.25 into the wj. Provided they loose the rear swaybar. Wj's come in 3.73 gear ratios just like the kj. I'm seeing things unfold here ![]() |
Author: | WhitbyKJ [ Mon Apr 06, 2015 8:14 am ] |
Post subject: | Re: IRO WJ Rear Upper A Arm Install (Completed) |
Crap. Spoke too soon... Lol... Wj is 5 x 5.5 bolt pattern *face palm* |
Author: | JeepMorrison [ Mon Apr 06, 2015 11:21 am ] |
Post subject: | Re: IRO WJ Rear Upper A Arm Install (Completed) |
Cool beans man. |
Author: | JeepMorrison [ Mon Apr 06, 2015 4:51 pm ] |
Post subject: | Re: IRO WJ Rear Upper A Arm Install (Completed) |
WhitbyKJ....id love to that .dxf file. |
Author: | WhitbyKJ [ Mon Apr 06, 2015 5:17 pm ] |
Post subject: | Re: IRO WJ Rear Upper A Arm Install (Completed) |
I am gonna need file hosting soon lol. Email me |
Author: | WhitbyKJ [ Mon Apr 06, 2015 7:38 pm ] |
Post subject: | Re: IRO WJ Rear Upper A Arm Install (Completed) |
The welds that look like crap, are actually triple stacked er70 mig welds overtop of 6011 root passes. for you folks that have already emailed me about the .dxf file, you can see where I had to fold 'wings' in on a 45 degree angle to clear the bolt shoulders. also, the wings are absolutely essential. I have yet to prove this design offroad. You are welcome to copy me, but it comes with the standard "don't kill yourself and use at your own risk" disclaimer. Also, for you adventurous types, the "wings" that come down onto the forward face are absolutely essential for transferring force into the bolt holes. If you don't use wings when you mock up your copy, all you will accomplish is twisting your bracket off the axle. but here are some more pics. ![]() ![]() ![]() ![]() ![]() ![]() ![]() ![]() The lower plate is 1/4" the upper is 3/16" the bolt holes require provisions for M14. Keep in mind, I cut this with my oxy acetylene and bent it in a 5 inch shop vice with a pipe wrench. When I get more funds, I will get a few wajer jet cut and folded on an actual press brake. It is critical that the inside width where the IRO joint sits has at least 2.65 inches of clearance or you will have a tough time getting your joint in. I still have to email IRO the good news. |
Author: | WhitbyKJ [ Mon Apr 06, 2015 7:41 pm ] |
Post subject: | Re: IRO WJ Rear Upper A Arm Install (Completed) |
oh and DCX... thanks for the excessive amount of Loctite usage. ![]() |
Author: | JeepMorrison [ Mon Apr 06, 2015 9:30 pm ] |
Post subject: | Re: IRO WJ Rear Upper A Arm Install (Completed) |
Looks good, but id somehow integrate that bottom bolt too. Thats the only thing i would add to it |
Author: | jeeptorino68 [ Mon Apr 06, 2015 9:32 pm ] |
Post subject: | Re: IRO WJ Rear Upper A Arm Install (Completed) |
WhitbyKJ when i finish the 3d model of the bracket, i plan to make PDFs of the drawing files, those would be easy to post and share with those who dont have autocad. i can have it fully dimensioned so it will be easy for anyone to make.. |
Author: | JeepMorrison [ Mon Apr 06, 2015 9:35 pm ] |
Post subject: | Re: IRO WJ Rear Upper A Arm Install (Completed) |
jeeptorino68 wrote: WhitbyKJ when i finish the 3d model of the bracket, i plan to make PDFs of the drawing files, those would be easy to post and share with those who dont have autocad. i can have it fully dimensioned so it will be easy for anyone to make.. Sounds great!!! |
Author: | 65Corvair [ Mon Apr 06, 2015 11:39 pm ] |
Post subject: | Re: IRO WJ Rear Upper A Arm Install (Completed) |
This looks good, keep up the work and development. |
Author: | WhitbyKJ [ Tue Apr 07, 2015 5:24 am ] |
Post subject: | Re: IRO WJ Rear Upper A Arm Install (Completed) |
jeeptorino68 wrote: WhitbyKJ when i finish the 3d model of the bracket, i plan to make PDFs of the drawing files, those would be easy to post and share with those who dont have autocad. i can have it fully dimensioned so it will be easy for anyone to make.. It's true, this man (or woman?) right here has probably worked harder than I did, making you a 3d model. I am pretty excited ![]() |
Author: | jeeptorino68 [ Tue Apr 07, 2015 10:50 pm ] |
Post subject: | Re: IRO WJ Rear Upper A Arm Install (Completed) |
my first pass at the 3D model with tips from Ryan i am working on finalizing it, will have PDF and .stp and .dxf files ![]() ![]() |
Author: | WhitbyKJ [ Tue Apr 07, 2015 10:58 pm ] |
Post subject: | Re: IRO WJ Rear Upper A Arm Install (Completed) |
I can't wait to cut one on the waterjet and have somebody else fold it and weld it for me ![]() You guys are super awesome. Lots of support here on lost. |
Author: | WhitbyKJ [ Wed Apr 08, 2015 10:03 am ] |
Post subject: | Re: IRO WJ Rear Upper A Arm Install (Completed) |
4x4kayak2112 wrote: Looks good, but id somehow integrate that bottom bolt too. Thats the only thing i would add to it I'm sorry man, I must have totally skipped over this message or missed. Apologies. Yeah, I farted around for 8 hours with lexan mock ups trying to hit the lower bolt hole. I didn't have any luck. If I was to incorporate it, it would be attached to the upper bracket. I thought about taking the upper bj mount and bolting it to pieces of wood arranged in a fashion that I could simply measure distance and offset. It's true, there is a ton of r and d that could be put into this little bracket (not trying to be rude), and it actually is a belief of mine to make something as strong as possible. But this project was quite aggravating to be doing at home, in my driveway. We haven't named this bracket yet, and I motion that the name include LOST somewhere in it. We need a 3D printer. Like a lost 3d printer. A communal printer. Lol. |
Author: | tommudd [ Wed Apr 08, 2015 11:23 am ] |
Post subject: | Re: IRO WJ Rear Upper A Arm Install (Completed) |
Its your idea/ project , so you can name it , it's not really a LOST project per se Others have been in the works for a quite a while and already have a few thousand miles of testing done on them ![]() Some projects are tried, tested , revised and done and no one knows about them until they are released to the public ![]() ![]() |
Author: | JeepMorrison [ Wed Apr 08, 2015 11:39 am ] |
Post subject: | Re: IRO WJ Rear Upper A Arm Install (Completed) |
tommudd wrote: Its your idea/ project , so you can name it , it's not really a LOST project per se Others have been in the works for a quite a while and already have a few thousand miles of testing done on them ![]() Some projects are tried, tested , revised and done and no one knows about them until they are released to the public ![]() ![]() Guess Rocklizard is out working on stuff again. |
Page 1 of 12 | All times are UTC - 5 hours [ DST ] |
Powered by phpBB © 2000, 2002, 2005, 2007 phpBB Group http://www.phpbb.com/ |