Recently I got a Pioneer P3300BT from my buddy because he had it for cheap and I figured otherwise I probably would have never considered a nicer head unit for my 05 Renegade. I quickly realized it was going to take much work to get it to fit and function properly, but - alas, I did it. I thought I would write up how I did it in case anyone else is considering doing this modification. For the record, I am inexperienced with doing custom fabrication, which goes to show that this isn't all that difficult to do.
Removing the factory system was easy, I popped off the front bezel with a PCI slot cover from a computer (works perfect).
The factory system is held on by the 4 screws on the two long thin metal tabs. The two screws to the upper outside of the top screws hold the mounting plate in place, so don't remove them.
I started off by test fitting the Pioneer in the radio cavity. It was clear that I was going to have to make more room for it to fit.
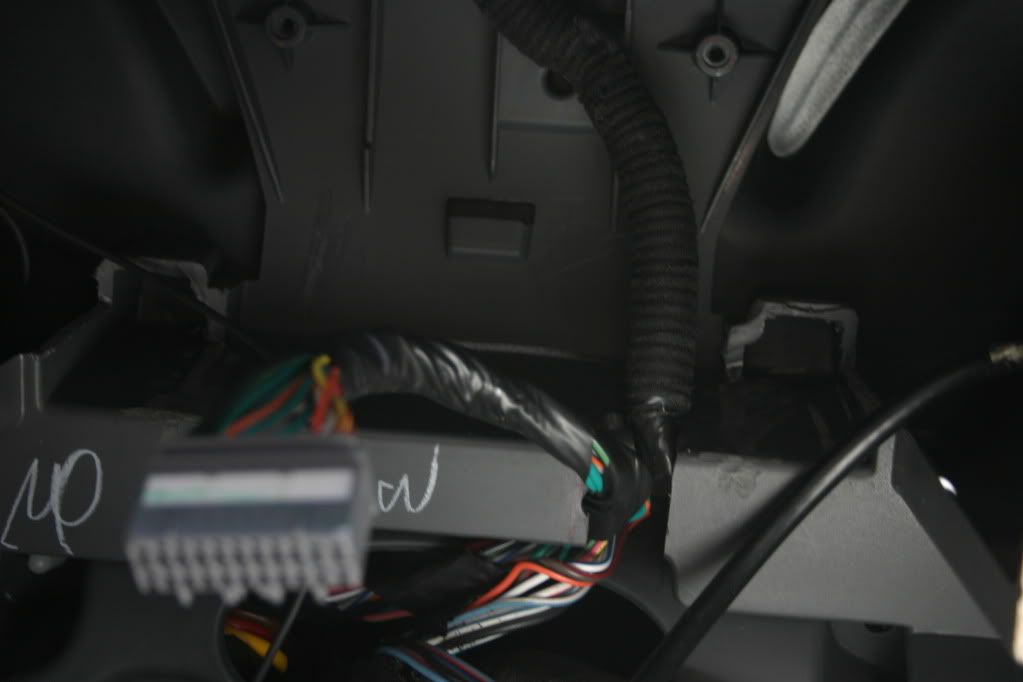
You can see I dremeled the rectangular plastic pieces that are on the sides, they used to jut out very far. To make sure I had room for the unit and its cables, I dremeled them as far as reasonably possible. I also cut out an area to run my cables through to ensure they don't get in the way of the new unit. In the picture it is to the right of the white W.
After this I was frustrated to find the unit STILL did not want to fit. At the back of the radios opening, in the area above what you can see in the previous picture, there is a metal piece that I had to remove. That is pictured below.
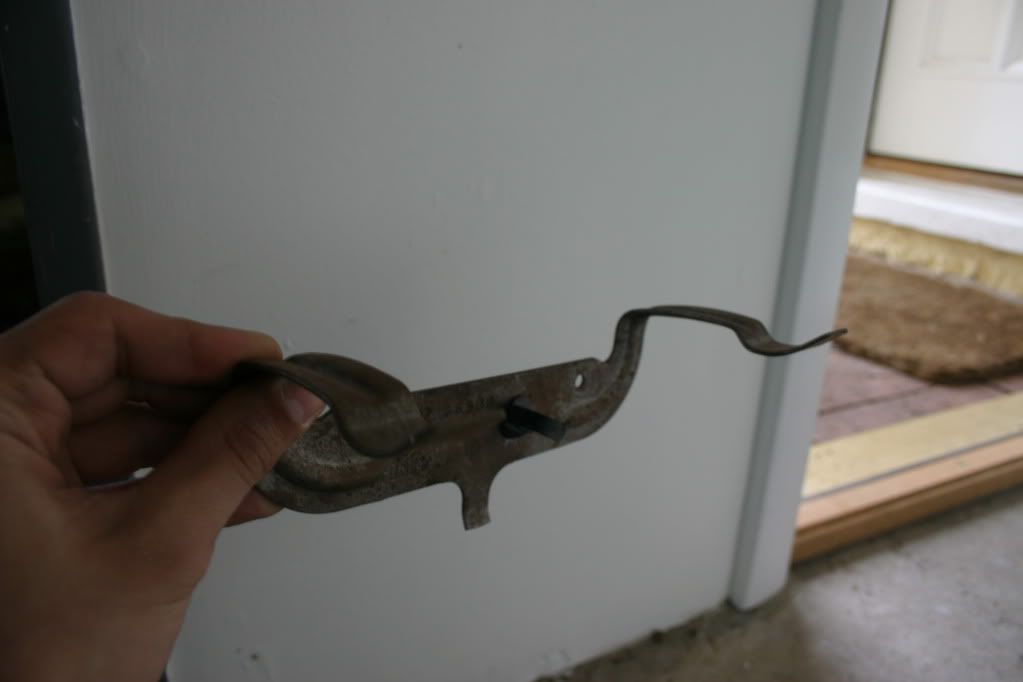
I had to pretty much just rip it off of its black tab, which is okay because its junk now anyway. Just know it takes a decent amount of force to get it off.
I picked up a single/double mounting kit for a 1999-04 ford/lincoln/mercury at Bestbuy.
Mounting it to the head unit is self explanatory, just screw it on with the supplied screws. There are not many mounting options despite the fact that both the mounting plates and the head unit have many different holes open for mounting. However, it all worked out for me and thats all I was looking for.
--Now, the mounting plates I got had 2 sets of tabs, with two smaller ones in the front and two large ones in the rear. I cut off the rear mounting tabs as they are useless and the unit cannot be installed otherwise.
All of that just to get the darn thing to fit! But it finally did. I used 1/4 washers to secure the head unit to the mounting plate and reused the factory screws. I only have mine mounted on the top two holes for now as the bottom ones do not line up, I will have to drill new holes later to fix that. But for now, everything its very secure.
With the unit in place I turned my attention to the scary part, dremeling my Bezel! Pretty much I just eyed out how much to cut and marked it with a Sharpie. After that I sanded the rest down by dremel and then by hand. Finally I polished the top and bottom lip, the way mine is set up you can see the bottom lip with everything installed, so its worthwhile to make it look as good as you can. I picked up some Cold Weld from the hardware store and a sheet of ABS plastic from Menards and focused on making the pieces to fill the side gaps in the bezel. I did this by making a paper template and tracing it onto the ABS plastic sheet with sharpie. Then I cut it wider than I had to and did the same thing as I did with the bezel. (sand and then more so by hand). This took a bit more precision to get the angles just right so there were not large gaps. I personally decided to use the textured side of the ABS plastic sheet. Once I was satisfied with my work, I used the cold weld to attach the pieces onto the bezel. It took 10-20 minutes to dry then was more or less good to go. There is a bit of excess material showing with mine, but it isn't a lot, and the cold weld is gray once mixed and looks fine so I left it the way it was. If your a perfectionist and want to take it a step more, good luck and more power to you.
With that over it was onto the wiring harness, which I got at Bestbuy.
I had some trouble at this point, if you don't wire everything correctly you could get your jeep to resent you and have it tell you it is not a buS. But lets just prevent all that - for the most part, the wiring is easy (but not so much for the color blind!!!). Line up the same color wires. However, do not connect the brown Mute wire. At least for me, it caused the no buS problem to come up. So I just taped it off, along with its partner on the stereo harness which is a yellow wire.
I also wired up a video bypass, which I got on Ebay for 7.75. Mine came with decent instructions also.
**Using the Video bypass was the only way I was able to view JPEGS)!!! This is important if you want to use a custom backround image. However, the main purpose of the bypass was to override the factory setting which doesn't allow you to view movies on the go. It is nice to be able to do this if you make long trips with annoying passengers
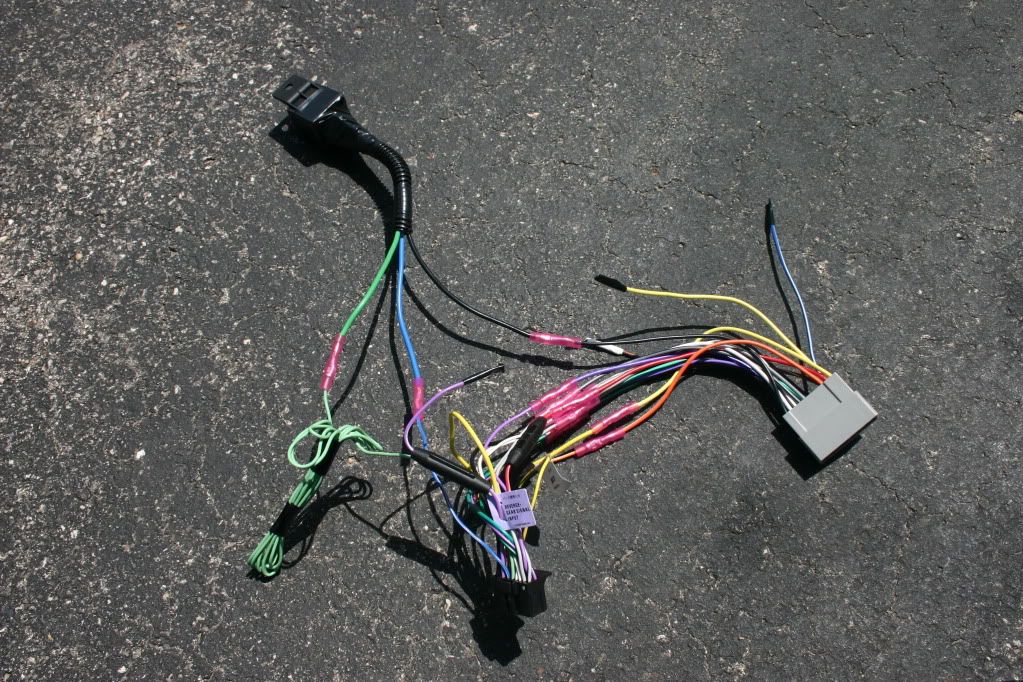
That is a picture of the harness with the bypass on the top left, along with the harnesses all hooked up.
The bypass plugs into the green parking brake wire (the long one), the blue wire with the white strip in it (believe its called amp turn on) on the pioneer side, and a black ground wire. I used the car side of the harness for that one.
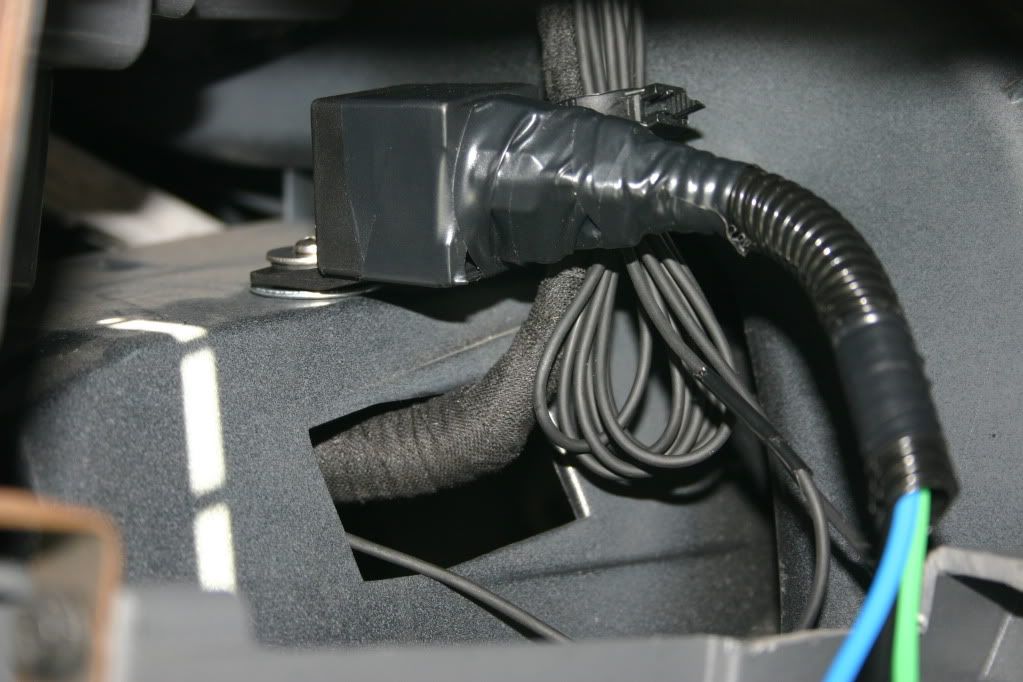
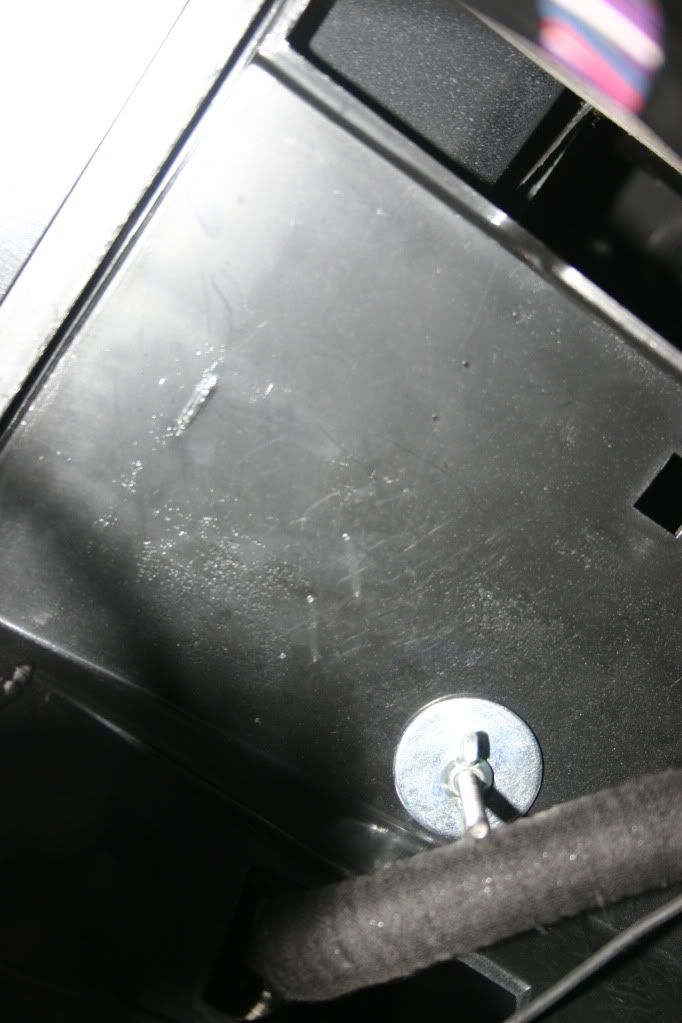
I found a small rectangular hole on the drivers side of the radio cavity and mounted the bypass there (it already had the mounting plate on it) with various metal and rubber washers and a wing nut. The long wire that is folded over next to the bypass is my Bluetooth mic wire. They supply a lot of wire and that is the perfect place to tie it all off and keep it out of the way. Speaking of the Mic....

I mounted mine there as it is out of the way and hopefully still picks up my voice (haven't tried it yet). I ran the wire between the plastic piece its mounted on and the plastic clear cover for the gauges. This way the wire is barely even visible and the Mic is also hard to even notice. I mounted mine with some Servo tape I had in my RC car tool box. I wanted to use a foam based double sided tape as I have had bad experiences with the gel type, they seem to not stick as well for me.
Now everything is setup for the most part and I am waiting to get the GPS unit for it. The pioneer only accepts ONE gps unit, so make sure you get the correct model. For this head unit you need to get the Pioneer AVIC-U220.
I can post up my install of that later.
With everything in place, I am starting to get used to this unit.
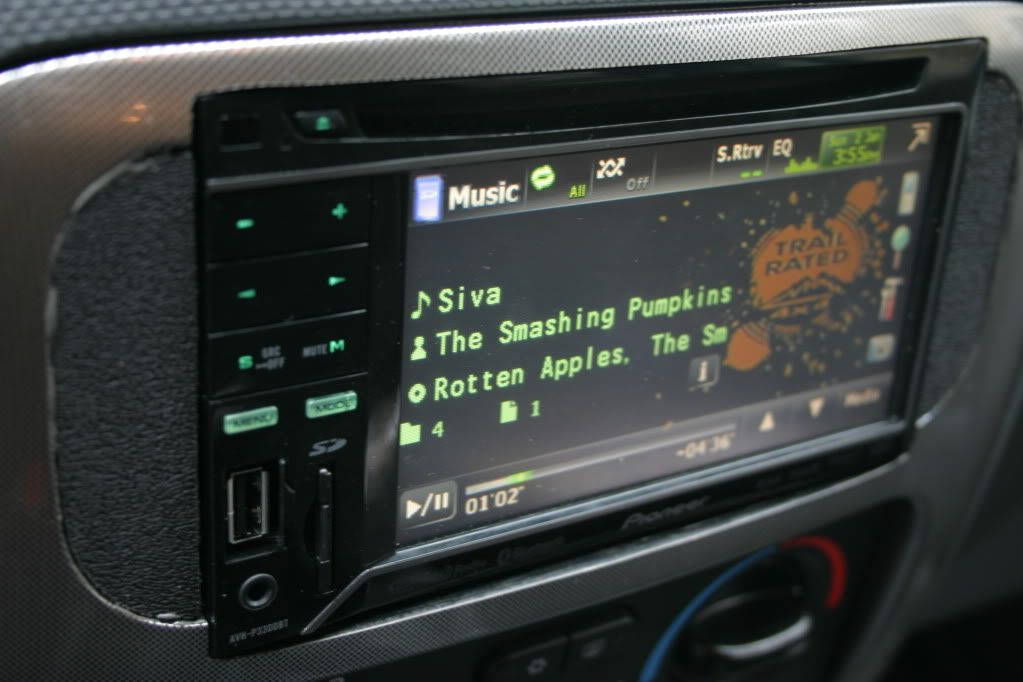
I have spent way to much time just trying to create a good custom backround that looks professional and has a Jeep theme to it. Also, I matched the color of the lights on the external buttons of the unit to match the teal of the Liberty gauge cluster. Keeping with the Jeep theme, I chose Green for my menus. (I am not a photoshop wizard!!! I used Aviary.com as it is 100% free and legal!)
The Pioneer uses a 480x320 (QVGA) display res, so when making my own backrounds I make them in 640x480 (VGA).
As a note, when you use your own images for a backround, it doesn't fill the whole screen. The sides are still going to be black, I have no idea how to get around this - as it is annoying, limiting your backround colors to just black, but you can still do a lot of cool things with a black backround.
my current backround (so you can get an idea of what you can do)

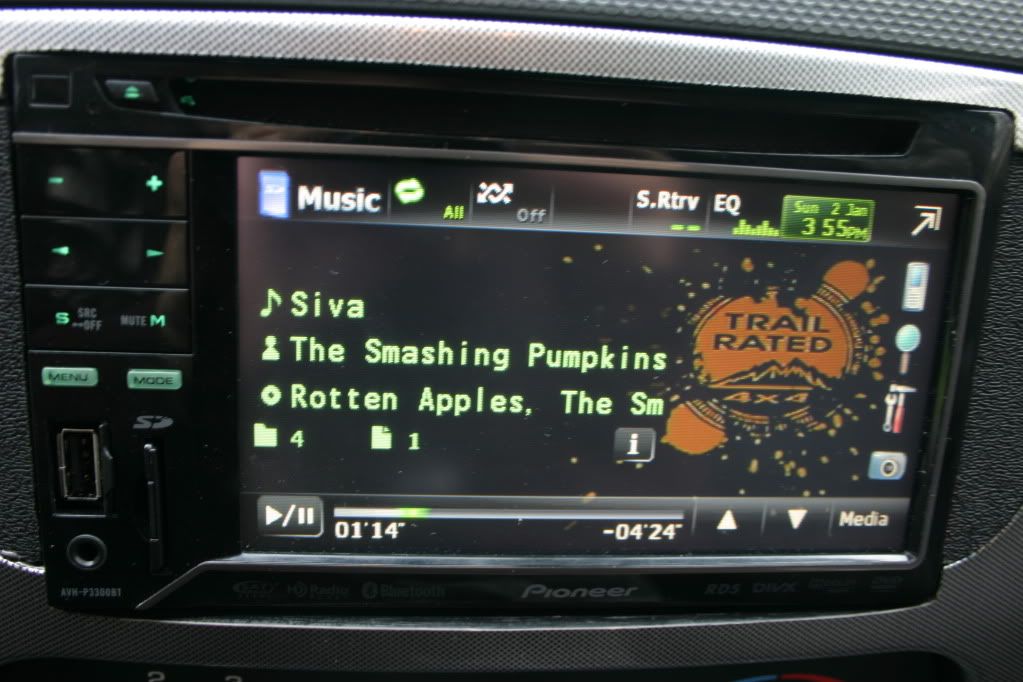
note the layout and coloration of the screen as described above
This pic shows the excess material which could be cleaned up if you want. However im fine with it as it is.
Thats all there is to it! You can install a backup camera, I am going to hold off on that personally, but if you do want to get one, make sure it is a quality brand. Apparently Audiovox units are junk, so steer clear of them. Try to get a Sony model if you can as they have CCD sensors and actually supply other companies with their CCD sensors! I found the Sony on ebay for $80.
Please feel free to post up your questions and comments, and keep in mind that this is just what MY experience was with this install. I have never claimed to be a prophet that knows everything and never will!
I am very pleased with how this project turned out as at first it seemed much more difficult than it actually was. I would recommend that if people want to get an aftermarket double-din, to install it themselves as I did because it is rewarding and saves you money.