This gets asked quite often, So I figured I make a separate post so I can easily link to it.
The first part are pictures and descriptions, at the end of the post you will find the directions to remove and replace the cowl from the Factory Service Manual (it is from the 2007 FSM, but it should be similar for all 2002-2007 KJs)
Hey, I'm not the first one that did this here, so I can't take the credit, but I might be the second, lol.
They do sell a bracket that mounts on the front doors' A-Pillar, (don't remember where I found that) but this is my "cheap" & "quick" way of doing it..
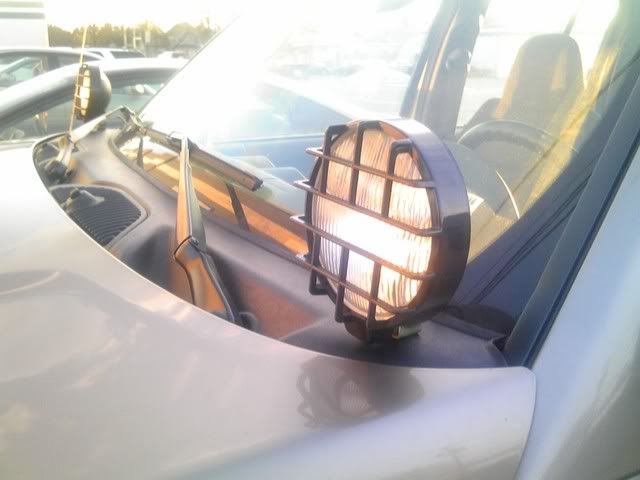
I have mine on the cowl.
Here is how I wired it, I believe it is the best way.
viewtopic.php?f=45&t=63132You can Definitely mount them a little further back, depends on how thick the lights are.
This was temporary for me, until I found a better way, but they seemed to work perfectly fine this way.
This works for cheap, or really light (in regards to weight) lights.
They shake a little at highway speeds but I don't use them on the road.
They have taken a beating between driving through the woods, multiple automatic car washes, driving 90mph down the highway and snow storms.
You can kind of see how the light reflects off the hood in this video @ around 30 seconds and again at around 1:30.
http://www.youtube.com/watch?v=TnK4XMKezpoHere are a few images. (all taken with a camera phone, sorry about the quality)
Front quarter shot with all lights on.
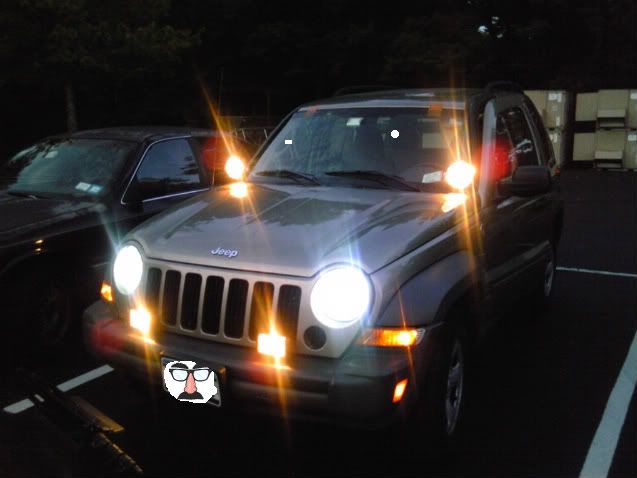
Front shot with all lights on.
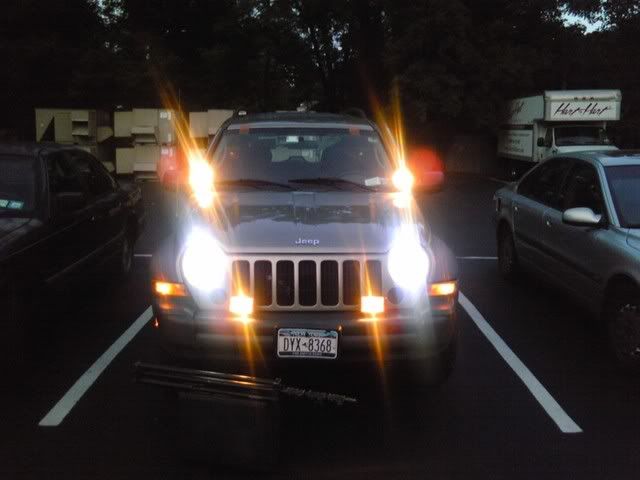
Front quarter shot with lights off.
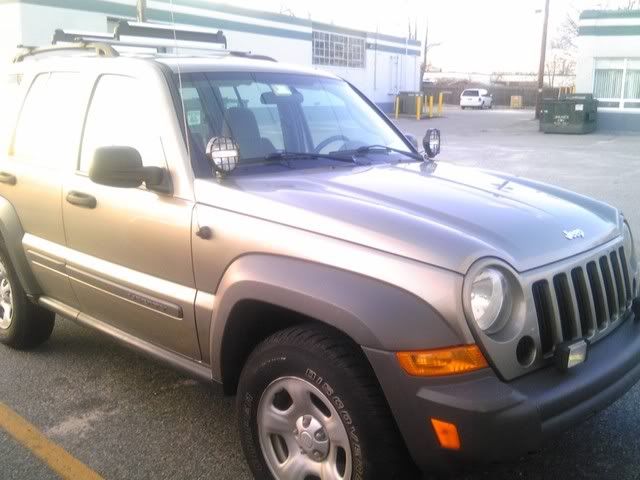
Closer shot of Lights.
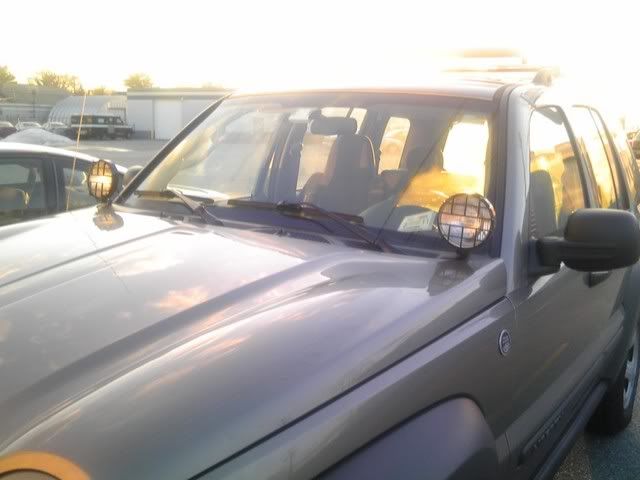
Close-up of the front of the Lights.
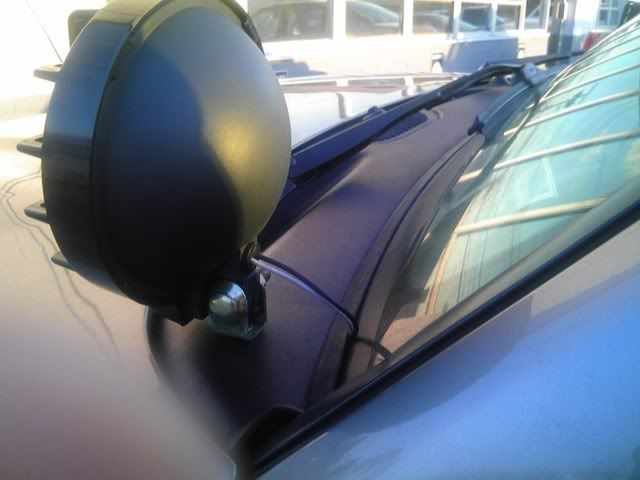
Close-up of the back of the Lights. You can easily move the lights back about half an inch.
Switches on the inside for fogs and spots. One way turns them on when I want them, the other turns on automatically with parking/brights respectively, and middle position have them off always.
Setting up Aux Fogs with a SPDT ON-OFF-ON switch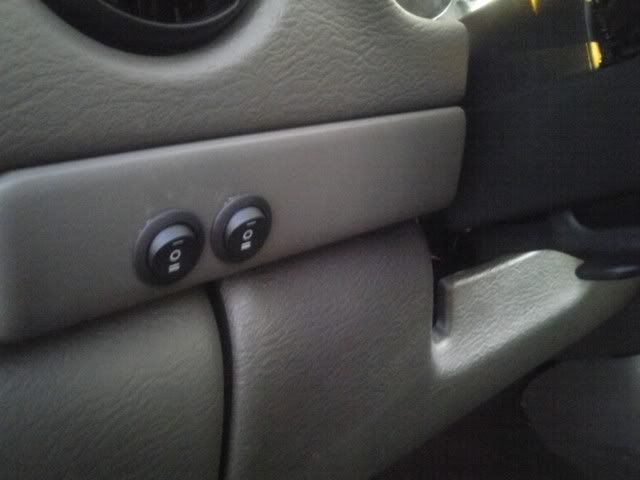 -----------------------------------------------------
Take the cowl off.
Drill a hole for each light.
Attach the lights.
Route the wires so they do not interfere with the wiper motors.
Put cowl back on.
Here it is a little more in depth.
To Remove the Cowl
2007 Factory Service Manual wrote:
COWL GRILLE
REMOVAL
(1) Remove the hood seal.
(2) Remove the wiper arms. (Refer to 8 - ELEC- TRICAL/WIPERS/WASHERS/WIPER ARMS - REMOVAL)
(3) Remove the four plastic retainers and remove the cowl grill.
INSTALLATION
(1) Position the cowl grill and engage the nine clips to the bottom of the windshield.
(2) Install the five plastic retainers.
(3) Install the wiper arms. (Refer to 8 - ELECTRI- CAL/WIPERS/WASHERS/WIPER ARMS - INSTAL- LATION)
(4) Install the hood seal.
Wiper Arm
REMOVAL
(1) Lift the front wiper arm to its over-center posi- tion to hold the wiper blade off of the glass and relieve the spring tension on the wiper arm to wiper pivot shaft connection.
(2) Carefully pry the plastic nut cap off of the pivot end of the wiper arm
(3) Remove the nut that secures the wiper arm to the wiper pivot shaft.
(4) If necessary, use a suitable battery terminal puller to disengage the wiper arm from the wiper pivot shaft
(5) Remove the front wiper arm pivot end from the wiper pivot shaft.
INSTALLATION
NOTE: Be certain that the wiper motor is in the park position before attempting to install the front wiper arms. Turn the ignition switch to the On position and move the control knob on the right (wiper) con- trol stalk of the multi-function switch to its Off posi- tion. If the wiper pivots move, wait until they stop moving, then turn the ignition switch back to the Off position. The wiper motor is now in its park position.
(1) The front wiper arms must be indexed to the wiper pivot shafts with the wiper motor in the park position to be properly installed. Position the front wiper arm pivot ends onto the wiper pivot shafts so that the tip of the wiper blade is aligned with the T-shaped wiper alignment lines located in the lower edge of the windshield glass (Fig. 10).
(2) Once the wiper blade is aligned, lift the wiper arm away from the windshield slightly to relieve the spring tension on the pivot end and push the pivot hole on the end of the wiper arm down firmly and evenly over the wiper pivot shaft.
(3) Install and tighten the nut that secures the wiper arm to the wiper pivot shaft. Tighten the nut to 24 N·m (18 ft. lbs.).
(4) Wet the windshield glass, then operate the front wipers. Turn the front wipers Off, then check for the correct wiper arm position and readjust as required.
(5) Reinstall the plastic nut cap onto the wiper arm pivot nut.
Enjoy!


