|
This is about how I went replacing the glow plugs.
The service manual instruction are as follows:
REMOVAL
CAUTION:
² If necessary, remove hindering components to ease access.
² Do not bend, knock, or drop the glow plugs while handling (any mechanical impact may damage the glow
plug).
² First loosen the glow plug with a wrench then screw it out by hand or with assistance of a flexible tool
(e.g. with a rubber hose).
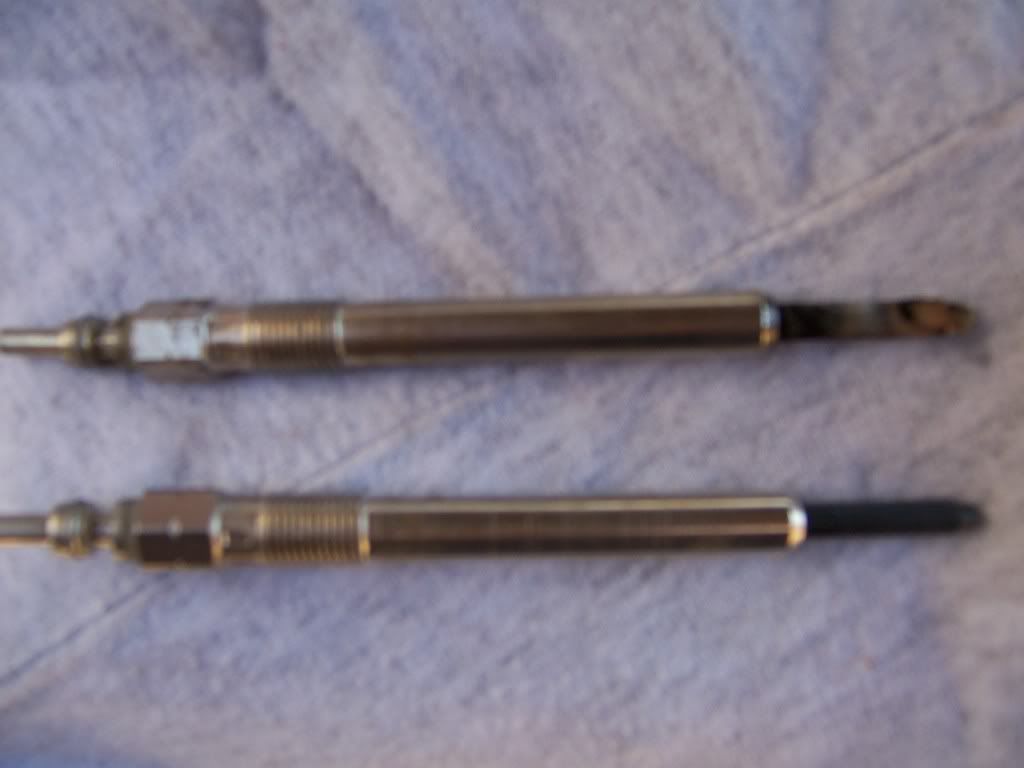
² Compare the removed glow plug with a new one. If there are missing parts of the ceramic heating element,
remove all fragments from the combustion chamber before you start the engine. CYLINDER HEAD
WILL NEED TO BE REMOVED
1.Disconnect negative battery cable.
2.To access the glow plug for cylinder number one, no additional components need to be removed.
3.To remove the glow plug for cylinder number two,remove the rear generator bracket.
4.To remove the glow plug for cylinder number three, remove the EGR pipe from the intake elbow and remove the intake elbow.
5.To remove the glow plug for cylinder number four, relocate the fuel filter assembly.
6.Disconnect glow plug electrical connectors.
7.Remove glow plugs from cylinder head.
It sounds easy but if you just go at them just one at a time, it will be more difficult than needed.
What I did was get all obstruction out of the way before removing any glow plugs.
First disconnect battery cable. Afterward I laid a fender cover over the battery and left fender. I then put my magnetic tray on the radiator cross-member to keep bolts from getting lost. Remove oil cap, remove engine cover and put oil cap back on. Next is to remove obstruction so yo can get to the glow plugs and wiring.
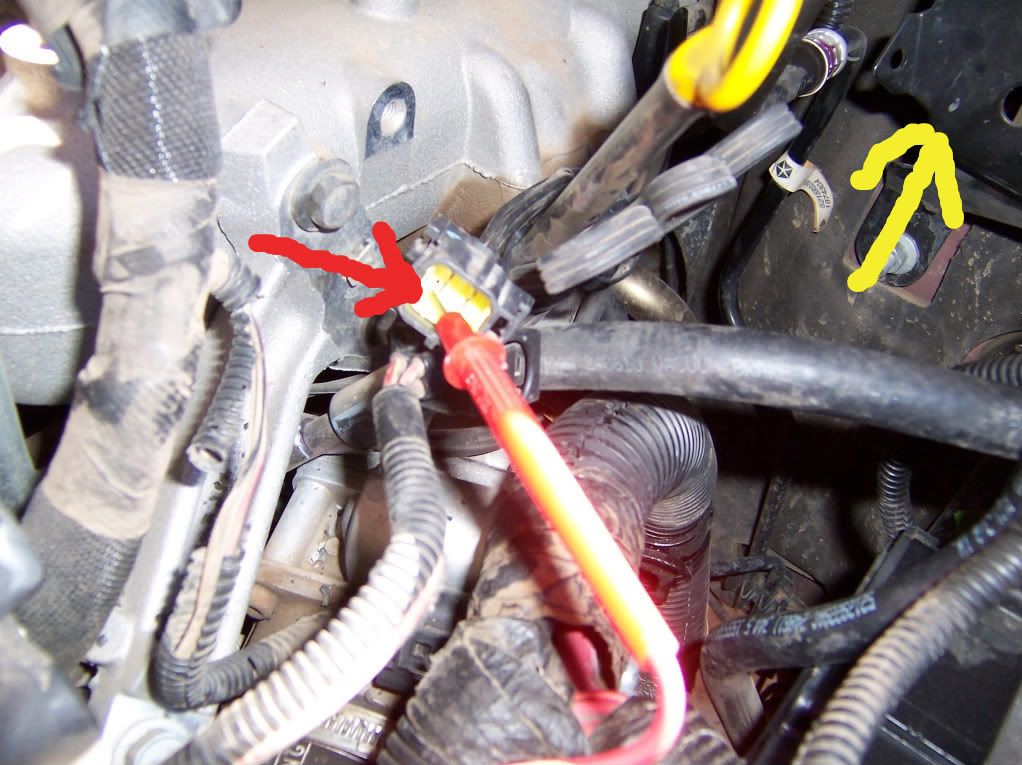
The alternator bracket is just behind the alternator and is triangle shape and connect to the intake Remove the rear alternator bracket using a 15 mm socket and extension near the rear of the alternator and 13 mm wrench on the two bolts on the intake. There is the glow plug harness there, Unplug it and move both ends out of the way.
Next step is to move the fuel filter assembly out of the way. I remove the two nuts ( 13 mm wrench) holding it, disconnected the lines and wiring. I put the filter assembly upright on the bench and move the hoses and wiring out of the way.
Now to tackle the intake elbow takes a little more work but is easier to get to with the first two items out of the way. You will need a gasket. Remove the vacuum hose from the pipe at the intake elbow for the brake booster and the bolt (8 mm) that hold the vacuum pipe. Loosen the EGR pipe clamp (underneath elbow 7 mm socket ¼ drive deep) from the elbow and 2 flange bolts (10 mm socket 3/8 drive) EGR pipe to cooler. Best to get those two bolts from under Jeep just above the starter. Then the pipe should swing loose and still be connected to the intake elbow. Remove the hose from the FCV and disconnect the wire and move both out of the way as much as you can.
Remove the 4 intake elbow bolts as following:
Right rear, use a 8 mm box
Right front use a 8 mm ¼ drive socket and extension working with hand from under the elbow and using the socket to guide the bolt down and under the elbow.
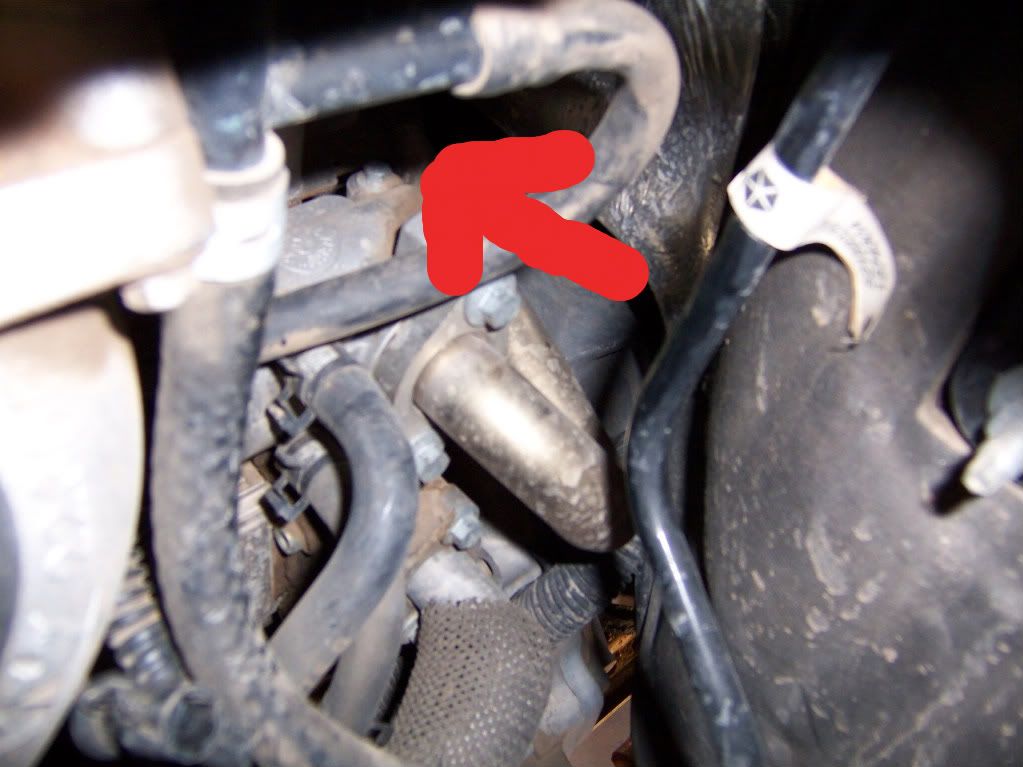
Left front with dipstick tube and left rear bolt comes out easy with a 8 mm ¼ drive socket. Do these bolts last when taking off the elbow and first when putting is back together. That way there is less fuss with the two inner or right side bolts. The elbow should be loose except for a EGR cooler bracket that holds a EGR cooler line. The elbow will now be able to move down and out enough to get number 3 glow plug.
Now it time to use long pliers or fingers to disconnect the wiring from the glow plugs by pulling straight out. Remove the glow plugs with a 10 mm socket 3/8 drive deep with an extension. They all came out easy and the threads were fairly clean as they should be. If fact they felt a little loose but was not leaking as far as I can see. Be sure not to over torque the new ones.
INSTALLATION
CAUTION:
² Before a new glow plug is installed, make sure that the thread of glow plug and glow plug bore in the
cylinder head is dry, clean, and oil/grease-free
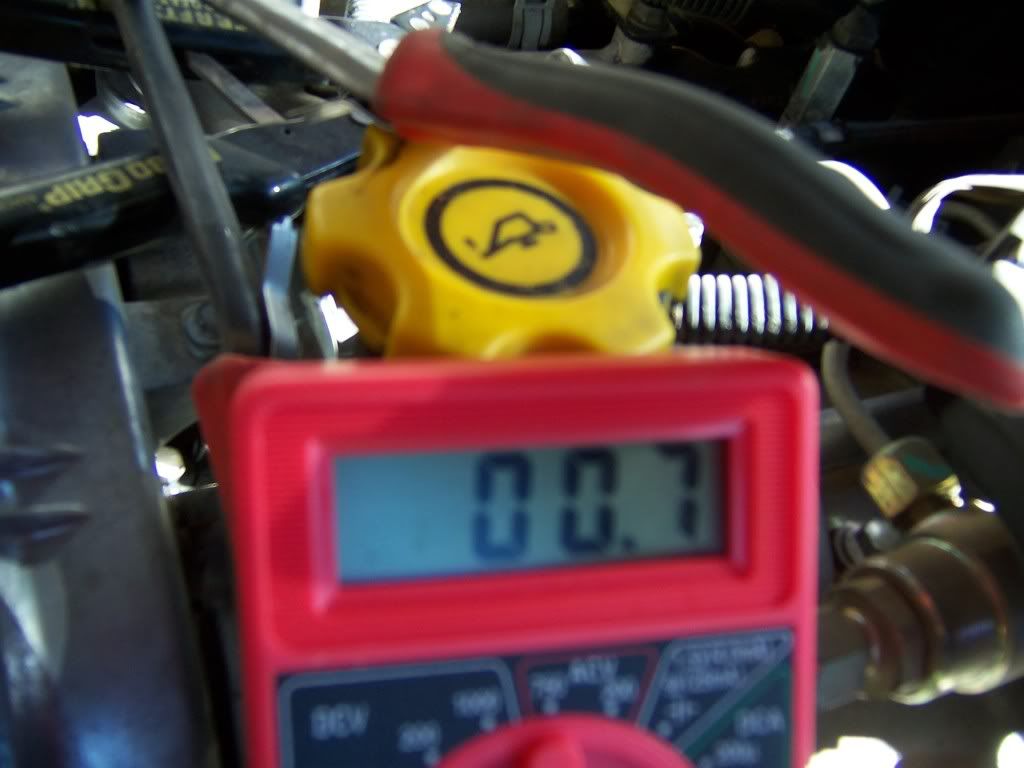
² Check the resistance of the glow plug with an appropriate multi-meter, resistance should be less than
0.8V.
² Tighten the glow plug by hand or means of a flexible tool (e.g. rubber hose) as far as possible and finish
tightening with a correctly set torque wrench.
² Strictly observe the required tightening torque.
² Do not bend, knock, or drop the glow plug while installing.
CAUTION: If a fragment of the ceramic heater of
the glow plug has fallen into the combustion
chamber, the cylinder head MUST be removed.
1. Install glow plugs all the way into cylinder head,
hand tight, until the thread stops.
CAUTION: Strictly observe the required tightening
torque. If tightening torque was to high, remove
and replace the glow plug.
2. Tighten glow plugs to 12.5 N·m (110 in. lbs.).
3. Connect glow plug electrical connectors.
4. Install any components that were removed for
access.
I use a long vacuum hose to install each glow plugs by hand so there wasn't any possibility of dropping a glow plug at over $30 apiece.
Reverse the process to install all items removed to get to the glow plugs. Be sure to bleed the filter assembly before trying to start engine.
I hope this is easy enough for all to follow.
_________________
2006 Black Jeep Liberty CRD Limited
K&N, Samco Hoses, Michelin 245/70-16 LTX A/T2, Fumoto F-102, V-Force Muffler, Mopar, Hitch, Trailer Wiring, Skid Plates, Slush Mats, Rear Shelf, Predator Stage 1, Transgo, ORM & CodeReader, Facet 40109 Pump
"IT'S A DIESEL THING, YOU WOULDN'T UNDERSTAND"
Certified Services Auto & Truck Repair
|