Hi guys.
I thought i own a write-up on my recent (not so anymore) mod when my Transmission
cooler started to leak.
I basically by passed the existing
cooler and fixed a replacement
cooler just behind the front grill..
I used a large
cooler 5 3/4 - 11 - 1 1/2
Yes its big, but it fits !
so here we go:
Cooler used: B&M Model: BM 70273. Size: 5 3/4 - 11 - 1 1/2
Ordered on Summit Racing for 60.95$
STEP 1:
Removed the plastic silver grill : clip out from the top and gently pull out. Watch out not to bend it or will break the lower clips that holds the grill (...yes , did it )

STEP 2:
Removed the plastic bumper: Remove screws from underneath the bumper, and unclip from the inside of the wheel passage. Disconnect wires of turning signals.
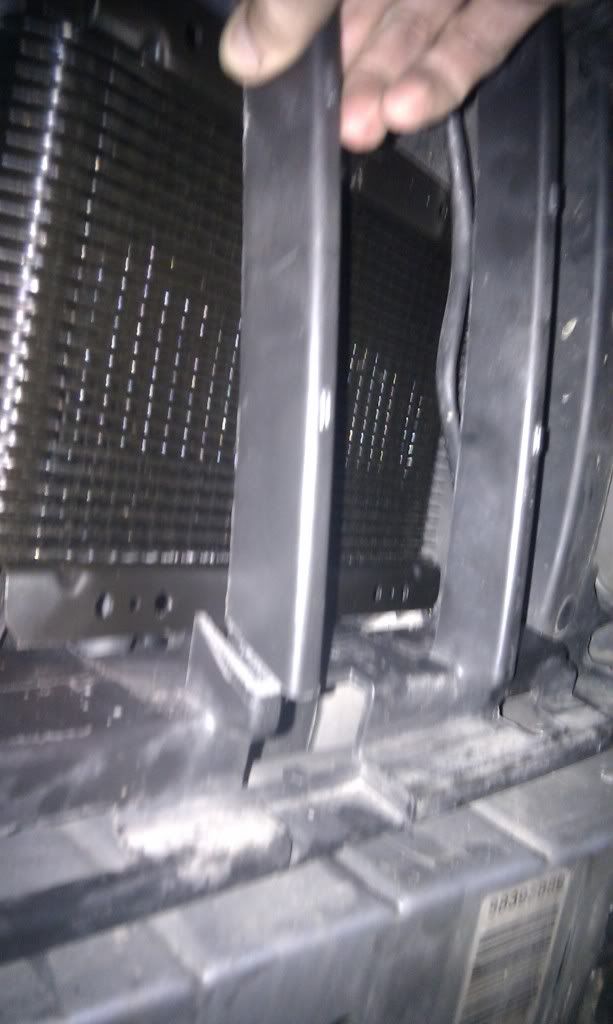
STEP 3:
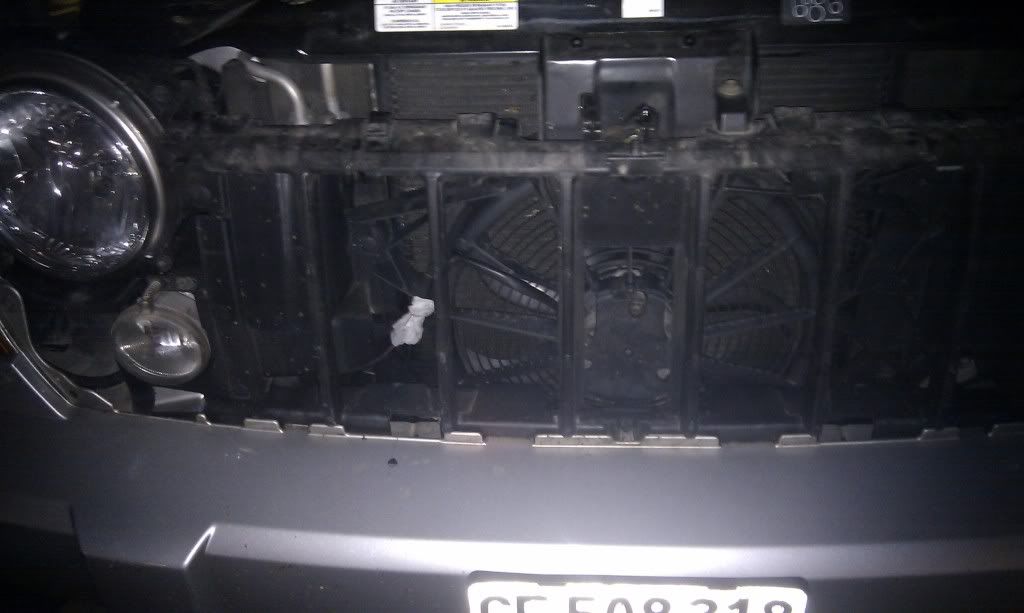
This is where i choosed to place my
cooler. I wanted the
cooler to be fully exposed to the fresh air and to keep clear from blocking the radiator behind.
Step 4:
I did not insert the
cooler like most of the people, from the top. The B&M 70273 is too thick to go through the top.
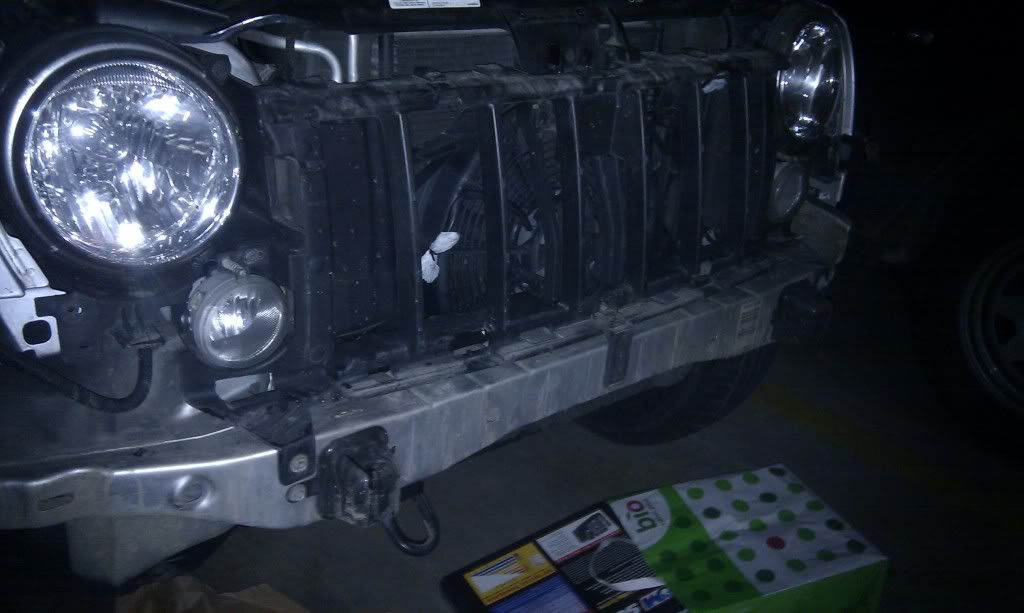
So i cut a hard black plastic bar, the second one from the right hand side. i cut it slanted that pressure will keep it place afterward and that i could easily glue it back...
That give plenty enough space to insert the
cooler and put it in place. It went in horizontally, i had then to work to place vertical.
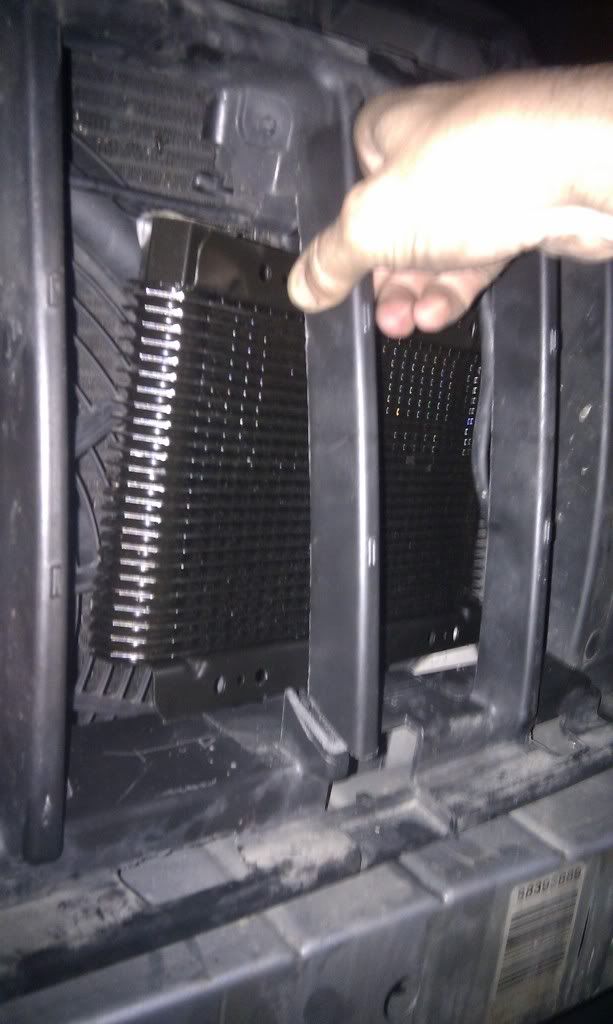
STEP 5:
Once you know where to place the
cooler, take it out and mount the connecting hoses.
I worked with braded hoses and alluminium fittings.
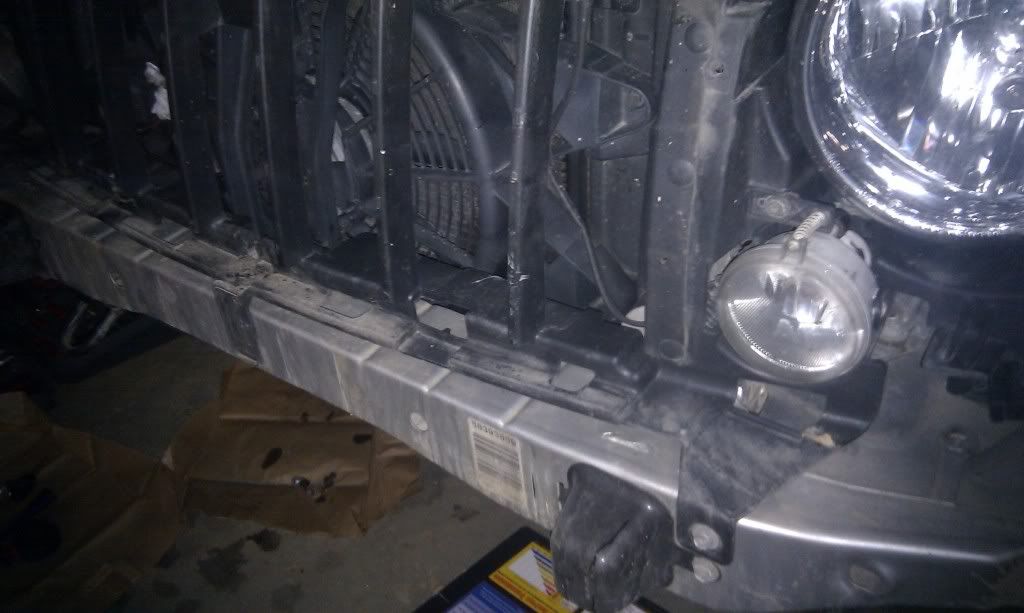
STEP 6:
Trim the lower plastic in order to allow the
cooler to fit. Less than an inch was enough
See how the plastic is trimed to allow the
cooler to pass behind
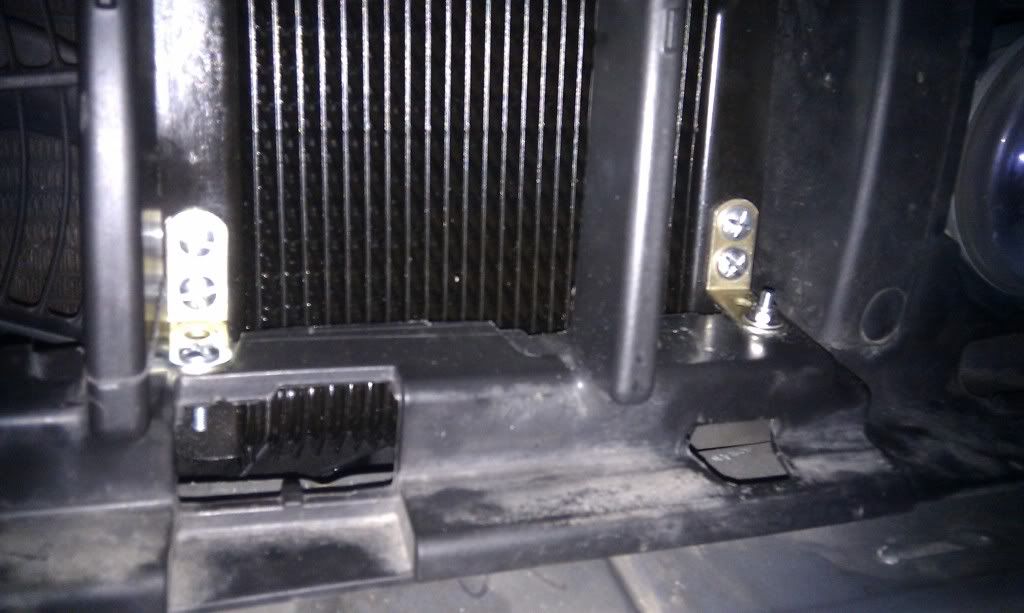
STEP 7:
Fix the
cooler to the hard plastic using 2 L shapes pieces (forgive my french

)
The left hand side is easier to fix because of the small open window, but for the right hand side i has to use the small opening in the plastic to allow a small L allen wrench to hold the screw and allow to tighten.
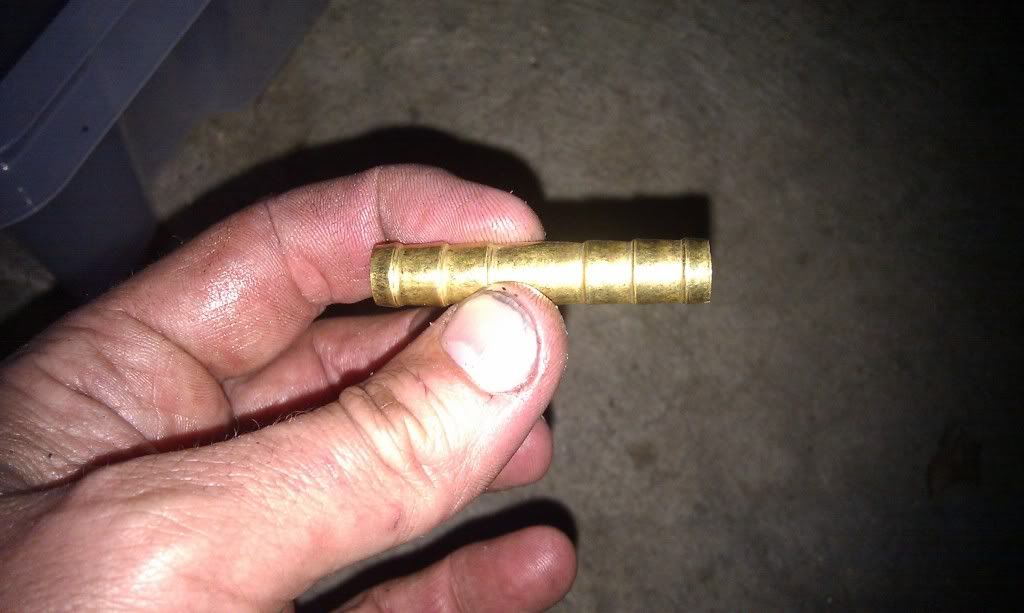
STEP 8:
cut the hoses to the correct length. i did this with a metal saw.
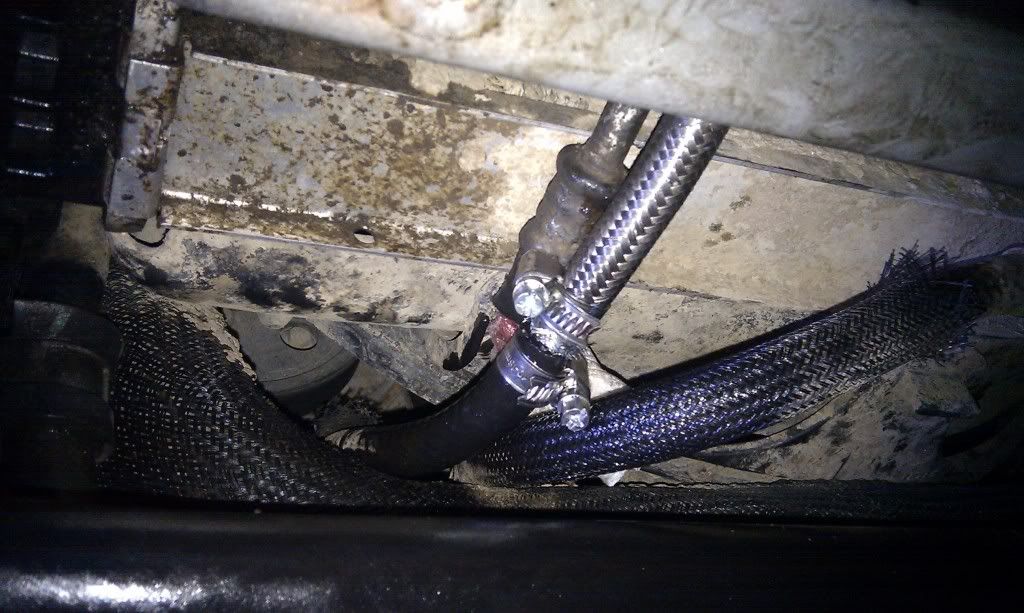
STEP 9:
Cut out the stock hoses. i was surprised how little oil came out. but i quickly insert some rag in it to stop the flow.
STEP 10:
I used some standard connectors to connect back the hoses together. a few box at a DYI store.
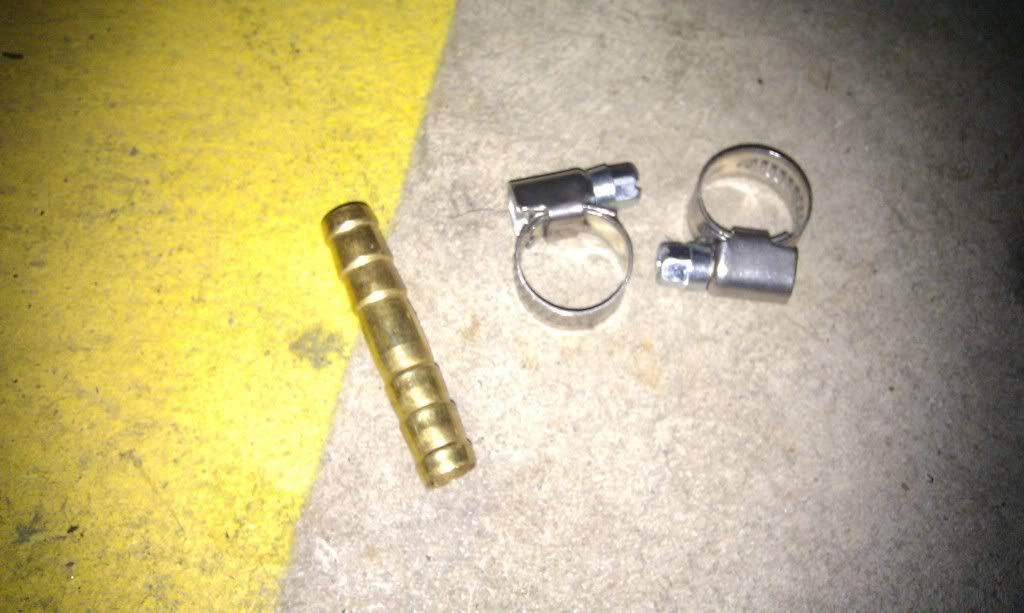
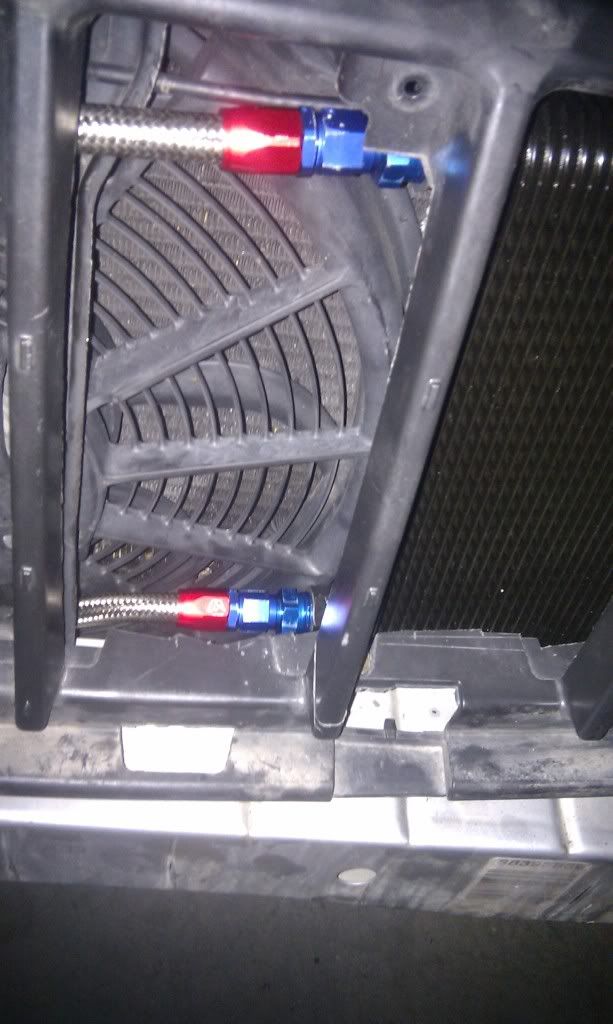
STEP 11:
I decided to connect the inflow to the lower inlet of the
cooler. My logic is that the oil being pushed up in the
cooler has a tendency to spread in all the
cooler circuit and give a better cooling effect... seems to work out well so far.
STEP 12:
I had to move the temperature sensor to the left of the hood hook. i found that it was too much surrounded with hot stuff to tell the truth with the new
cooler next to it. An electrical connector (sugar ??), 10 inches of electrical cable and a small drilling made the job.
STEP 13:
Glue back the grill or just duck tape it.
Mount every thing back. (optional ...

)
STEP 14:
It took about 10 miles to really get the correct level of cooling oil.(ATF +)
Drive- stop-check- refill- drive- stop-....
ok. now i know that some guys in AZ organised workshop where they were doing a KJ in 30mn......am obviously not that good .
It took me 16 hours...
most of the time was spent on figuring out where and how to place the
cooler. But i think that gowing through the grill by cutting it is good.
have fun and pm me if needed
cheers !!