ARP Head Studs Install InstructionsPer ARP regarding the proper way to torque the studs.
Blow out any debris that is in the holes.
1. Install a bone-dry stud into a bone-dry block and chase the threads with the stud up and down a few times to clean the threads.
2. Place a bone-dry washer on the bone-dry head.
3. Place a dab of lube on the upper part of the washer only, the bottom part of the washer must be bone dry.
4. Place a small dab of lube on the bottom of the nut.
5. Place a small dab of lube on the fine threads of the stud and screw the nut on till it reaches the top of the washer.
6. Use a small wrench to hand tighten the nut onto the head.
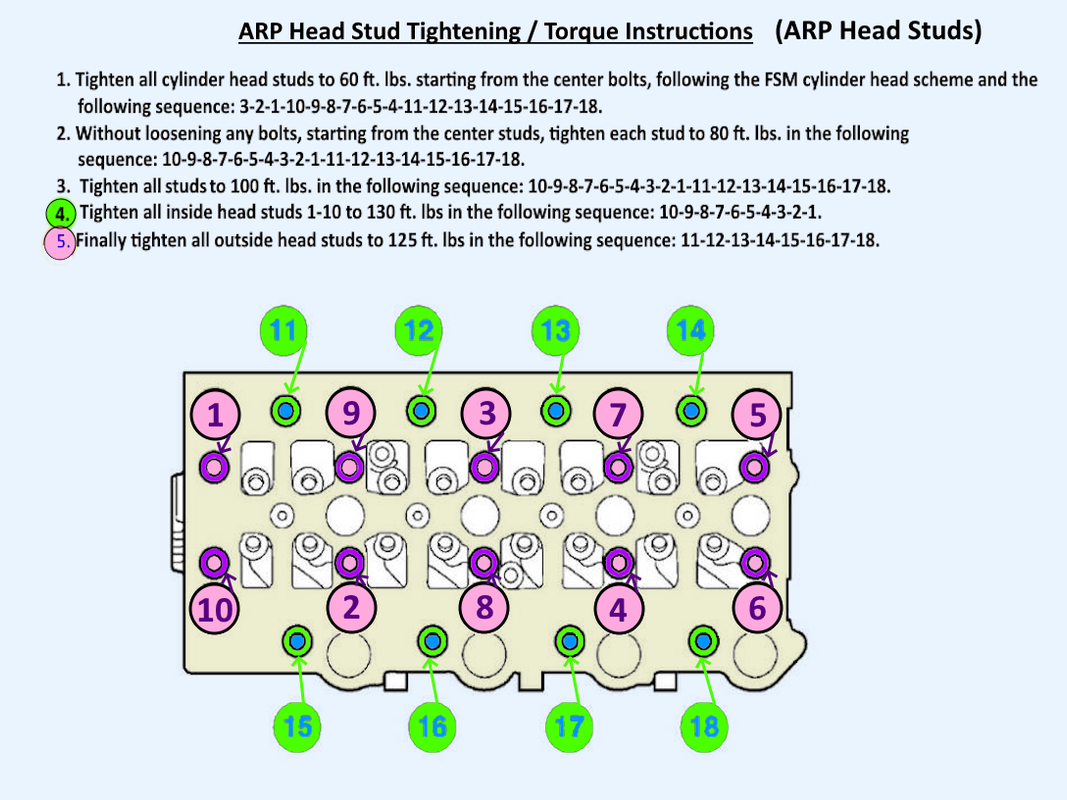
7. Using the proper torque wrench begin torquing the nuts in three separate torque sequences waiting 60 seconds between torques until the desired torque is reached.
Wait several minutes between each torque value.
Then wait 12 hrs. and recheck all torque values before final assembly.