It is currently Mon Oct 20, 2025 6:21 am

All times are UTC - 5 hours [ DST ]


Post new topic Reply to topic  [ 67 posts ]  Go to page Previous  1, 2, 3, 4  Next
Author Message
 Post subject:
PostPosted: Mon Aug 18, 2008 9:15 am 
Offline
LOST Addict

Joined: Wed Mar 29, 2006 6:36 pm
Posts: 3143
Location: OKLAHOMA
holllllly crap !!! you got a lotta electrical stuff there!
looks awesome! i love the look of your lightbar!


Top
 Profile  
 
 Post subject: Breather Tube Extension & Relocation
PostPosted: Tue Aug 19, 2008 12:35 am 
Offline
Lifetime Member
Lifetime Member
User avatar

Joined: Fri Oct 07, 2005 5:40 pm
Posts: 570
Location: Colorado
This photo shows how I extended the breather tubes for my differentials and transfer case. There is no breather for the transmission because it is a six-speed manual.

I extended the tubes and ran them into this lawn mower filter which I made a base plate out of sheet metal. The base plate is attached to the filter by silicone sealent and has three plastic tubing nipples for the connection of the breather tubes. The filter it attached to a connector near firewall just to the right of the brake fluid resivoir.

Image

John
];')

_________________
05 4x4/3.7L/6 Spd
245/75R16 GY Dura Trac
Lots of Mods! :D
My Wheeling Videos :JEEPIN:
My Mods, Upgrades and Custom Fabrications


Top
 Profile  
 
 Post subject: Gutter Screen Grill Inserts
PostPosted: Tue Aug 19, 2008 12:52 am 
Offline
Lifetime Member
Lifetime Member
User avatar

Joined: Fri Oct 07, 2005 5:40 pm
Posts: 570
Location: Colorado
I wanted something to reduce the number of bugs in the radiator and add a layer of rock/debris protection for the stuff behind the grill. I removed the grill and disassembled the two pieces. The black plastic insert just snaps into the body colored frontpiece. I bought a roll of gutter screening and cut a piece to size for each grill opening. You want the screen to be slightly larger than the opening in the frontpiece so that it overlaps and can be sandwhiched between the plastic insert and the frontpiece. I then pressed the screen over the stock plastic inserts to form the shape of the screens. I temporarily reassembled the grill with the screening to make sure it all went together and to finishing the forming of the screen to the plastic insert. I then disasembeled everything and spray painted the screen inserts with flat black paint. Once dry, I reassembeled everything and reattached the grill.

What you see in the photo is how my grill screens look after about two years on the Jeep. As you can see they hold up fairly well with only a little of the paint wearing off.

Image

John
];')

_________________
05 4x4/3.7L/6 Spd
245/75R16 GY Dura Trac
Lots of Mods! :D
My Wheeling Videos :JEEPIN:
My Mods, Upgrades and Custom Fabrications


Top
 Profile  
 
 Post subject:
PostPosted: Tue Aug 19, 2008 1:35 am 
Offline
Lifetime Member
Lifetime Member
User avatar

Joined: Fri Jun 09, 2006 2:30 pm
Posts: 2520
Location: LOST in Wisconsin
I did a similar mod. cut a piece of fiberglass window screen and placed it between the two pieces. after 2 years and 60k miles. I have a very clean radiator.

_________________
2005 CRD "Ol' Blue"
Red Ryder carbine-action, two hundred shot range model air rifle with a compass in the stock and this thing which tells time.
My build page- RL Komodo Rear and TJM Front Bumper, armored, lifted, JBA Steel D30, 4.10s and ARB air lockers.


Top
 Profile  
 
 Post subject:
PostPosted: Wed Aug 20, 2008 9:01 pm 
Offline
Lifetime Member
Lifetime Member
User avatar

Joined: Fri Oct 07, 2005 5:40 pm
Posts: 570
Location: Colorado
Well here is my version of phxtoad's rear shelf design.

This is the first mod and fabrication I did to my Jeep. After two years I must say that it is still holding strong and there is very little wear on the textured paint. I did have one of the electrical clamps pull out but that was due to my carelessness. Still the rods probably could be secured better. Some people have claimed my version is too tight of a fit at the back seat. I have found that the seat does in fact press against the part of the shelf nearest the back seats but this was by design in order to keep the shelf from vibrating and from easily coming unhooked from the links on the rear seats. It should fit like a glove at the rear seats. At some point in the future I do intend to make it attach so that it is safer in the event of a rollover. Note: There may be differences in measurements from KJ to KJ. This may account for issues some peole have had with the design.

Below is the description of what I did and how I modified phxtoad's design to fit my needs.
__________________________________________________________________________________________________

I used 3/4" AB plywood for the main shelf board and 3.5" 'select' pine for the shelf edge and bracing. In case you are not familiar with what 'select' pine is, it is a higher quality and stronger board than the stardard pine boards you commonly find at places such as Home Despot. Basically 'select' pine has no knots or splits and costs only slightly more then the basic pine. I probably could have made the rear 43" wide as in phxtoad's design but I thought I had clearance problems at first...now that it is installed I see that my fears were unfounded.

I used 1/2" metal rod for the shelf deck supports as well as the 12.5" rear hook brackets. I purchased 2-36" lengths of the 1/2" steel rod and cut each to 23" long for the shelf deck supports then used the remainder of each rod to construct the rear hook brackets. It was easy to bend the steel rod by heating them to red hot at the place where I made my bends using my blow torch. I then used my anvil and 5lb sledge hammer to bend the right-angle into the rod to make the hook. The reason for using two rod sections was due to not being able to find 48" long steel rod of the correct diameter. There was 1/2" threaded rod available but it is not nearly as strong as the 1/2" non-threaded steel rod. In the end it turned out for the better as I used the leftover rod for the rear hook brackets. Using the two sections up front allows me to push them out some once the shelf is installed thereby allowing for more support of the rods by the plastic body panels notches where they sit.

The wood was assembled with 1-1/2" and 9/16" lathe screws which were countersunk until flush for the shelf edge which is visible in the front. The 1/2" metal rods were attached with metal 1/2" electrical cable brackets as phxtoad used. The shelf edge was secured using 1-1/2" lathe screws as well as the angle brackets seen in the detail photos. I use corner fastners in the corner cut-out areas to help prevent splintering and to give it a cleaner more professional appearance.

Finishing of the rear shelf unit consisted of using wood filler at the seams in the visible areas and over the counter-sunk screw heads along front of the shelf edge. All wood surfaces were sanded and the ends of the rods were smoothed on a grinder. The entire assembled unit was given several coats of grey primer and then painted with 2 coats of granite texturing paint. Finally I gave it several coats of clear-coat to make it all nice and chip-proof. We'll see how chip-proof it really is after a few runs in the mountians.

Anyway...the photos are as follows. I have included dimensions on some of the images. Please feel free to PM me if you have any questions.

Click the thumbnail to enlarge the images.

Top Shot
Image
Bottom Shot
Image
Construction Details
Image
Rear Bracket Detail
Image
Rear Shot Lower View
Image
Rear Door Opened
Image
Rear Shot Door Closed
Image

John
];')

_________________
05 4x4/3.7L/6 Spd
245/75R16 GY Dura Trac
Lots of Mods! :D
My Wheeling Videos :JEEPIN:
My Mods, Upgrades and Custom Fabrications


Top
 Profile  
 
 Post subject: My Version of the Cold Air Intake
PostPosted: Thu Sep 11, 2008 10:04 pm 
Offline
Lifetime Member
Lifetime Member
User avatar

Joined: Fri Oct 07, 2005 5:40 pm
Posts: 570
Location: Colorado
Basically what I did was to trim away a little bit of the grill at the top of the headlight to make a space between the hood and the grill. I then removed the stock diverter that sits in front of the stock snorkel. Next I cut and 'persuaded' a piece of sheet metal to fit in the area you see in photo four. The sheet metal took a a lot of fine tweaking to get it to fit and allow the hood to close properly. Once the sheet metal fit I used contact cement to attach 1 1/2" insulating foam to the inside of the hood. The foam seals the space between the sheet metal plate and the hood so that it forms a channel from the cut out in the grill to the snorkel. There are also several small pieces of foam glued to the snorkel and the hood to fill out any rough areas. The foam is not glued between the snorkel and the sheet metal so that the snorkel can be easily removed. The sheetmetal plate is held on by the edges of the grill and the snorkel. It is not permanently attached to facilitate easy removal if needed.

In order to make the passenger side cutout even less noticeable, I painted the top edge of the grill over the driver side headlight black to match. You would never notice it if you didn't know it was there.

Note: I have calculated the surface area size of the opening between the grill and hood to be close in surface area to that of the stock snorkel opening and larger than that of the opening in the throttle body. This allows clean cool air to be ducted relatively smoothly with little restriction directly into the stock snorkel. The opening can be enlarged some depending on how much you are willing to take off of the grill. Enlarging the opening too much may weaken the grill.

At some point I intend to replace the tube between the air box and throttle body with one that is smooth walled in order to improve the airflow.

The cost of this little mod runs about $6 for the sheet metal and the foam.

I'll let you know if there is any difference in gas mileage after I put a few tanks of gas through it. Before the snorkel I got 14.5-15.5mpg. We'll see if there is any difference with the cool air intake mods.

John
];')

Click the thumbnails to make them large.

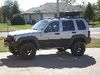
Can you see the intake?
Image

How about now?
Image

Here's a closeup.
Image

Here is what it looks like on the inside showing the sheetmetal plate as it is in place. Note the small piece of foam attached to the snorkel on the right side. This foam fills a gap between the snorkel and the stock foam when the hood is closed. There is also a 3/4" sliver of foam placed under the snorkel to fill the gap and make the transition from the plate smoother.
Image

Here is the inside of the hood showing the stock and added foam seals. You also probably want to tape the area indicated or you will draw in some warm air from under the hood. The way that the stock air diverter (which was removed) is located, it draws most of the air through the hole in the hood sheet metal which ducts to the area behind the air filter box. You can see where this ducting is at the arrow over to the left side of the photo.
Image

_________________
05 4x4/3.7L/6 Spd
245/75R16 GY Dura Trac
Lots of Mods! :D
My Wheeling Videos :JEEPIN:
My Mods, Upgrades and Custom Fabrications


Last edited by Kugellager on Tue May 05, 2009 12:29 pm, edited 7 times in total.

Top
 Profile  
 
 Post subject:
PostPosted: Thu Sep 11, 2008 11:55 pm 
Offline
LOST Addict

Joined: Wed Mar 29, 2006 6:36 pm
Posts: 3143
Location: OKLAHOMA
very different idea and i likie it!!!


Top
 Profile  
 
 Post subject: Cold Air Intake Preliminary Results
PostPosted: Tue Jan 06, 2009 10:19 pm 
Offline
Lifetime Member
Lifetime Member
User avatar

Joined: Fri Oct 07, 2005 5:40 pm
Posts: 570
Location: Colorado
All I have done is record the mileage. The mileage seems to be about the same after the first couple of tanks - maybe slightly higher - more mileage recording needed. I am still getting about 15 +/- mpg. The only noticeable difference has been what feels like a bit more power/acceleration when merging onto the highway in the lower 3 gears. I still plan at some point to replace the rubber flexible intake tubes with smooth metal pipes which would help with the intake flow to some extent. I will also get a higher flowing filter at some point.

John
];')

_________________
05 4x4/3.7L/6 Spd
245/75R16 GY Dura Trac
Lots of Mods! :D
My Wheeling Videos :JEEPIN:
My Mods, Upgrades and Custom Fabrications


Top
 Profile  
 
 Post subject:
PostPosted: Wed Jan 07, 2009 2:15 pm 
Offline
Lifetime Member
Lifetime Member
User avatar

Joined: Mon May 22, 2006 6:28 pm
Posts: 3880
Location: Wichita/ Pittsburg, Kansas
Have you re-geared it John? or are you still on the 3.55s?

_________________
1980 Jeep CJ7 Buggy
SOA, D44/ FF14B, SBC 350, SM465, NP205, 108" WB, 37" MTs

http://www.dpgoffroad.com/
http://www.ucora.org/
http://www.christianoffroad.com/
http://jeepinbyal.com/


Top
 Profile  
 
 Post subject:
PostPosted: Sun Jan 11, 2009 12:06 pm 
Offline
Lifetime Member
Lifetime Member
User avatar

Joined: Fri Oct 07, 2005 5:40 pm
Posts: 570
Location: Colorado
No I have kept them at 3.55.

John
];')

_________________
05 4x4/3.7L/6 Spd
245/75R16 GY Dura Trac
Lots of Mods! :D
My Wheeling Videos :JEEPIN:
My Mods, Upgrades and Custom Fabrications


Top
 Profile  
 
 Post subject:
PostPosted: Wed May 13, 2009 10:34 am 
Offline
Lifetime Member
Lifetime Member
User avatar

Joined: Fri Oct 07, 2005 5:40 pm
Posts: 570
Location: Colorado
This is a real old mod (3+) years but I recently found it and thought I would consolidate it here with the rest of my mods.

NOTE: The Reese Front Hitch is no longer made. I got one of the last ones from Ted when he upgraded to a RL Bumper.
-------------------------------------------------------------------------------------------------------------------------------------------

Here are some photos of how I solved the license plate problem with the install of my Reese Front hitch.

First is the cut around the hitch face in the front bumper.
Image
The the cut in the license plate holder.
Image
Next is a close-up of the slits and bending I did to the plate itself. I formed the plate around the hitch
using a 2x4 so as not to trash the plate too much.
Image
Lastly, here is a shot of the finished mod. The plate and holder are in the original stock location.
Image

John
];')

_________________
05 4x4/3.7L/6 Spd
245/75R16 GY Dura Trac
Lots of Mods! :D
My Wheeling Videos :JEEPIN:
My Mods, Upgrades and Custom Fabrications


Top
 Profile  
 
 Post subject:
PostPosted: Mon May 18, 2009 12:59 pm 
Offline
LOST Member
User avatar

Joined: Fri Oct 05, 2007 7:02 pm
Posts: 176
Location: Geneva, Illinois
Image
By xc204, shot with FinePix S5000 at 2009-05-18
Mine came out here by design so I didnt have to cut the lower area of the bumper . but I missed and still had to do some trimming of the lower.

_________________
Geneva Illinois
2000 XJ 2.5" lift 245-75R16 MT's on Moabs
2006 KJ sport rear Air Lift,Clevis lift, front hitch rec. point,Front and Trans skids,Really Nice Roof Bars!
3 Jeeps owned
Favorite Destination Gunnison Co.


Top
 Profile  
 
 Post subject:
PostPosted: Mon May 18, 2009 4:32 pm 
Offline
Lifetime Member
Lifetime Member
User avatar

Joined: Fri Oct 07, 2005 5:40 pm
Posts: 570
Location: Colorado
I didn't have to cut or push anything out of the way in the lower section of the bumper. You can see it in my photos.

The only part I had to trim was behind the license plate holder - and the holder itself.

John
];')

_________________
05 4x4/3.7L/6 Spd
245/75R16 GY Dura Trac
Lots of Mods! :D
My Wheeling Videos :JEEPIN:
My Mods, Upgrades and Custom Fabrications


Top
 Profile  
 
 Post subject: Air Tube Replacement
PostPosted: Fri Sep 04, 2009 10:22 am 
Offline
Lifetime Member
Lifetime Member
User avatar

Joined: Fri Oct 07, 2005 5:40 pm
Posts: 570
Location: Colorado
A few months back I replaced the rubber 'accordian' tube between the air cleaner box and the throttle body with 3.5" OD (3" ID)smooth-walled black PVC tubing and rubber connectors. The theory being that it will increase air flow and therefore power production.

My results are subjective but this modification has definitely made it feel like I have more power and better acceleration. There is no noticeable difference in gas mileage - The best thing for that is to make sure your AC compressor is not running.

Regardless, it certainly feels like there is more power.

Total cost for this mod runs $10-15 including paint to make everything look nice.

I will post photos at some point.

Disclaimer: Yeah I know you shouldn't use PVC due to its low melting point but I did some research on what those points are for what I used and it should be more than ok. Remember the throttle body is mounted to a plastic intake manifold and therefore does not get too hot due to heat conduction from the engine. Touch your throttle body after a good run and you will see that it is not that hot. I am using a rubber connector to connect the PVC to the throttle body further reducing the conduction of heat to the PVC. Also...the PVC is getting cool air running through it helping to keep temps down.

John
];')

_________________
05 4x4/3.7L/6 Spd
245/75R16 GY Dura Trac
Lots of Mods! :D
My Wheeling Videos :JEEPIN:
My Mods, Upgrades and Custom Fabrications


Top
 Profile  
 
 Post subject:
PostPosted: Tue Dec 01, 2009 3:50 pm 
Offline
LOST Addict
User avatar

Joined: Mon Apr 17, 2006 10:16 pm
Posts: 1391
Location: Felton, DE
how do you power the compressor?

_________________
06 White KJ Sport 4x4 :JEEPIN:
http://www.cardomain.com/ride/2432458/1


Top
 Profile  
 
 Post subject:
PostPosted: Sat Dec 05, 2009 1:45 pm 
Offline
Lifetime Member
Lifetime Member
User avatar

Joined: Fri Oct 07, 2005 5:40 pm
Posts: 570
Location: Colorado
Sport wrote:
how do you power the compressor?
I use a 30 amp relay to turn the power on/off for the compressor. You can see the switch locations that control the relays in the post about the ARB installation and pics of the monster under my dash showing all of the relays controlling various things in my KJ.

John
];')

_________________
05 4x4/3.7L/6 Spd
245/75R16 GY Dura Trac
Lots of Mods! :D
My Wheeling Videos :JEEPIN:
My Mods, Upgrades and Custom Fabrications


Top
 Profile  
 
 Post subject:
PostPosted: Mon Dec 14, 2009 1:08 pm 
Offline
LOST Addict
User avatar

Joined: Mon Apr 17, 2006 10:16 pm
Posts: 1391
Location: Felton, DE
Kugellager wrote:
Sport wrote:
how do you power the compressor?
I use a 30 amp relay to turn the power on/off for the compressor. You can see the switch locations that control the relays in the post about the ARB installation and pics of the monster under my dash showing all of the relays controlling various things in my KJ.

John
];')


That compressor has alligator clips for quick connect to a power source. Did you modify them to connect to the battery at all times. I get the relay part.

_________________
06 White KJ Sport 4x4 :JEEPIN:
http://www.cardomain.com/ride/2432458/1


Top
 Profile  
 
 Post subject:
PostPosted: Mon Dec 14, 2009 1:38 pm 
Offline
Lifetime Member
Lifetime Member
User avatar

Joined: Fri Oct 07, 2005 5:40 pm
Posts: 570
Location: Colorado
It's permanently mounted under the hood so I snipped the clips and hard-wired it in.

John
];')

_________________
05 4x4/3.7L/6 Spd
245/75R16 GY Dura Trac
Lots of Mods! :D
My Wheeling Videos :JEEPIN:
My Mods, Upgrades and Custom Fabrications


Top
 Profile  
 
 Post subject:
PostPosted: Tue Dec 15, 2009 10:36 am 
Offline
LOST Addict
User avatar

Joined: Mon Apr 17, 2006 10:16 pm
Posts: 1391
Location: Felton, DE
Sweet, I have the same compressor and I am going to copy you. thanks man.

_________________
06 White KJ Sport 4x4 :JEEPIN:
http://www.cardomain.com/ride/2432458/1


Top
 Profile  
 
 Post subject: Re: Air Tube Replacement
PostPosted: Tue Dec 15, 2009 1:23 pm 
Offline
LOST Member
User avatar

Joined: Sat May 30, 2009 10:17 am
Posts: 195
Location: Colorado Springs, CO
Kugellager wrote:
A few months back I replaced the rubber 'accordian' tube between the air cleaner box and the throttle body with 3.5" OD (3" ID)smooth-walled black PVC tubing and rubber connectors. The theory being that it will increase air flow and therefore power production.

My results are subjective but this modification has definitely made it feel like I have more power and better acceleration. There is no noticeable difference in gas mileage - The best thing for that is to make sure your AC compressor is not running.

Regardless, it certainly feels like there is more power.

Total cost for this mod runs $10-15 including paint to make everything look nice.

I will post photos at some point.

Disclaimer: Yeah I know you shouldn't use PVC due to its low melting point but I did some research on what those points are for what I used and it should be more than ok. Remember the throttle body is mounted to a plastic intake manifold and therefore does not get too hot due to heat conduction from the engine. Touch your throttle body after a good run and you will see that it is not that hot. I am using a rubber connector to connect the PVC to the throttle body further reducing the conduction of heat to the PVC. Also...the PVC is getting cool air running through it helping to keep temps down.

John
];')


Any pics yet of finished product? Just curious, you do good work and was looking for ideas for my KK. Nice Jeep BTW.

_________________
2012 LIBERTY SPORT Bright Silver Metallic Trailer Tow Class III Group
New: Destination AT 245 70 16 (5)

Prev Vehicles: 1979 Caprice, 1997 TJ2.5, 1997 TJ4.0, 2000 Honda Civic, 2000 Dakota4.7, 2001 Explorer, 1985 VW golf, 2004 WJLTD, 2004 WJ4.0, 2005 TJX, 2007 F-150, 2004 WJ4.7, 2004 WJ4.7 LTD, 2009 KK, 2002 WJ4.7, 2004 WJ4.7 LTD + 2007 Kia Rio


Top
 Profile  
 
Display posts from previous:  Sort by  
Post new topic Reply to topic  [ 67 posts ]  Go to page Previous  1, 2, 3, 4  Next

All times are UTC - 5 hours [ DST ]


Who is online

Users browsing this forum: No registered users and 6 guests


You cannot post new topics in this forum
You cannot reply to topics in this forum
You cannot edit your posts in this forum
You cannot delete your posts in this forum

Search for:
Jump to:  
Powered by phpBB © 2000, 2002, 2005, 2007 phpBB Group. Color scheme by ColorizeIt!
Logo by pixeldecals.com