Hey everyone! This is my first post and one of my first visits to these forums. I just finished a project that I thought might be beneficial to some of you who have experienced the same problems I have.
Short story: the wife purchased a Limited '03 KJ new and we lifted it last year with a Rocky Road OTT lift I bought on a local forum. It worked sufficiently well to give her the look she wanted and boost our ground clearance over the trail rocks, but the problem we encountered was the struts bottoming out on hard bumps. Because of the spacers, the distance between the upper A-arm and the stock bump stop was now longer than the travel of the strut. This led to harsh collisions of parts inside the strut. We knew we needed longer travel struts or an extended bumpstop kit, but Rocky Road wasn't offering anything, and we were on a budget, so here's where the project started.
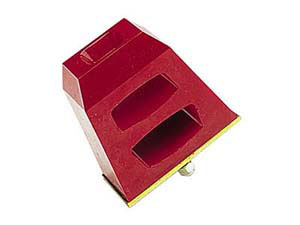
I purchased a pair of these bumpstops:
 http://www.energysuspensionparts.com/pr ... rod=9.9104
and proceeded to figure out how to mount them. Amazingly, it's not as hard as it sounds.
1) Remove stock bumpstops by pulling them out with vise-grips.
2) Drill out the two spot welds that holds each bump stop cup onto the unibody, and remove the cup. This reveals a stamped "hump" in the steel that serves as a mounting surface for the bump stop.
3) Use a cutoff wheel on an angle grinder to cut the hump out flush with the surrounding material. It will look like this:


4) Next, grind down the ribs on the stock upper A-arms that were used to hold the stock bump stop in place on compression. They don't need to be completely gone, just smoothed out. They'll look like this:

5) Drill a mounting hole up through the sheet metal for the new bumpstop. Be careful to remove the battery and the airbox before this step. You'll find that there is a strut-mount reinforcing rib stamped into the engine compartment that looks like this:

6) You'll need to cut an access hole with a hole saw to reach the bump stop stud and place the washer and nut in place.

When all is said and done, you'll have a finished product that is ready for some rough stuff.

Like I said, I just finished this projects, so if I encounter any problems in the future, I'll report them here for reference.
-Bryan