It is currently Wed Apr 24, 2024 2:56 pm

All times are UTC - 5 hours [ DST ]


Post new topic Reply to topic  [ 3 posts ] 
Author Message
 Post subject: Writeup: Relocating the stock washer bottle
PostPosted: Fri Aug 20, 2010 11:56 am 
Offline
LOST Member
User avatar

Joined: Sat Mar 27, 2010 9:46 pm
Posts: 172
Location: Frisco, Texas
All of the old write ups have dead pictures so i decided to make my own, not alot of detailed pictures, but you should get the point.

Materials:
Stock washer bottle
8 butt conectors from NAPA or autozone
Primary electrical wire
wire cutters/ strippers
electrical tape
plastic welder

Total cost: $10.33

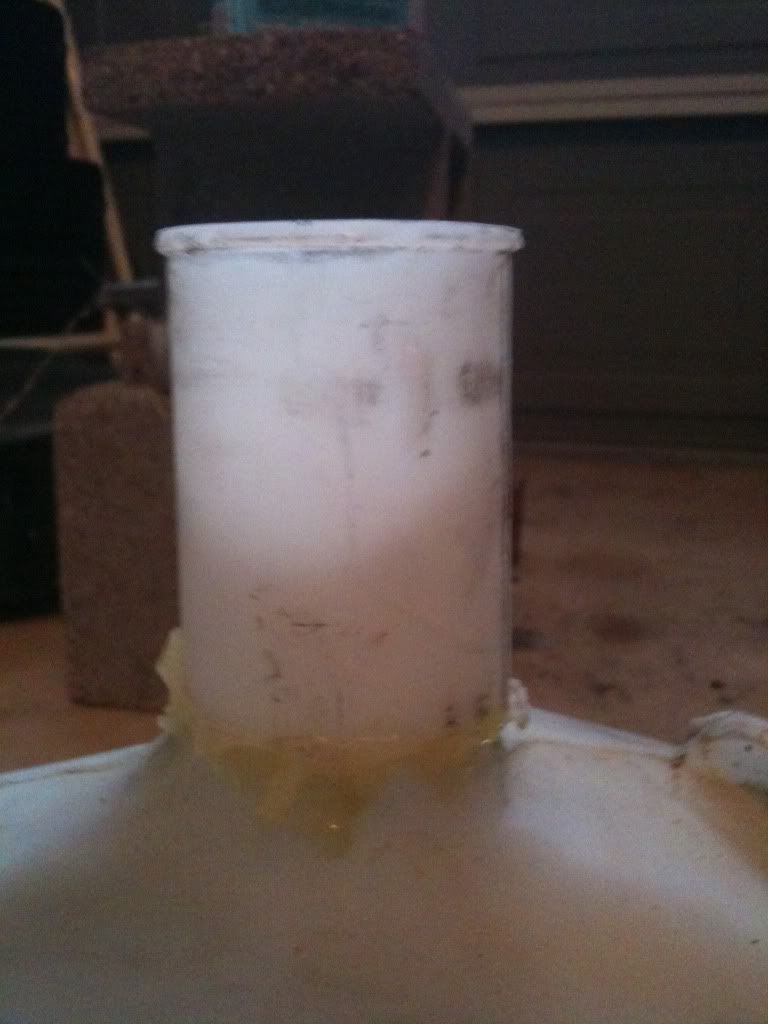
1. Remove stock winshield washer bottle, cut off the long neck, and plastic weld the top where the cap attaches back to the bottle. Let sit over night.
Image

2. Take the stock electrical cord and cut it off about 2 inches from the end attachment, strip the plastic off the wire about an inch from the end. There are 2 things that attach to the washer bottle, 2 wires for each- that means you have to strip 4 wires, a total of 8 times. Take your primary cord and strip an inch off the ends. Use your butt connectors and attach the primary wire in between your 2 stripped ends of each wire (make sure you match up the colors) make sure you crimp the butt connectors tight. Reattach both attachments to the washer bottle and test it out to make sure it works
Image

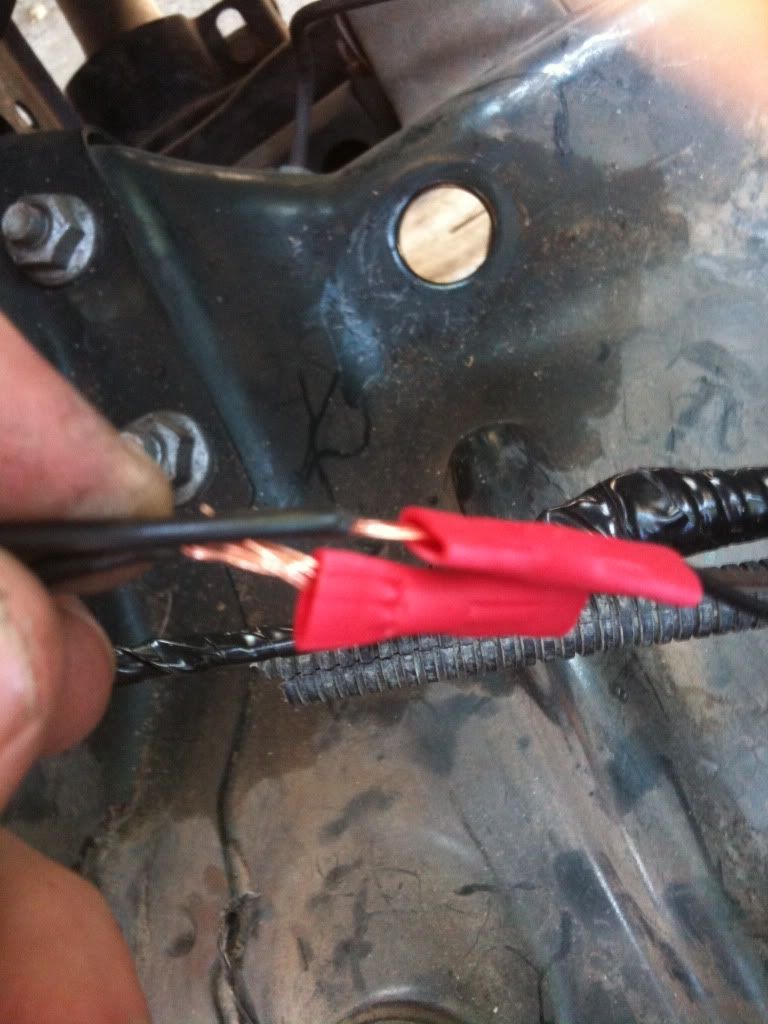
3. Grab your electrical tape and tape all of the stock and primary wire, and butt connectors.
Image

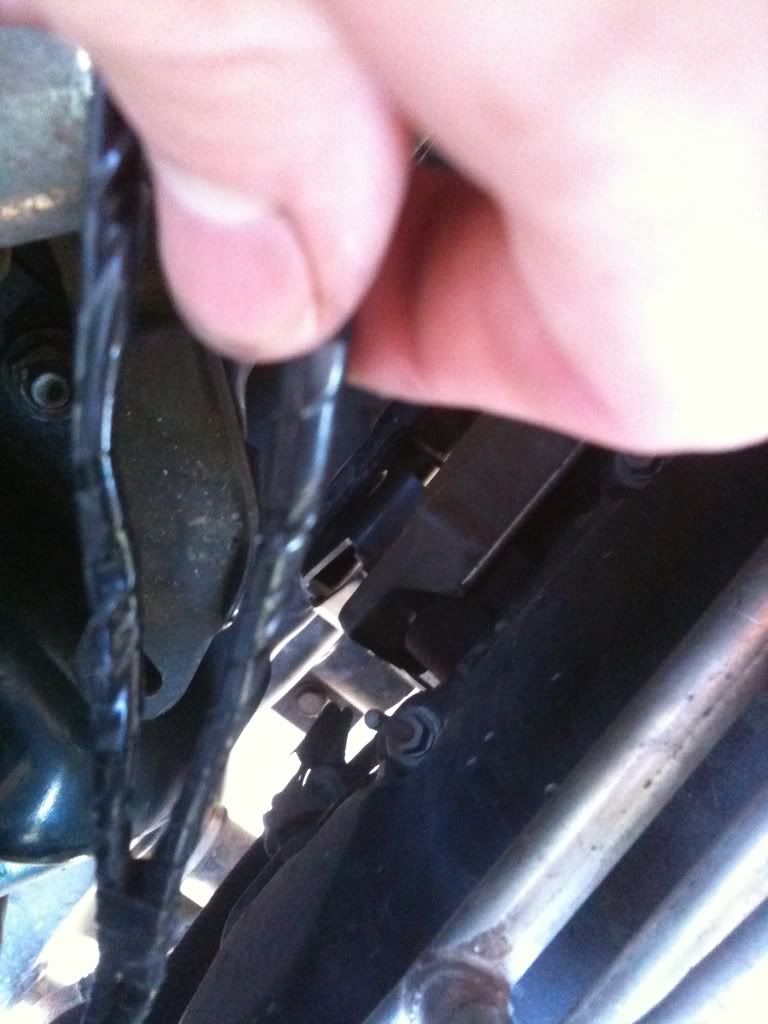
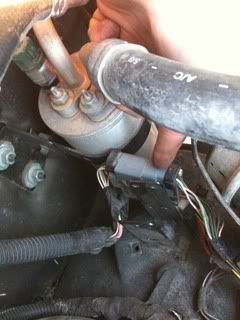
4. Next, there are 2 sensors. Move them from here:
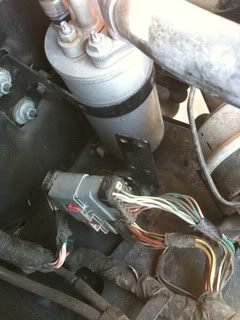
Image

to here:
Image

5. Your airbox should already be out- put the washer bottle into the space behind where the airbox fits. Push it as far back as you can without it pushing on anything- Put your airbox back in. You will have to push to get it back in. Congratulations, you just relocated your stock windshield washer bottle for under 15 bucks- a mod very, very few people will ever notice.

Image

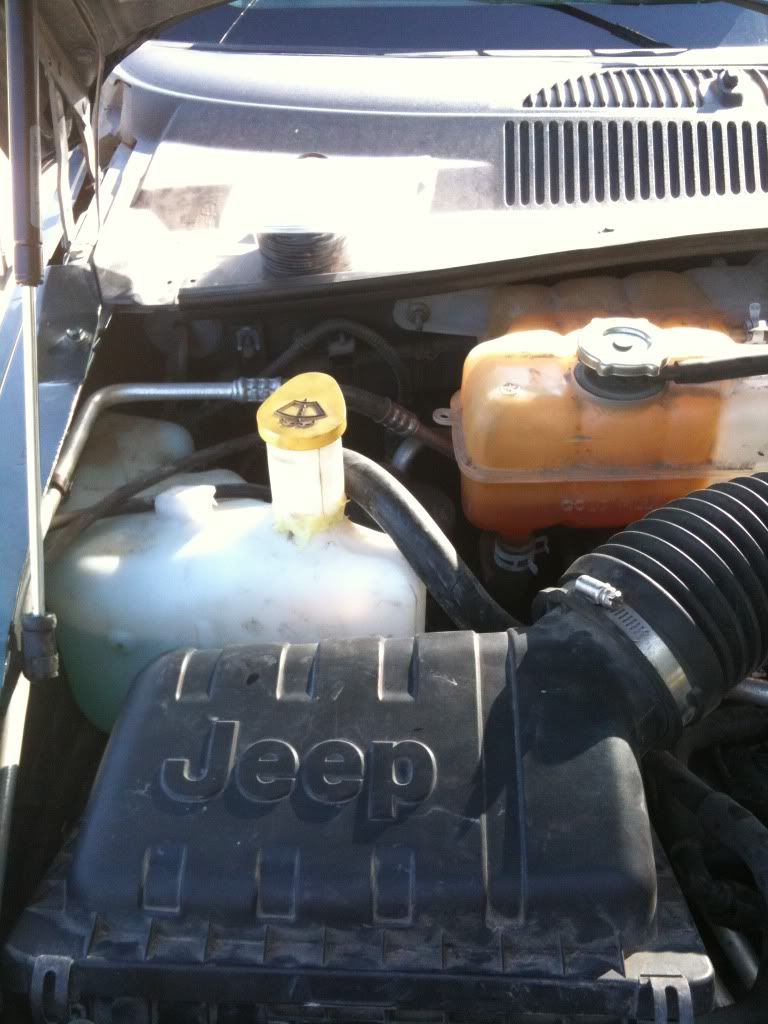
Im working on a mounting bracket, but for now its not going anywhere, its a very snug fit.

_________________
Dalton Caudell
Jeep Liberty: Sold... Build Thread: http://www.jeepkj.com/forum/showthread.php?t=45924
Red Jeep XJ: Build thread: http://www.cherokeeforum.com/f46/project-bigfoot-69539/ OR viewtopic.php?f=68&t=57768


Last edited by daltonamorph on Sun Oct 10, 2010 5:01 pm, edited 1 time in total.

Top
 Profile  
 
 Post subject: Re: Writeup: Relocating the stock washer bottle
PostPosted: Tue Sep 07, 2010 7:24 pm 
Offline
Lifetime Member
Lifetime Member
User avatar

Joined: Sat May 08, 2010 6:58 pm
Posts: 212
Location: Down by the River
Good write-up, the only thing I'd change is...when using crimp wire connectors in an automotive application, I always coat them in StarBright Liquid Electric Tape, once it's dry I go over it with vinyl electric tape to prevent chafing.

I plan to do mine in much the same fashion, but with my cold air intake....(no stock air box)....I'll have to engineer a bracket of some sort to hold the bottle.....

_________________
2005 KJ Renegade
3.7 Lt. V-6
2.5" Daystar Lift
Thrush Welded Muffler
K&N (Poor Man's) cold air intake
Goodyear Duratrac 245/75-16


Top
 Profile  
 
 Post subject: Re: Writeup: Relocating the stock washer bottle
PostPosted: Tue Sep 07, 2010 10:38 pm 
Offline
Lifetime Member
Lifetime Member

Joined: Mon Jul 06, 2009 7:35 pm
Posts: 4576
Do you have a bracket holding the resivoir? If not, you may want to fab a bracket to keep the bottle up off the wiring loom right underneath it. It wouldn't be a good thing to have the bottle rub through the harness there. I made a 90 degree bracket to hold mine up just off the loom.


Top
 Profile  
 
Display posts from previous:  Sort by  
Post new topic Reply to topic  [ 3 posts ] 

All times are UTC - 5 hours [ DST ]


Who is online

Users browsing this forum: No registered users and 30 guests


You cannot post new topics in this forum
You cannot reply to topics in this forum
You cannot edit your posts in this forum
You cannot delete your posts in this forum

Search for:
Jump to:  
Powered by phpBB © 2000, 2002, 2005, 2007 phpBB Group. Color scheme by ColorizeIt!
Logo by pixeldecals.com