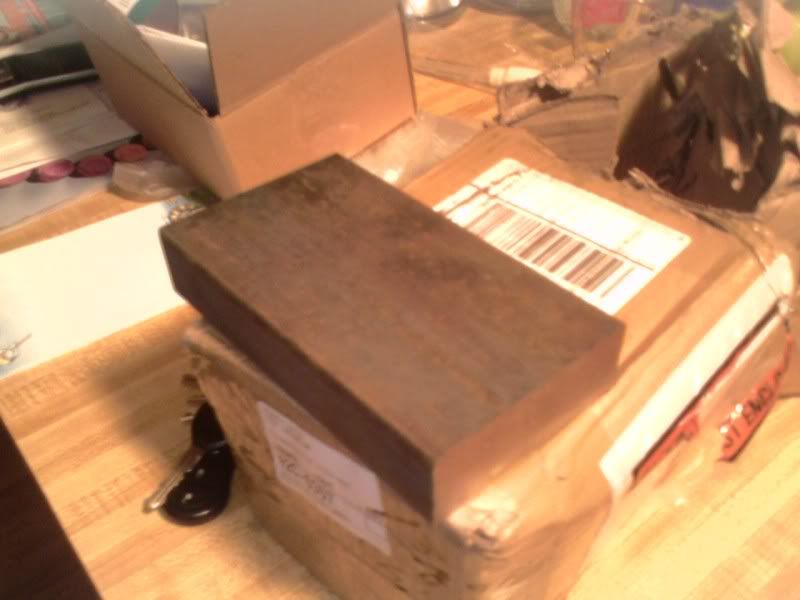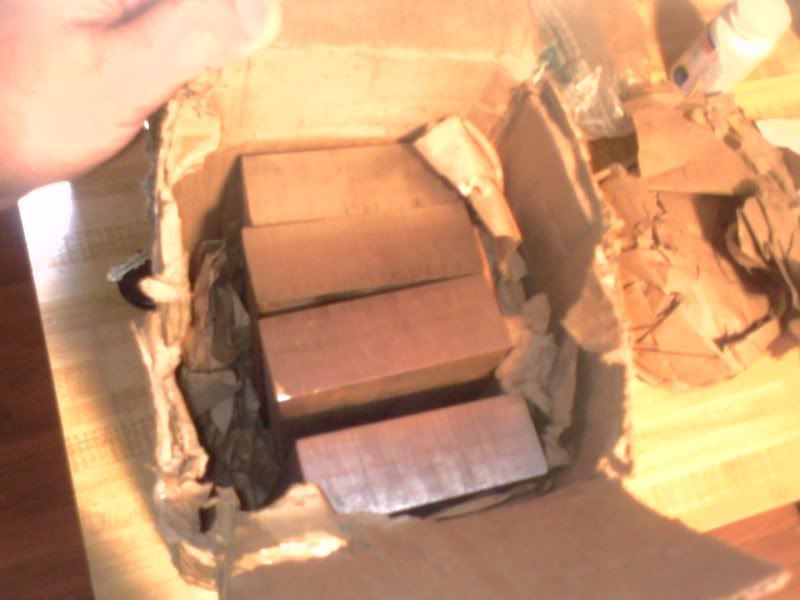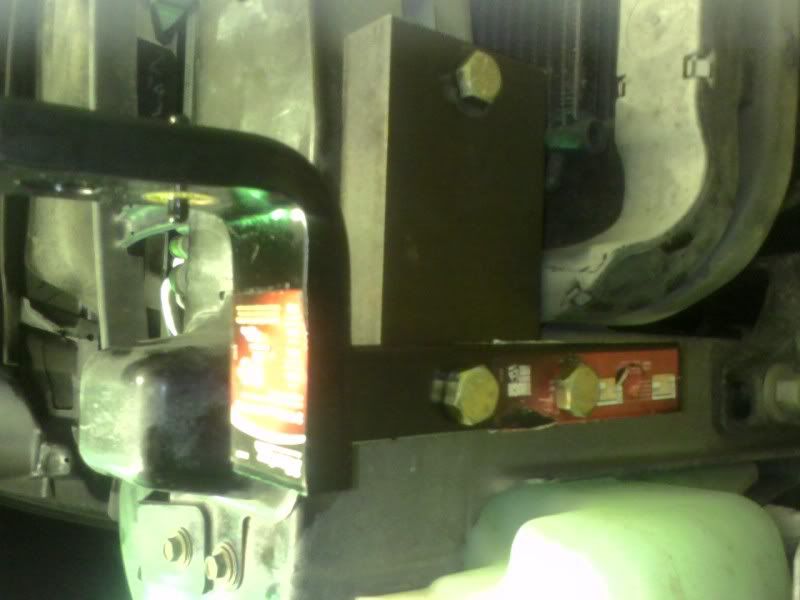
Here you can see most all of the necessary hardware to do this mod. Specifics will be for an 03 renny, may differ slightly for your model.
Open hood
Remove your grill - 4 T20 torx across the top, lean it forward and lay your grill somewhere safe
Unbolt the 2 10mm bolts under your fascia at the airdam
Press in the red retainer on your light harness plug, use your thumb nail to pull the red clip down till it stops, press down the hinge clip and wiggle the plug till it separates
use a thin screw driver to leverage out the 7 reuseable push-pin type rivets [1 to the bottom edge of each headlight, 5 across the grill backbone supports] - put them somewhere safe
It may help if you have something similar to snap ring pliers to leverage the pins out of the inserts
There's either 2 or 3 rivets through the fender flares and wheel well plastic that interfere, you can either drill them out, or cut the heads off with a pair of wire cutters - I used a brake spring tool to grab and squeeze in the stupid plastic wedge retainer pieces that are serrated to get the clips out of the fender
Wiggle the fascia around and loosen it up, lift it up and pull the bottom out, adjust the flares so that the bottom most edge is now behind and under the fascia, check to make sure you don't have a 2nd lighting harness plug (i didn't have a 2nd) - gently lift up on the tabs where the bumper hooks in below the headlights and get it unhooked, it just takes some monkeying around - put the fascia somewhere safe like out in the grass or something
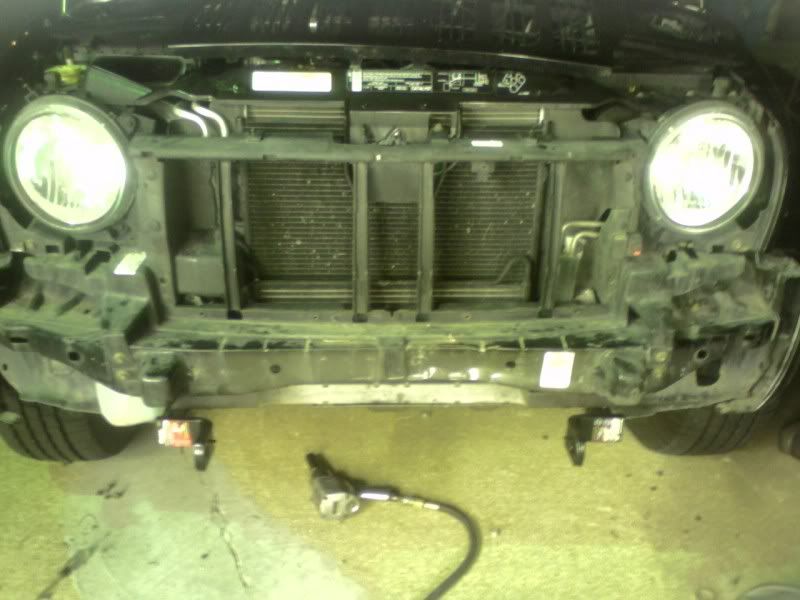
Your jeep will now look like this - except not as sexy and you'll still have tow hooks
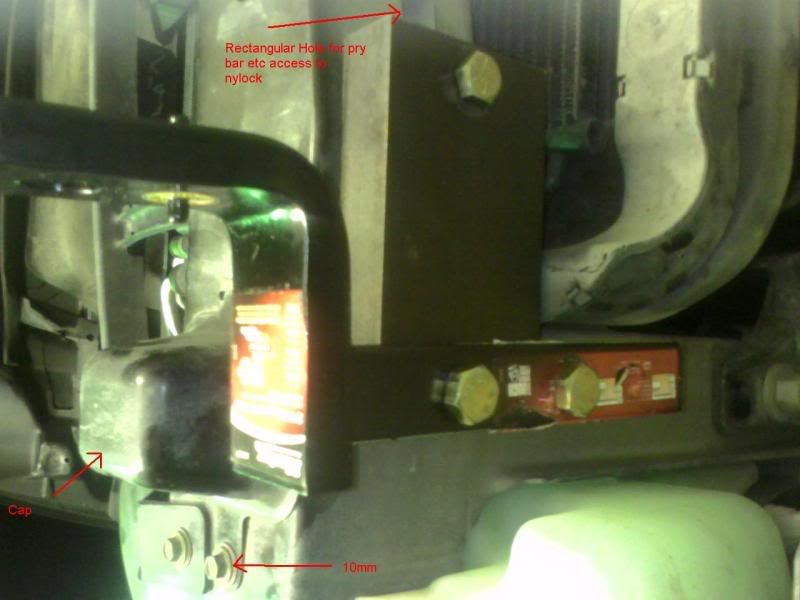
Remove the caps (the bubble things above the hitches in the picture held on by a 10mm bolt, and your tow hooks and all associated hardware, a pair of plyers and a hammer will come in handy
-- Mod specific information --
I used 6L x 3.5W 1.25 thick A36 steel - don't buy plates, buy bars it's cheeper
If I were to replicate this mod, I would use slightly longer steel, 6.5 or 7inches instead of 6. It will make the fabrication easier but 6in was right on the money for the shortest possible.
Sit your steel on a bench and clamp the tow hooks to them, use a center punch to mark the center of the holes.
Clamp the bars in a drill press and use a 3/8ths bit being careful to get center on the punched spots and drill through using ample amounts of motor oil ( cutting oil is pricey, motor oil or atf works just fine to keep from smoking the bit ) - drill all 3 holes and then switch the bit to a 1/2 and repeat - X2
-- use the towhooks to check to make sure your holes line up
For this part you're probably going to want a squaring triangle -
Take your Class II hitch ( mine was Class II with a 3.25 inch drop )
This part's a little squirrley , the steel you just drilled is a bit thick to accurately centerpunch through to the hitch and the tow hook brackets don't have 2 holes, they have a hole and an oblong slot.
You have a few options -
Option 1 - Use a squaring tool to measure the best you can the distance between the edge of the steel and the center of the first hole - this is the distance from the edge of the hitches headplate weld you need to be down the hitch (minimum) - chalk it, scratch it, bleed on it however you can mark the hitch at this centerline - 2nd measurement from center of first hole in plate to center in 2nd hole in plate - mark it
use the squaring tool to find center across the hitch and mark each centerline center and center punch them - use the drill press and drill them just like you did the steel. 3/8ths first, and follow through with the 1/2 with plenty of bit oiling
(This is a good use for that used ATF4 you drained out of your transfer case the other day! Recycling for the win

)
The closer you get the headplate of the hitch to the edge of the steel the less trimming you will have to do
** it's the headplate on the hitch that interferes with fascia reinstallation, with hitch drops over 2 inches or so, the ball mount portion of the hitch isn't in the way, the headplate is **
Use a 9/16ths bit and bore out the 2 outside holes where the OEM towhooks mounted, the 3rd hole is already over 9/16ths and does not need to be drilled out.
Test fit the steel to the vehicle using 2 of the 3 1/2 inch long 1/2 dia grade 8 bolts and 1 of the 2 1/2 inch long 1/2 dia grade 8 bolts.
** the exit of the bored holes in the plates may need to be ground, the grinding will mark the side of the plates which goes against the vehicle. Should your holes be slightly off canter, there will be enough leeway for everything to bolt together correctly
Should a hole in your hitch bar be too far off to get a bolt through the steel and the hitch, use a bolt and nut and torque it down good in position and use a drill and a 1/2 inch bit to correct the misalignment - slight wallows in a hole here and there are acceptable
Once everything fits together acceptably well (Don't expect bolts to slide in and out easily, it will be kind of tight) then you're ready to have some fun
 ** An extendable magnet will be useful and almost required at this point ... **
You will now need:
A pry bar
6 nylocks
6 uss 1/2in washers or 1/2in fender washers (IF you can aquire them) - thicker and heavier washer the better
3/4 Wrench
1/2 impact socket and airgun or bigarse ratchet
--
Start with the single hole - it'll make things easier since you'll only be dealing with the steel bar and not the weight of the hitch bar
You'll need a 2 1/2 inch long 1/2 dia bolt, washer and nylock for each single hole per side
There is a rectangle hole in the bottom of the chassis near the single hole that you can monkey the washer through, get the washer over the hole and then get a few threads of the bolt through it, twist a nylock onto the tip of your finger and carefully get the nut onto the exposed thread and rotate the steel and the bolt until it engages the nut, use your index finger to rotate the nut the best you can down a few threads.
Cut off 3 unneeded fingers and a portion of your hand for this next step...
put 2 of the 3 1/2 inch long 1/2 dia bolts through the hitch (make sure you have the drop going towards the center of the vehicle on both sides

)
Monkey the bolts through the plates and into the holes in the chassis
use your 2 remaining fingers or the extendable magnet to put the washers on, then repeat with the nylocks
Use the prybar to wedge against the nylock on the single hole side, you can get it through the same retangular hole in the bottom of the chassis that you used for getting the washer and nylock in there - zip it up but not fully torqued down
repeat on the double hole side using the 3/4 wrench to hold the nylocks
go back to the single hole side and hammer it down good with the impact gun and repeat for the double hole side
reinstall the channel caps with the 10mm bolt per side
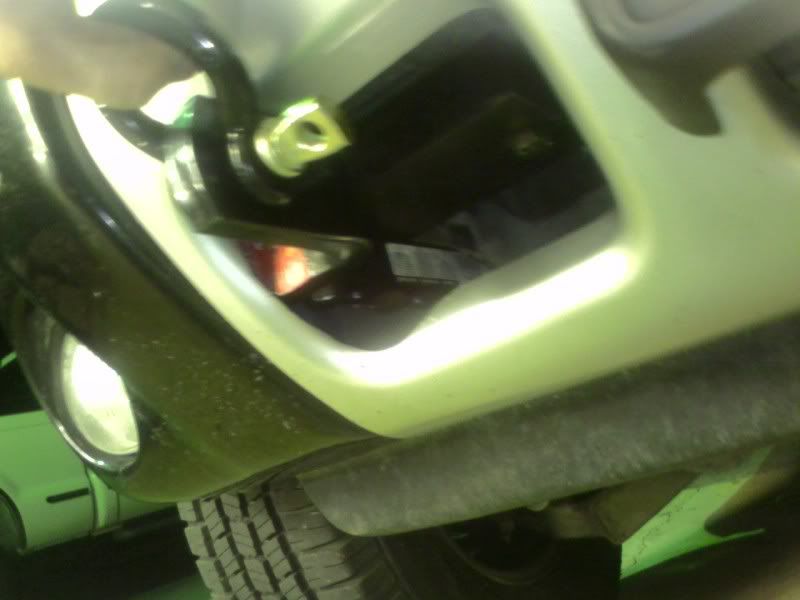
Test fit your fascia, more than likley you will need to trim as shown -
-Razor knife, sucked for the job didn't work well at all
-Recip Saw, sucked for the job, worked, but not clean
-Electric moonblade, sucked for the job, couldn't get correct angles
Took my head out of my booty and used a stone bit in my air dremel, i don't remember what grit it would be but it was a snap-on blue stone, just be careful on the throttle and pressure - finesse it and it will look like it was supposed to be like that
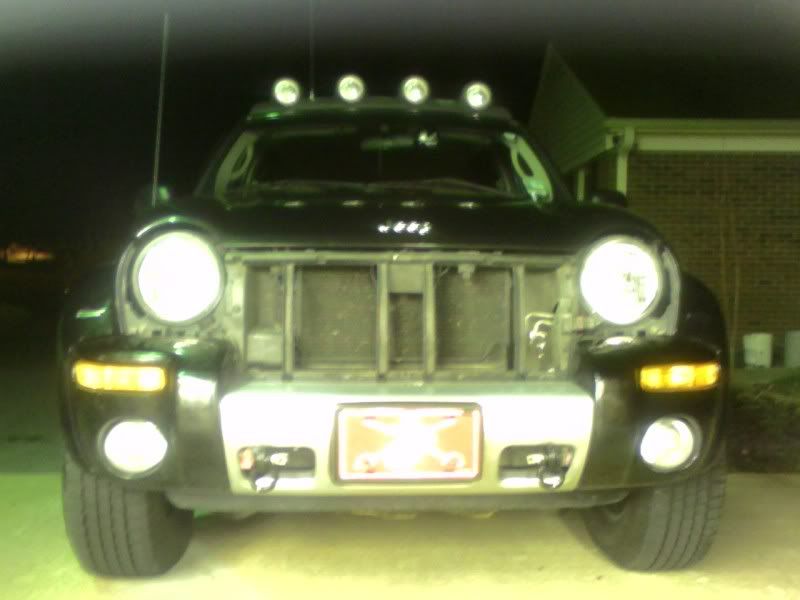
Most of the trimming is needed towards the center of the outside edge of the hole. I took about an inch off. I will probably go back and take it down flush to where the bumper edge finishes curving in. Originally it curves in from the flat portion of the bumper and then continues flat for about 2 inches. When you test fit it, you may want to mark the spot where it hits the headplate with a sharpie or something. Just go ahead and trim it as much as you feel comfortable and test fit again as necessary. Once it fits enough to hook at the top and you're still able to press the bumper in to get the airdam bolts in on the bottom, then you're good to go. Put your airdam bolts in, then the push-pin rivets below the headlight, then start at the center of the fascia and reinstall the push-pins there. Re-clip your flares, install the new rivets in the flare/wheel well and fascia-flare. Re-plug your light harness, test your lights real quick, press in the red retainer clip and reinstall your grill.
You're done. (Unless you still need to mod your grill, then the grill goes in the back seat until tomorrow
)
 Parts List
X4 3.5"L 1/2dia grade 8 bolts
X2 2.5"L 1/2dia grade 8 bolts
X6 1/2" USS washers or improved equiv.
X6 1/2" nylocks
X2 A36 or equiv steel bars 6"L (or 7") 3.5W 1.25D
X2 Class II 3.25 Drop ball hitch bars (or longer drop - see NorthernTool for large selection of Class II hitches - I used MasterLock brand)
X2 clevis or your favorite flavor of recovery point attachment
Tool List
-Thin flat head screw driver
-(Improvised) Brake spring tool
-(Improvised) Snap ring pliers
-Medium pry bar
-Hammer
-C-clamp or wood clamp
-Drill press and brace clamp
-3/8" bit
-1/2" bit
-Rigid Cordless Drill (they FRIGGIN ROCK - Get one! and fill out the paper work, life time warranty on batteries and *#&%)
-T20 torx screw driver
-1 qt - whatever oil, motor oil, atf, etc & applicator bottle of some type
-3/4 wrench
-1/2 impact socket
-impact gun
-10mm wrench Or 10mm socket and ratchet
-wire cutters / dykes
-squaring triangle and tape measure or drafting ruler
-center punch
-pneumatic or electric dremel and stone grinder bit
-safety glasses - atleast for drilling the chassis, you'll be on your back
-grinder or file for deburring steel and hitch bar holes
-leather gloves or you'll get steel splinters wiping off the press and steel from shavings
Welding the hitch to the steel is optional. Mounted in this manner, depending on the type of clevis you used, the clevis will break, or you will rip out of your chassis before this mount fails. I have a lot of experience building draw bars and hitches for pulling tractors that pull over 50,000lb sleds and i feel the weakest portion of this mod is the clevis ring, and the jeep itself.
If you wish to weld it, weld it, it won't hurt my feelings a bit
Secondary note: The picture of the hitch and plate mounted was a test fit which did not work out like I had hoped. I reworked the mounting so that the headplate weld of the hitch was as close to the steel as I could get it within reason. The actual fitted mount that I ended up going with is 1.25" closer to the steel bar from what you see in the picture. I had no problems with clearance of the clevis mounting hardware and very little fascia tension at the trim level I used. The only trimming necessary was on the outermost edge of the OEM tow hook holes in the fasica. Fitted fascia photo was of final fitting and final trim with fascia fully attached.
Feel free to critisize or ask questions. I can detail any photos with arrows if you need specific location information.
This mod was completed on an 03 KJ renny with factory renny fascia and renny flares.
Steel was ordered from allmetalsinc dot com
Steel Hot Rolled Flat Bar 4 x 10.71
1-1/4 x 3-1/2 (Grade A36) Sawcut 6"
Shipping for 4 (30lbs) was 17.36
For just 2 for a single vehicle, it would come to aprox. $30 including shipping
Got the hitches from home depot for about 15 dollars each.
Got all of the grade 8 hardware, nylocks and washers from a local hardware store for about 15 dollars total which includes the cost of 2 shorter 2" bolts that I deemed too short for the mod.