Okay, here's some more of my TJ story. A summary of the first chapter....I bought a stock '98 jeep TJ sport and drove it that way for 18 months while I read about the popular ways to modify it. During that time I gradually collected parts and stacked them in my garage. Included in those parts were a rear dana 44 TJ axle, and a front high pinion dana 30 axle from a XJ cherokee. I cleaned them up some so I could swap them into my jeep. I then took a week long vacation and spent it in my garage.
The point of this essay is how I installed a replacement belly skid. I ended up having to change several other aspects of the stock jeep to make the new skid work out. There's several paragraphs to start with here and it's pretty obvious stuff for most readers. But I didn't know much about any of this a couple years ago. I was hoping I could combine some of the common modifications into a "lesson" for fellas like me who are new to all this. I advise anyone who reads this to confirm my comments through your own efforts. I sometimes hardly know what I'm talking about....but the pictures are nice.
---------------------------------------------------------------------------------
The most common questions I see asked on the forums are about tires. How big a tire can be installed on a jeep? What kind? Big tires is a fundamental element, the hydrogen of the jeep universe. Most everything else revolves around tire sizes. Springs, gears, bumpers, brakes. Personally, I think you need to make a tire size choice before you spend much time on any other pages in the catalogs. So I looked at other jeeps in the local club to get some ideas. After I decided what size tire I prefered, then I started adding up the direct and incidental expenses to make them fit and function well. The bigger the tire size, the more issues you have to address.
I'm not qualified to advise others. I'm going to put 33" BFGoodrich mud tires on my jeep. Plain vanilla for many of you, but a good product and a sensible choice for a beginner in a florida jeep. This size isn't extreme by most standards and there are several affordable ways to make them fit on a jeep. You have to make room for them inside the wheel wells, especially when turning and when flexing the suspension. I picked a method that costs a little more but seems popular.
Once I made that decision, I was able to start purchasing some parts....
---------------------------------------------------------
One thing you'll notice on stock jeeps is the factory center skid and how it hangs down from the frame rails. When I first started talking to guys about getting a TJ, I liked the look of the minimal profile center skids used on long arm suspension kits. Those skids appeared much more functional than what I saw on stock suspension set-ups. As I learned more, I realized that a short arm suspension kit would be more suitable for what I wanted, but that I could still have an improved clearance center skid. And I could still have some of that "sleek" look that originally appealed to me.
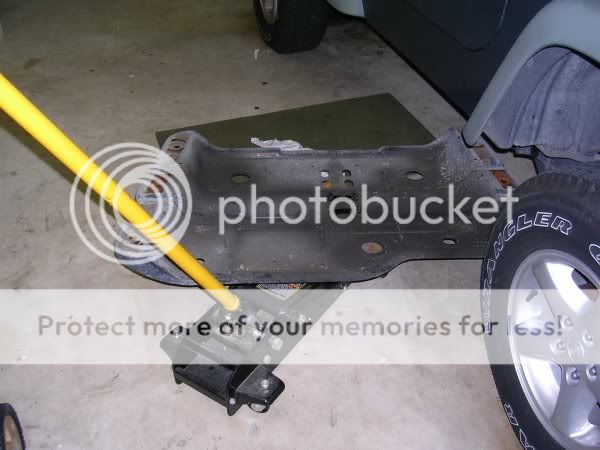
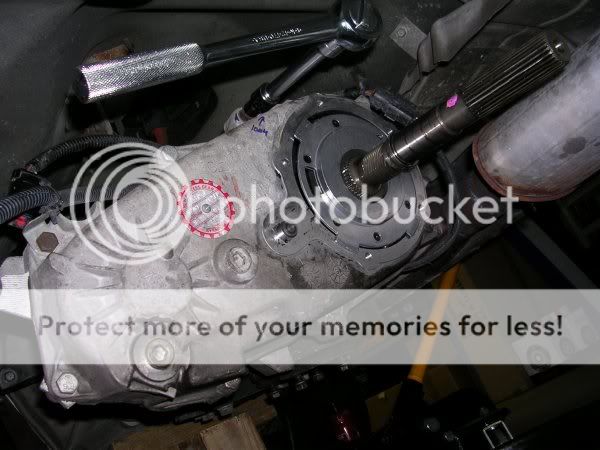
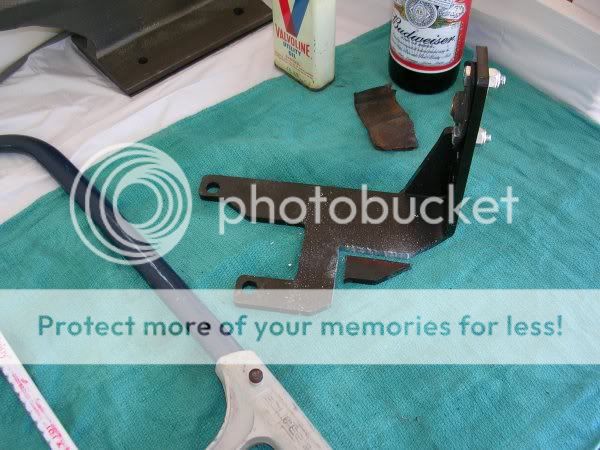
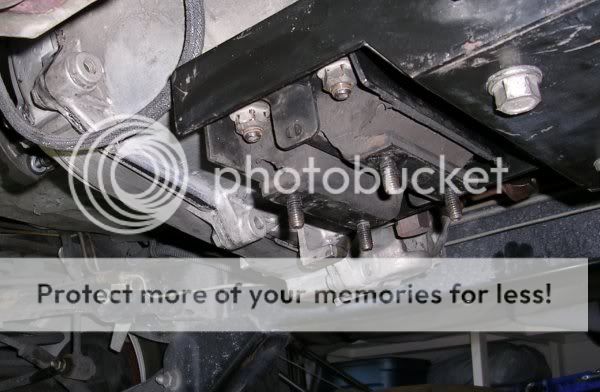
This is the Teraflex brand "belly-up" skid. It replaces the factory center skid that supports the transmission and transfer case. Notice all the holes punched in it....especially along the two frame edges. At the end of all this, I'll mention them again. This piece of plate steel cost me several dollars....

What I mean by "costs" is that in order to install it as recommended, I needed to purchase several other popular jeep modification products. This skid was one of the first things I purchased when I was just beginning to figure this hobby out. I occasionally read some complaints about Teraflex products but I don't know enough about them to add to that. I know now that there are other interesting "belly-up" designs/brands I could have considered.
The "belly-up" style center skid is designed with less pan depth than the factory skid, so you get a desirable few more inches of trail clearance. The transmission/transfer case sits on top of the skid. The almost flush mount to the frame necessarily raises the transmission higher into the frame/body tub cavity. While that effect is useful, it requires attending to several other consequential things. I want to put this belly-up skid on my jeep, so it was recommended I install a body lift kit, some motor mounts, a slip-yoke eliminator, and a transfer case shift bracket. All of these parts compliment each other in the following way.....
The new skid moves the bulk of the transmission/case up into a limited space under the body tub. My exhaust catalytic converter is supported at the transmission mount, so its also forced to move up. And, the transfer case shift linkage attached to the tub and to the transfer case is affected. A solution for these issues is to raise the body tub higher on the frame rails with a body lift kit so that additional room is created. And there are a couple options for insuring the shift linkage operates correctly.
A body lift creates a few small problems of its own depending on how much lift you install. The radiator and fan shroud moves out of position relative to the engine fan. The gas tank fill hose, the air condition lines, some brake lines may reach their limits of movement. A body lift kit can provide several inches of lift if you want it. Many fellas install them as an inexpensive way to clear more room in the wheel wells for larger tires. Other fellas have a strong dislike for them for safety reasons and simple aesthetics. A middle ground opinion is that a 1 inch body lift is useful and sensible.
The front of the jeep drivetrain is my 6 cylinder motor, with the transmission behind it. There are three mounting points for the whole thing. Two forward motor mounts, one on each side of the engine block, and the transmission mount in the center of the belly skid. You can install slightly raised motor mounts to lift the front of the drivetrain. This puts the fan back into the center of the radiator shroud, and it provides a slightly improved trail clearance for the oil pan.
Another issue affected by the belly-up skid is the stock rear driveshaft. It's attached to the transfer case with a splined sleeve on splined shaft. They call this a slip-yoke. Because the splined shaft is relatively long in comparison to the total length of the driveshaft, the rear driveline geometry is sensitive to any change from the factory design. Raising the transmission/case changes the angle that the slip-yoke operates at. By slightly raising the two forward motor mounts, the rear splined shaft tilts slightly down. This helps return the rear driveshaft to a better geometry.
If you are also planning to install a suspension lift kit (I was), the splined slip-yoke may have to be removed. An additional expense but important product is a fixed yoke at the rear of the transfer case to attach to a modified rear driveshaft. This slip-yoke eliminator will further correct any driveshaft problems caused by the raised center skid and suspension lift.
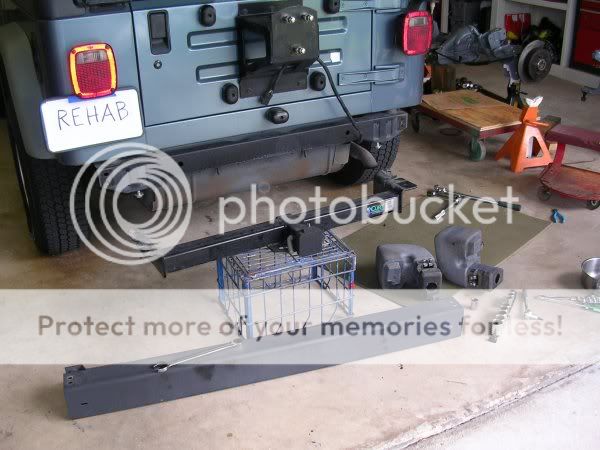
I pulled my rear hitch and bumper because of some other things I'm gonna be doing. But the 1" body lift kit is first.
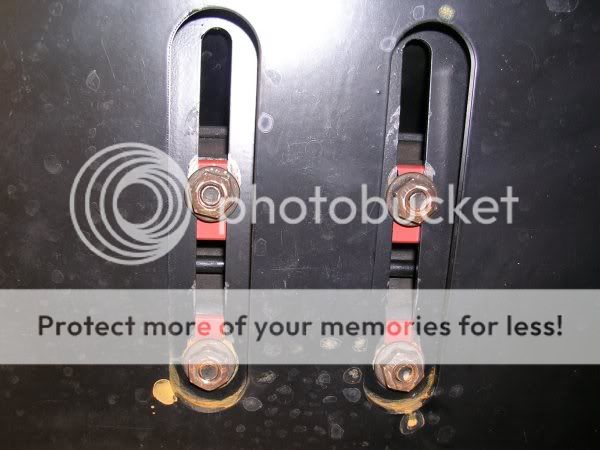
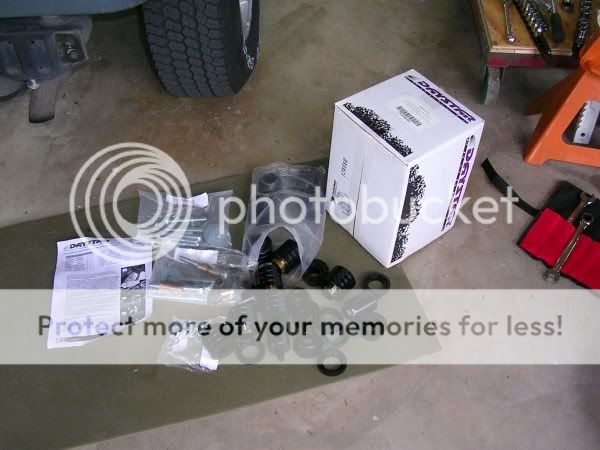
There are a few different body lift kit designs. This one replaces all of the factory mounts. You reuse a factory sleeve at each location to index the top of the new rubber. Daystar is a reputable company and the kit was suggested by someone I trust, so I really can't criticize it. Now that I know a little more, I might consider a kit that uses the factory set-up with additional spacers. The bolts and spacers and fender washers in this kit don't seem as solid as the factory mounts that came off. I saved all my old mounts in case I learn later that I want to try a different design.

Its pretty easy to install the body lift kit. Loosen all the mounts, remove some fan shroud bolts and the air intake tube, disconnect the transfer case shift linkage, unbolt the body mounts on one side completely, lift that side of the jeep with a jack, replace the mounts. Don't remove the bolts from the side you're not working on. That will keep the tub positioned correctly on the frame.


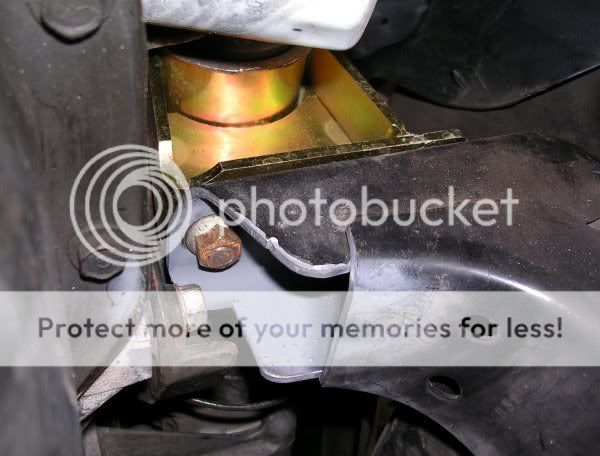
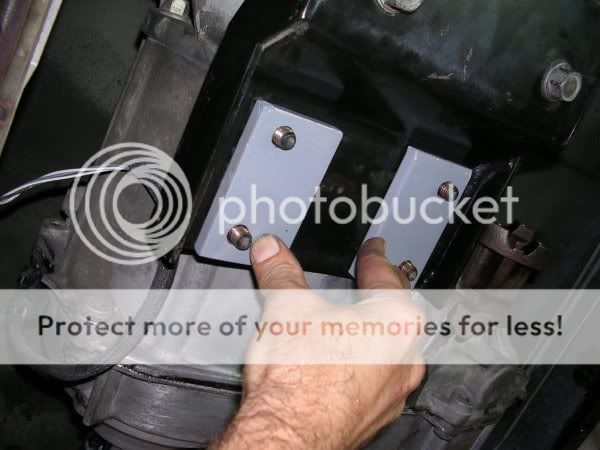
The front uses two rubber bumpers to support the radiator area. They have a nipple that pushes up into the front grill. I struggled with these. I tried stacking a couple bushing drivers under the rubber and lowering the body down to force the nipple to pop into place. That didn't work. Finally, I removed the headlights and reached my hand into the space and pulled the nipples through from above.

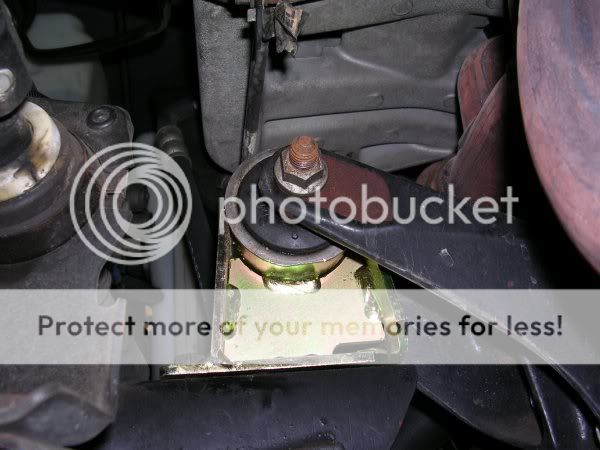
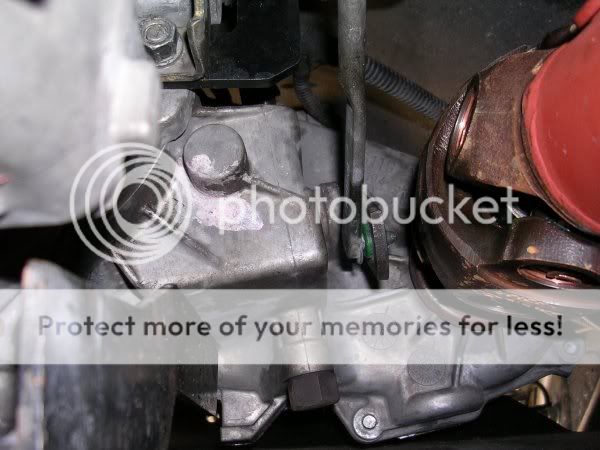
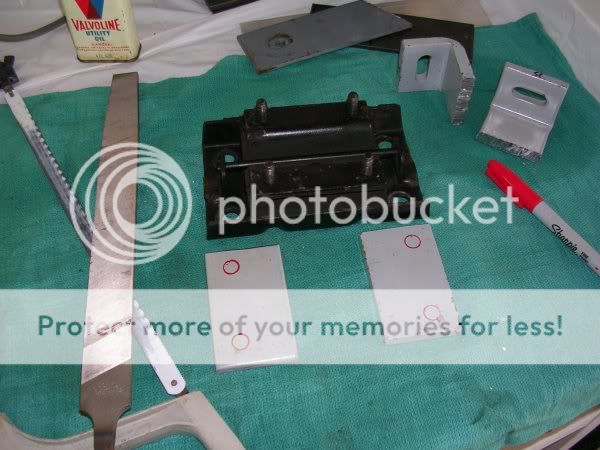
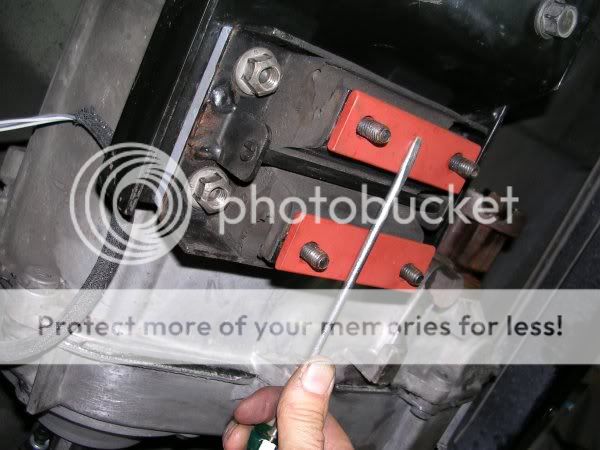
This is the front center. When I lowered the tub back down on all the new mounts, this position did not contact the new mount. When I tightend the bolt, it just caved the thin fender washer. I ended up stacking some washers on top to fill the space. I later made a better spacer out of bar stock.

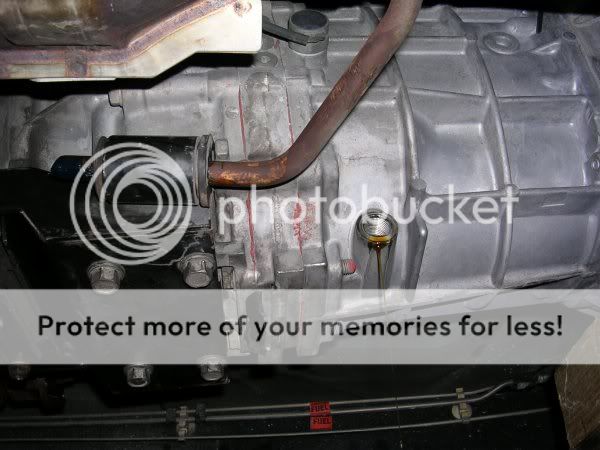
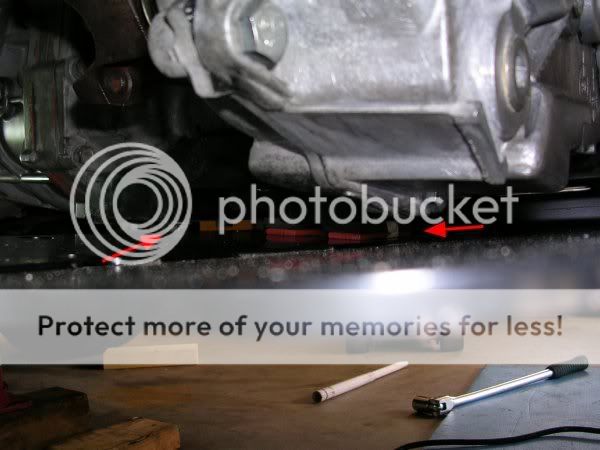
The body lift project was step one and not too difficult. I sprayed bolts and nuts with PB blaster penetrating oil, but I didn't need it. My used jeep had no rust issues. I had a whole week of vacation ahead of me and thought I'd have plenty of time for other planned projects like the body lift. It turns out I'm pretty much the slowest mechanic I know. Good thing I get paid by the hour. You can see a little of the factory center skid at the bottom of this picture

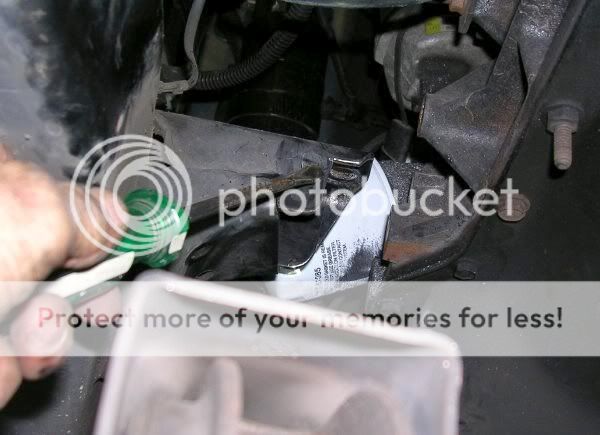
I should have disconnected the fuel fill hose. If the instruction sheet advised it, then I failed to read that step. The position of the two rear mounts above the fender wells is tight and I needed room to get the old rubber mounts out. I jacked the tub up too high and cracked the plastic fuel bezel. I stuck it back together with some epoxy but it cracked again when I tightened up the fuel fill hose. The bezel isn't expensive, but I'm looking locally for a used one before I purchase new. A lot of guys swap it out for a more expensive style.

see the following post for more....motor mounts are next.