It is currently Thu Apr 25, 2024 6:43 am

All times are UTC - 5 hours [ DST ]


Post new topic Reply to topic  [ 4 posts ] 
Author Message
 Post subject: part 3 of my '98 TJ build...rear axle...lots of pictures
PostPosted: Fri Jan 02, 2009 1:10 pm 
Offline
Lifetime Member
Lifetime Member
User avatar

Joined: Thu Jul 07, 2005 12:26 pm
Posts: 174
Location: altamonte springs, fla. (orlando)
Hey ya'll....here's another chapter in my picture essay for working on my '98 TJ. I started this in a topic awhile back....then a few weeks later I lost my picture host site and it took me awhile to move them to a new host. This is part 3 where I swap my rear dana 35 axle.

The first two essays are linked below. Both of those topics are long in text with a whole bunch of pictures....it's way too much, but a few folks seemed to enjoy it....and my dad likes to read it too. If you don't feel like reading them, I reported on purchasing some swap axles for a stock TJ dana 35/dana30 with 3.07 gears. I put a rubicon TJ rear dana 44 and a front '99 XJ high pinion dana 30, both with factory 4.10 gears, in my garage while I collected other modification parts. The second chapter was about installing a belly-up skid and the body lift, motor mounts, slip-yoke eliminator kit.


my axles for swap essay

my belly up skid essay


Here's a picture of the low profile Teraflex belly-up skid installed...I didn't get this picture into the previous story.
Image

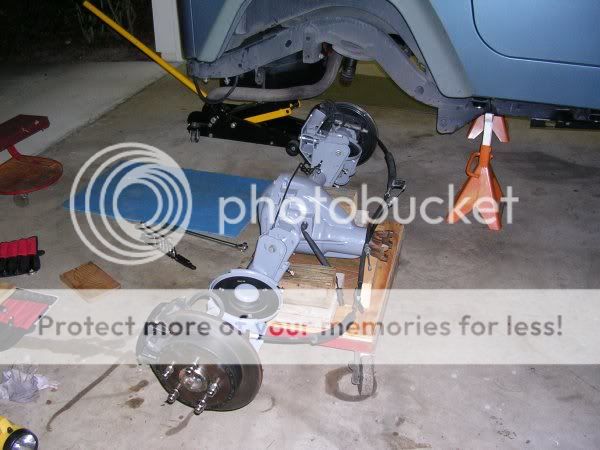
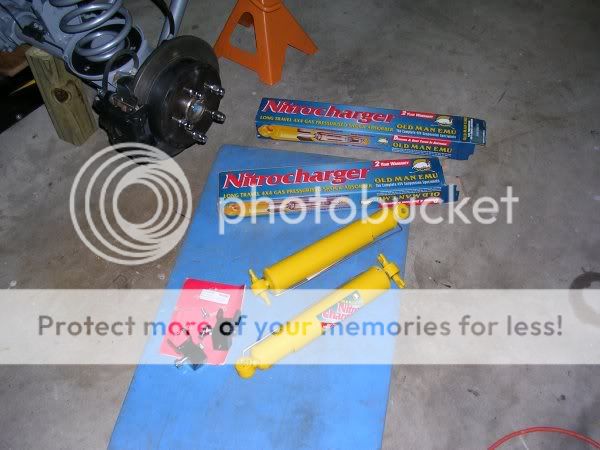
So now I will pull the rear dana 35 axle out. I'm a easy sell when reading the internet chatter and accepting other opinions without much first-hand experience. Some jeep forums will have you convinced you can't ride a dirt road with the factory dana 35 rear end. I wanted to purchase a used TJ with a factory dana 44 rear but I didn't find one in a clean, unmodified jeep. I could have kept looking but I found a jeep I liked for it's other qualities and bought it. Since I knew I wanted to run a larger tire diameter, I was faced with regearing the axles. And I had installed lockers in my KJ liberty and knew I would eventually go that route again. So I adhered to the advice of not investing more money into the dana 35 rear. I would have been money ahead if I had kept looking for a jeep with a dana 44 rear axle. But I would still have had to regear and I would still have rear drum brakes. I had lessons to learn and I'm happy with what I have.

-------------------------------

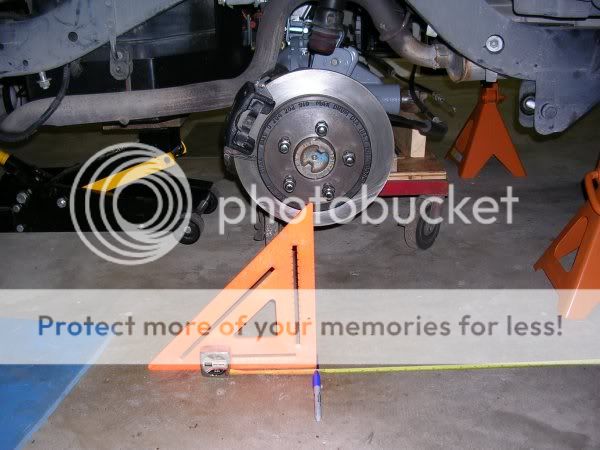
Working on the rear of the jeep......

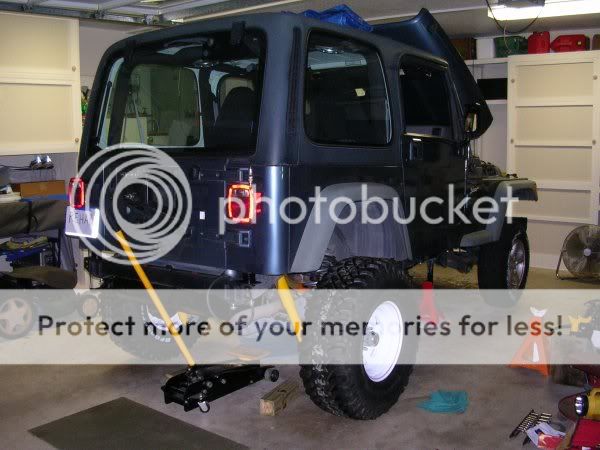
I left the front end on the ground on tires....jacked up the rear and supported the frame on harbor freight 6 ton stands....you need the height of the stands, not the weight rating. I also have some 3 ton stands which are useful for supporting the axle tubes. I was several days into my vacation now and some of the anxiety of tearing up a perfectly good jeep was now past....and my box of empty beer bottles was starting to be respectable.
Image


Taking things apart is usually easy if you have a common selection of wrenches and sockets. I tried to take my time and made an effort to commit to memory things I thought might be important when it was time to reassemble. I took some pictures along the way, but as usual I missed taking pictures of some steps. I had pulled the rear hitch and bumper, because I will be replacing the bumper.

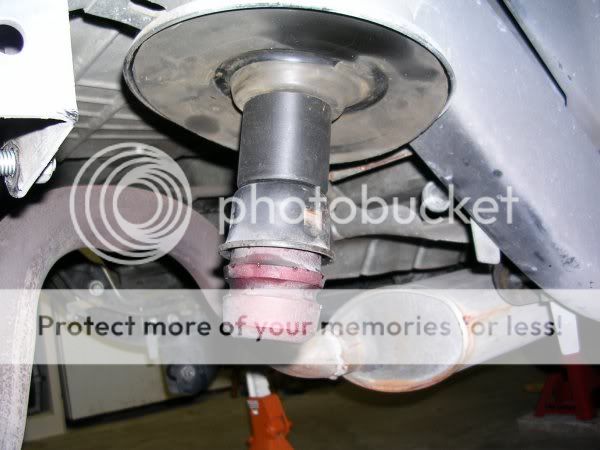
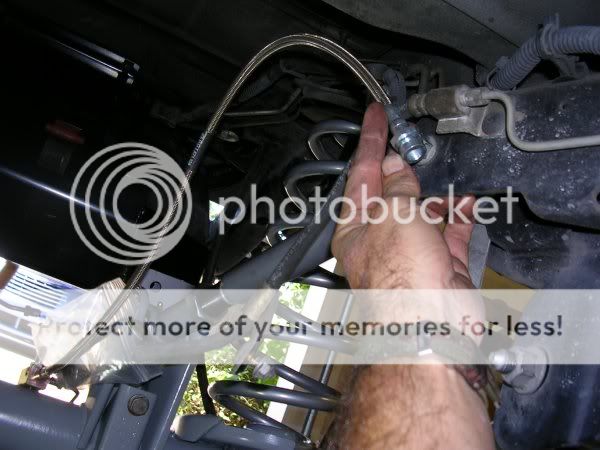
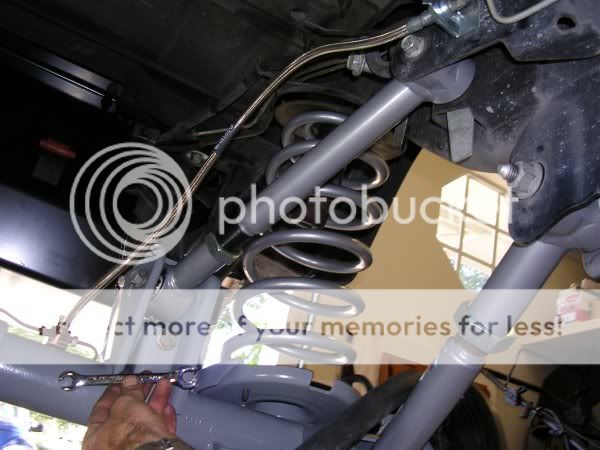
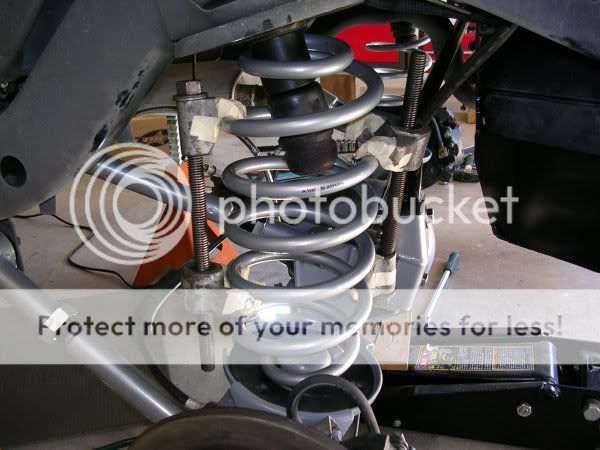
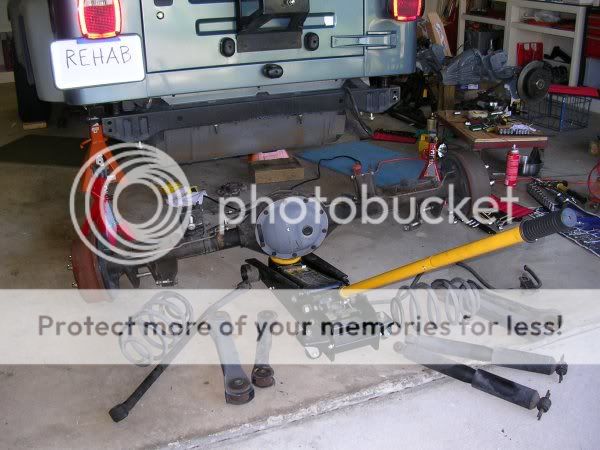
The rear axle is positioned by four control arms. Two lower arms set the wheel base and two upper arms set the tilt angle of the pinion/driveshaft. A axle track bar centers the left/right. Two shock absorbers and springs and a sway bar control the ride. A single flexible brake hose connects to a T junction on the driver side axle tube. A good floor jack makes it easy to remove the axle by yourself. I planned to advertise the dana 35 and hoped to recover some cash by selling it. After a couple months on local forums and craigs list, I still have this thing in my garage....which is a disappointment.
Image


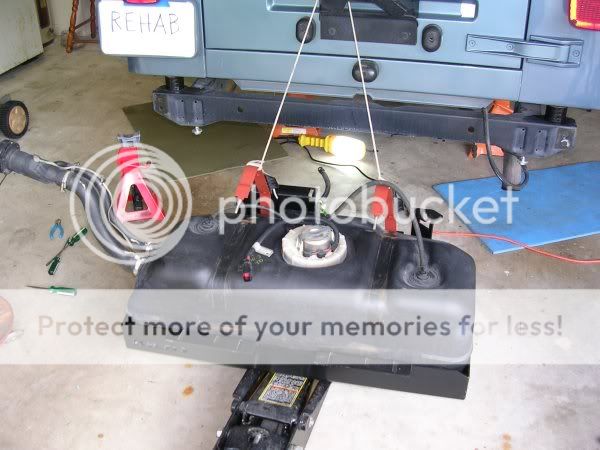
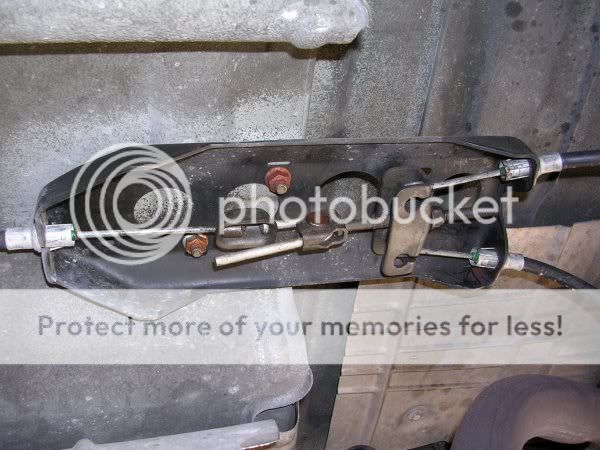
Before I install the replacement axle, I will drop the gas tank and factory skid. The fuel line is pressurized and connects up near the rear shock mount. Pull the fuel pump relay from the power distrubution box and crank the engine to clear the fuel from the line. Centered in this picture are the electrical and mechanical connections that have to be detached.
Image


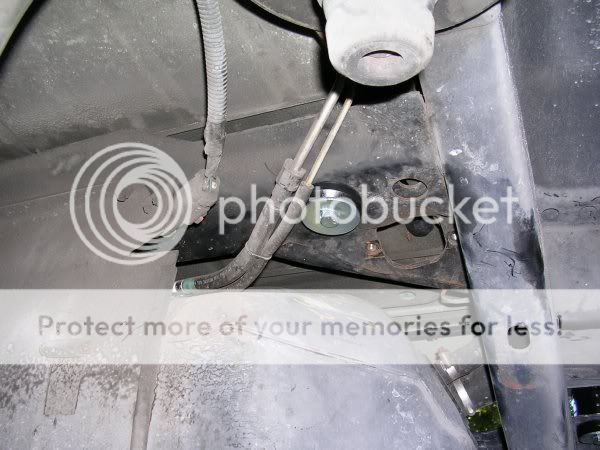
When I installed the body lift kit, I had detached the fuel fill hose at the fuel cap bezel on the rear quarter panel. When you lower the gas tank, you have to help guide the fuel fill hose out from underneath. It also helps to have a near empty tank so that when the gas sloshes, it won't knock the tank off the jack.
Image


The fuel pump assembly fits in the top center of the plastic tank. There are some left and right hoses that have to do with roll-over safety.
Image

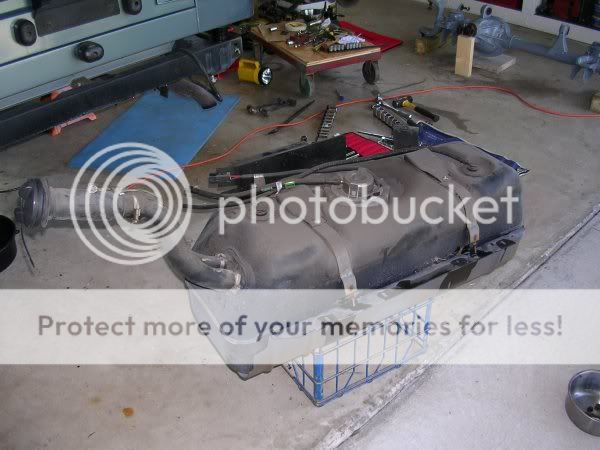
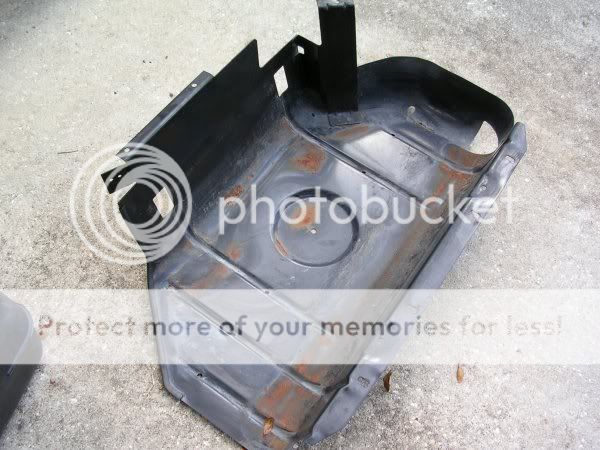
The tank is cradled in a sheet metal support skid and strapped across the top. The metal skid bolts to the bottom of the jeep. With the axle out, it was very easy to remove everything.
Image

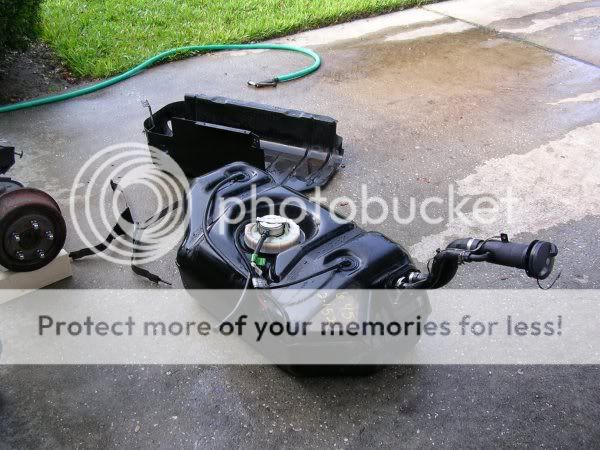
This is a Kilby brand gas tank skid that will replace the factory skid. My jeep friends have a high regard for the Kilby products.
Image

(more below...)

_________________
steve

'98 TJ sport gunmetal blue
33's with modifications to make them fit....still need a few more things....

first jeep....
'04 liberty sport 4x4 khaki
modified as recommended by L.O.S.T.....major fun on vacation....

L.O.S.T. (in fla.) #000496


Top
 Profile  
 
 Post subject: more of this story....
PostPosted: Fri Jan 02, 2009 1:12 pm 
Offline
Lifetime Member
Lifetime Member
User avatar

Joined: Thu Jul 07, 2005 12:26 pm
Posts: 174
Location: altamonte springs, fla. (orlando)
The factory skid has a large dimple in the bottom center for relief of pressure on the fuel pump. The kilby skid is perfectly flat. If I trust the jeep engineers, the kilby skid with no dimple concerns me. My used jeep was rust free and this slight rust scale in the botton of the skid was about the only I found.
Image

I have a lot of camping and backpacking gear. I had this old wal-mart sleeping bag pad that I measured and cut to support the bottom of the plastic gas tank. I cut a large relief hole in the center and trimmed the edges to match the shape of the tank. The bottom edges of the plastic tank are radiused. I cut enough around the perimeter to allow water to drain around the bottom of the tank skid. This picture shows the foam pad ready to be cut to fit.
Image


I painted the straps with primer. The foam pad is now under the plastic tank and makes it sit a little higher in the skid basin. But when I put gas back in the tank, it will compress without excess pressure on the fuel pump....I hope.
Image

Image

Image


The bottom of the skid is flat and solid....I don't have to worry about bashing the tank.
Image


My suspension lift kit is the Rubicon Express 4.5 inch super-flex kit with the springs swapped for the 3.5 inch lift. The 4.5 inch kit comes with parts that most folks will want to purchase anyway, so it saves a little cash. I also upgraded to all eight control arms as adjustable. These are the rear pieces. The gray bracket in the center is for repositioning the axle track bar. With taller springs, the factory track bar will want to push the rear end towards the passenger side.
Image


The kit comes with plastic spacers to extend the rubber bump stops. This will prevent over compression of the new springs when the axle flexes and help keep larger tires from contacting the fender wells and flares.
Image

Image


While the swap axle is still out, I'll go ahead and fill the gear lube. The rubicon dana 44 has a air-acutuated locker with a limited slip mechanism. The factory recommends synthetic 75w-140 gear lube. I like valvoline products.
Image

(more below....)

_________________
steve

'98 TJ sport gunmetal blue
33's with modifications to make them fit....still need a few more things....

first jeep....
'04 liberty sport 4x4 khaki
modified as recommended by L.O.S.T.....major fun on vacation....

L.O.S.T. (in fla.) #000496


Top
 Profile  
 
 Post subject: I know, it's alot of pictures and words....
PostPosted: Fri Jan 02, 2009 1:15 pm 
Offline
Lifetime Member
Lifetime Member
User avatar

Joined: Thu Jul 07, 2005 12:26 pm
Posts: 174
Location: altamonte springs, fla. (orlando)
The fill plug on the cover is right above the air locker diaphragm. You have to be careful not to over-tighten the plug or it will contact the locker. I wrapped the threads with some teflon tape and snugged the plug down by hand with a 3/8 socket extension.
Image

I reused my stock rear track bar. I couldn't get a clear answer from reading the internet about whether I needed a adjustable one with my set-up. You can see the replacement track bar mount. It raises the mount point to match the spring lift. With the adjustable upper control arms, the axle will also be tilted up toward the transfer case. So the mount also changes the tilt angle for the track bar.
Image

Image

I was pleased that I could manuever the swap axle around on a cart I have. I did every aspect of the the jeep work by myself with no second set of hands. I have the rear of the jeep supported on frame stands but I was able to use the kilby gas tank skid and a board on the floor jack to make adjustments. I wouldn't do that with the factory gas tank skid.
Image

The factory wheel base is about 93 inches. I didn't know if I was going to be able to maintain that with the lift kit. I made some measurements on the concrete to check later. This also allowed me a starting point when I positioned the axle for reattachment.
Image

Whenever possible, I also later tried to lift the axle to about the height of a mounted 33 inch tire....16.5 inches above the floor for the center of the hub. I didn't know if any of this was going to be important, but it couldn't hurt.
Image


The kit instructions give a suggested length to set the new rear adjustable arms. I don't recall what they were. My finished jeep now sits with 16 1/4 inch rear lower arm and 14 1/2 inch rear upper arm length measured center of bolt to center of bolt. I have plenty of room between the gas tank skid and the pumpkin cover, so I might have been able to go a little longer. The main thing is to make the pairs both equal. I also counted exposed threads, but I wasn't sure if manufacturing quality control would make that a workable rule. I thought I had written down the factory arm dimensions, but I can't find the notes. I sold my old arms recently so I can't go back and measure them for this post.
Image

At this point, I still have the front on the original springs and 28 inch tires. I'm going to roughly set-up the rear and come back to it after I have the front parts swapped. The kit provides bolts for the flex joint mounts. So that the unthreaded shank of the bolt is long enough to go all the way through the body of the flex joint, you end up with a bolt thats too long and threads that stick way out. I cut the excess threads off to make for a better looking install.
Image

I made the mistake of not installing the axle track bar as a first step. I ended up removing the springs and the upper arms later so I could more easily fit the track bar without excess misalignment.
Image

I get to replace the rubber brake hose with a longer, steel braided hose.
Image

I only post ten pictures at a time...that's how another forum works I hang out on....see below for more....

_________________
steve

'98 TJ sport gunmetal blue
33's with modifications to make them fit....still need a few more things....

first jeep....
'04 liberty sport 4x4 khaki
modified as recommended by L.O.S.T.....major fun on vacation....

L.O.S.T. (in fla.) #000496


Top
 Profile  
 
 Post subject: ...more of the story...
PostPosted: Fri Jan 02, 2009 1:18 pm 
Offline
Lifetime Member
Lifetime Member
User avatar

Joined: Thu Jul 07, 2005 12:26 pm
Posts: 174
Location: altamonte springs, fla. (orlando)
I had to rob the brake line junction from my dana 35. The dana 44 had the hard lines and parking brake cables. It's always a good idea to use a flare nut wrench when possible to prevent damage. If you foul up the flare nut, you have to either cut and reflare the hard line or purchase and re-bend another line. Later when I was first driving the jeep, the fittings at the junction leaked a little, even though they were adequately tightened. I guess the used T-junction was looking for the dana 35 brake lines flare nuts. So I then had to "overtighten" the flare nut, which I hate to do.
Image


It was now that I realized it would have been better to have the track bar already bolted in. After partial disassembly of work I just did, it wasn't going to be as easy to get the coil springs back in. I have some old spring compressors, which made it go quickly.
Image

My swap axle was in good shape and included just about everything. Unfortunately, when the owner pulled it, he didn't take the time to properly disconnect the parking brake cable spring retainers at the adjustment bracket. If you've ever tried to squeeze the three retainers to slide the cable out, it can be a pain. The previous owner cut some of them to save time. I was able to get an adequate fasten with the remaining spring clips but it was a little disappointing.
Image


I upgraded the shocks to OME brand. I don't have any experience with other options and was told this was a good choice. I read that the shock tube will rub the lower coil spring perch. I didn't think the lower mount relocating brackets were too expensive so I'm going to use those instead of cutting a clearance in the lower coil spring perch. Reaching up into the tight space to bolt the upper bar pins to the bottom of the tub took a socket extension and a little effort.
Image

I had all these parts stacked in my garage for over a year. Five mounted tires stacked up really gets noticed everyday. When I finally got to put a couple on the jeep, I had to have a beer.
Image

With the rear roughly set-up with the pinion pointing to the transfer case output, I could measure for a new rear driveshaft. I'll need a spicer 1330 series joint for the rubicon rear yoke, and the teraflex slip-yoke eliminator requires a 1310 series joint. I'm a believer of using local businesses when I can. Usually the cost difference isn't significant and I can develop a customer relationship with someone I can speak to face to face.
Image

There's a very good driveline shop in Orlando (Advanced Driveline) that treated me fairly. I took the measurements to the shop and had a drive shaft built. They feature spicer products so I also purchased new u-joints to rebuild the front drive shaft. While I'm waiting, I'll switch to the front end and install the new u-joints. I'll install the rear shaft later.
Image

That's all for now on the rear until I set the pinion angle.

This is another long string of pictures....I have about the same for the front. I'll let ya'll read this for awhile while I work on the next part. Thanks for looking and please comment if I need to learn something.

_________________
steve

'98 TJ sport gunmetal blue
33's with modifications to make them fit....still need a few more things....

first jeep....
'04 liberty sport 4x4 khaki
modified as recommended by L.O.S.T.....major fun on vacation....

L.O.S.T. (in fla.) #000496


Top
 Profile  
 
Display posts from previous:  Sort by  
Post new topic Reply to topic  [ 4 posts ] 

All times are UTC - 5 hours [ DST ]


Who is online

Users browsing this forum: No registered users and 39 guests


You cannot post new topics in this forum
You cannot reply to topics in this forum
You cannot edit your posts in this forum
You cannot delete your posts in this forum

Search for:
Jump to:  
Powered by phpBB © 2000, 2002, 2005, 2007 phpBB Group. Color scheme by ColorizeIt!
Logo by pixeldecals.com