Hey everybody,
I had been eying the other thread about the blacked out headlights, and this weekend I decided to just take the plunge and figure it out. So I wrote up a detailed How-To on here to make sense of the mod a little better.
I hope this helps anyone thinking about this mod, and feel free to ask any questions if I left something out!
Supplies:
Torx Screw Driver
Flathead Screw Driver
Spray paint; I went with Rustoleum Flat Black
Silicone Gel (Maybe not necessary, but for another $4.00 it was worth the piece of mind knowing the lights won't be fogging up)
One Jeep Liberty KK
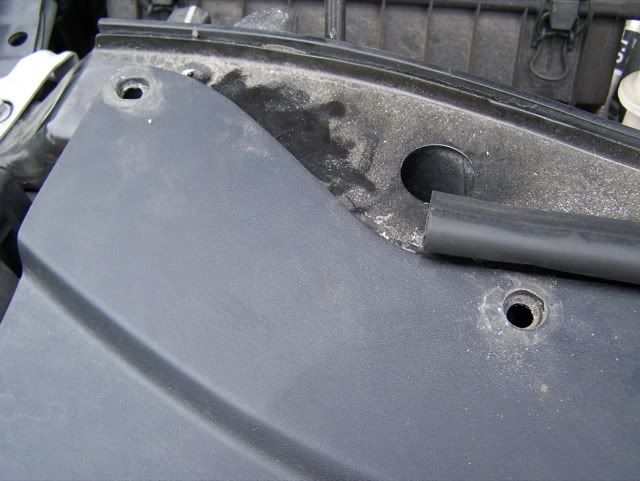
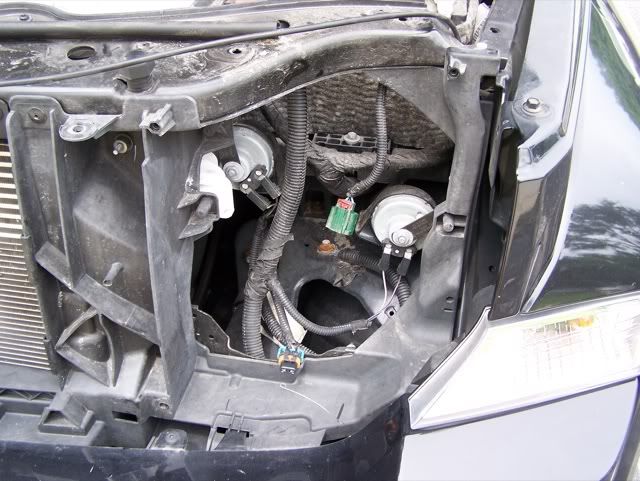
Step 1: Removing the front clip
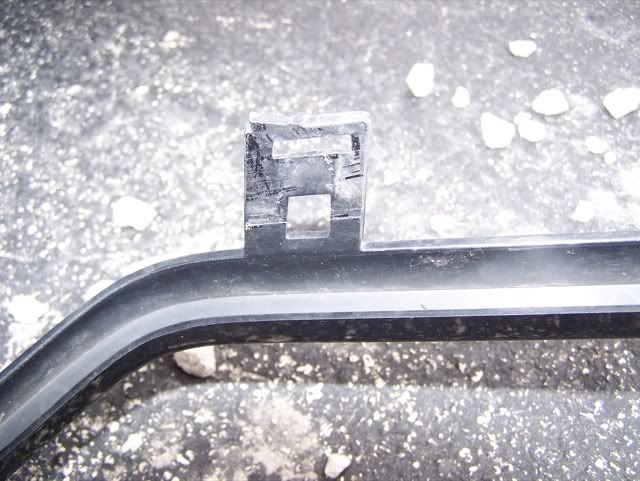
Locate the hood latch cable, and unclip it from the plastic along the front of the engine bay, you will need to tilt this piece forward later and its just good to get it out of the way. This next part is really easy, you will need your flathead. Locate the 9 plastic tabs which hold the top of the front clip in. Each of these tabs are made up of two parts. An anchor, so to speak, and a pin that slides into it. Using the screwdriver, pop the smaller piece up and out, this will release the tension on the anchor under the metal. Then pry the anchor up and pull it out. These should come out pretty easily. Then, tilt the clip forward from the top unhinge the small tabs on the corners and pull. There are tabs along the bottom, they will all simply pop out when you pull. It takes some pressure so don't be afraid to break anything, just be careful not to scratch the bumper.
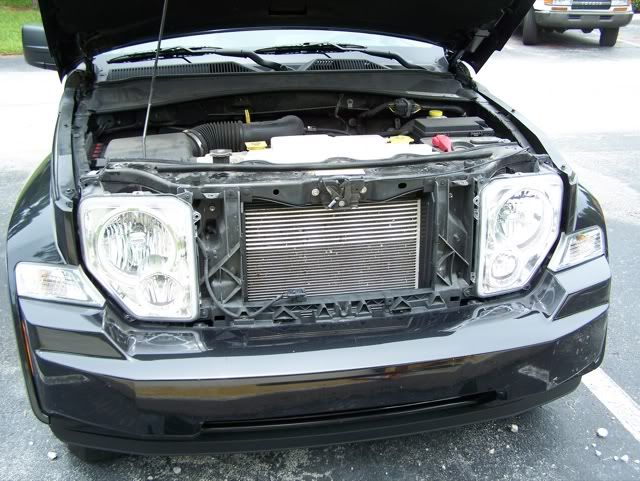
Step 2: Removing the headlight assemblies
Each headlight is secured by 3 torx screws, they all come out pretty easily. Once you remove those, tilt the lights the same way you did the bumper and reach back and unclip the two power connections. Pretty standard stuff so far. (I did find the cord on the fog light connection was extremely short on the passenger side, so keep that in mind.)
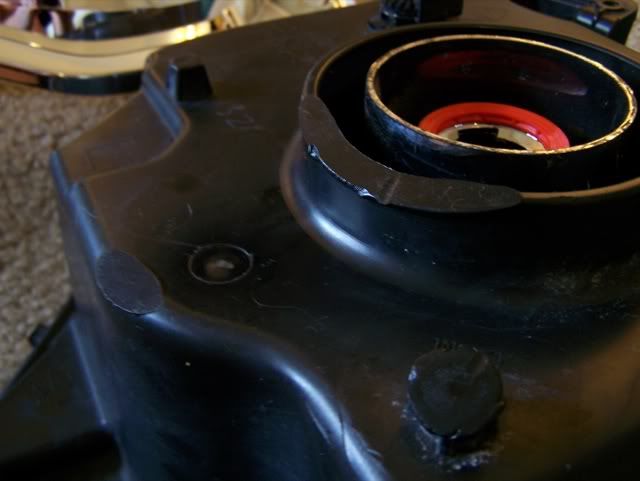
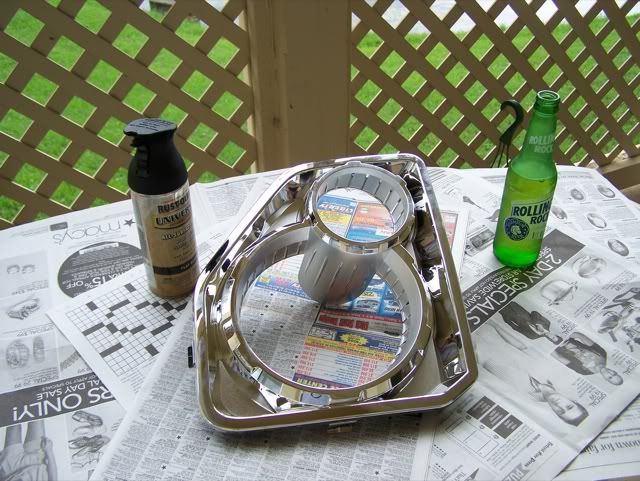
Step 3: Prepping headlights for bake
Now things get a bit weirder. Remove the rubber seal on the back side of the lights as well as the clip and three screws around the fog light hole. Again, maybe not necessary, but it cant hurt. I gave the whole thing a good cleaning with a rag and some windex. I didn't feel like getting that nice road taste baked into my next meal.
Step 4: Baking headlights to loosen the glue
I tried a few temperatures with each light and kinda struggled to really get the glue to separate. I would recommend going with about 10-12 minutes at 300. I started at 10 minutes at 250 and it just wasn't happening so I bumped it up. My first light took some trial and error, I put it back in a few times. The key is to place the oven rack in the middle and put some foil or reynolds wrap on the rack. EXTREMELY important, I first popped mine in on a cookie sheet with no heat protection and kind of melted the back.
As a precaution, I would also place the lights with the clear plastic facing up, just in case you get a bit of melting, but as long as you use some foil, it should be fine.
After about 10-12 minutes, grab the light with some potholders and set it down on some carpet or a towel. The light will be HOT and can burn you, but the heat dissipates quickly, so its'm important to work fast. Pick a corner and have at it. Pry back a few tabs with the flathead and try to pivot on some of the protruding plastic parts for leverage. It will take a while to get things goin, and probly wear out your fingers, but just keep at it. Things should start to loosen up a bit and get kind of gummy, once this happens just follow the side along and try to wedge it open. If its taking a while, or you can only seem to get certain parts of the glue loose, then toss it back it. Keep it at 300, but you probably won't need to wait the full 10 minutes this time. Once you get it open, you are done with the first difficult part.
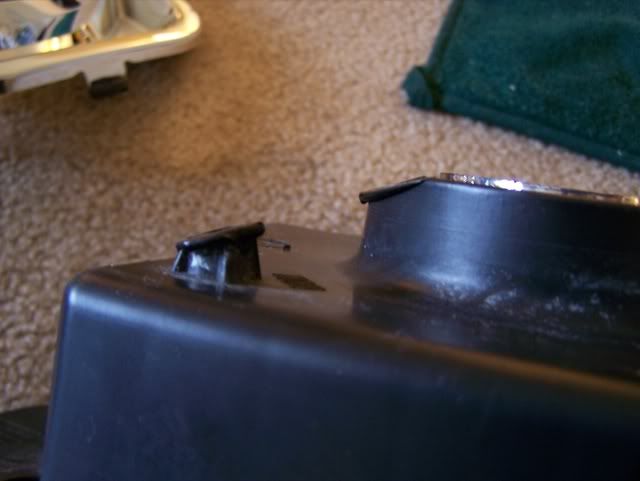
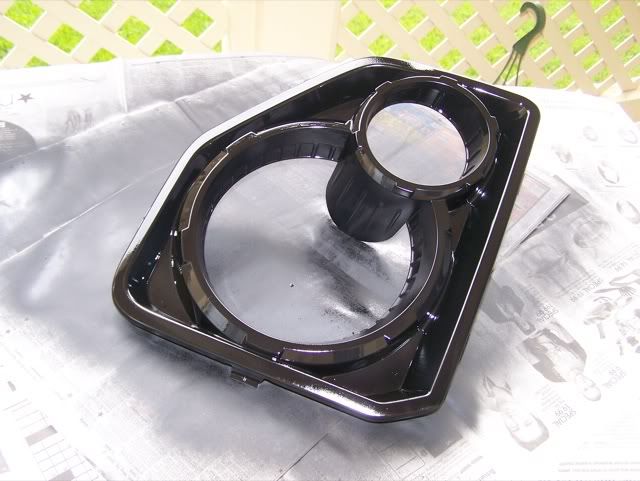
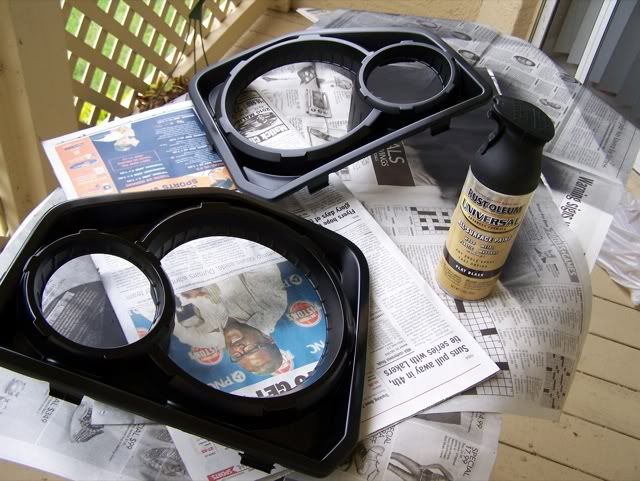
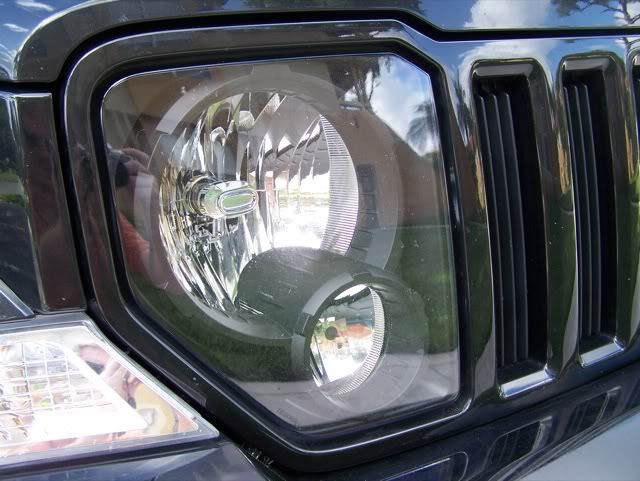
Step 5: Further disassembly/painting
Pop out the chrome plastic piece carefully, the tabs should come loose no problem. Then get to an area ready for painting; ventilation, newspapers, etc. Holding the spray paint around 6 inches way, just start coating the piece. Be careful to stay in one area for too long, because the paint could pool up on the sides of the main light covering. You will also have to hit it from a few angles to get everything coated evenly. I only used one coat of the flat black and did some touching up after it dried a bit. If you are going for a glossy look you might need a bit more.
Step 6: Prepping for the re-bake
Once they are dry and look great you're almost done... almost. For me, this was the most difficult part of the process. I managed it, but there might be a better/easier way... First I popped just the back part with the glue in the over and baked for around 5 minutes. Then I tried fitting the newly painted part and the clear plastic, but It wouldn't fit back in. I baked it for a while longer and found out the the way I let it the glue dry and resettle (or something) was preventing the clips from the painted part from sitting flush on the housing. So I ended up tediously cutting away the glue around the clips, then just putting it back in on top of the piece once it was heated. This was time consuming and a real pain in the booty to be honest, so you might want to consider pushing the glue up against the outer wall once you first take them apart. Once I trimmed the spots back I re-heated and was able to squeeze the cover back on, most of the tabs were tough to re-click but I got them all to snap. Once it cooled down it didn't seem like the glue had totally fused, so I popped it back in for a while and then coated the whole seam with some silicone. I chose against a stronger sealant just in case there WAS a leak that I missed, but also because I may have to crack em open again and put the halos in there

.. we'll see.
Step 7: Sealing/Reinstallation
I used simple waterproofing silicone, it was pretty easy to work with. Cut the hole just smaller than the gap between parts and go to work. I smoothed the seam out once I was done just to make sure there were no air pockets or anything. After a quick Florida rainstorm there was zero fogging, so at this point it's looking like a success!
The hardest part was trying to get them back together and getting a real solid fit. As long as you waterproof the seam and get the clip in, the fit shouldn't be tooo important. Everything pops back onto the car but in reverse:
Foglight cord, headlight cord, 3 torx screws, bottom of the grille just pops back in, slide under the two top corner clips and re-insert the 9 plastic tabs followed by the hood latch cable. Check the lights to make sure they still turn on and you are all set.
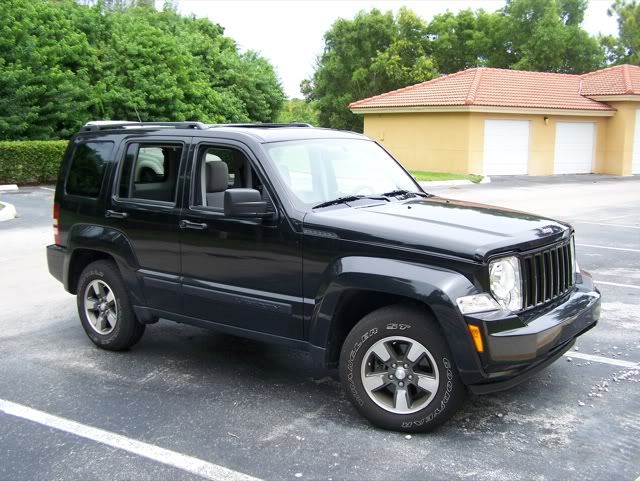
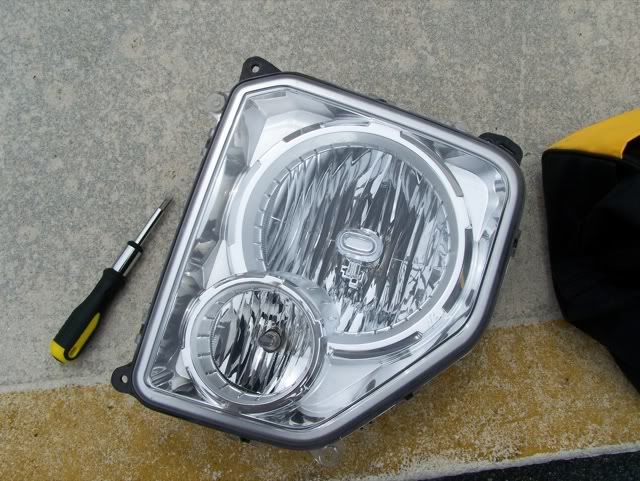
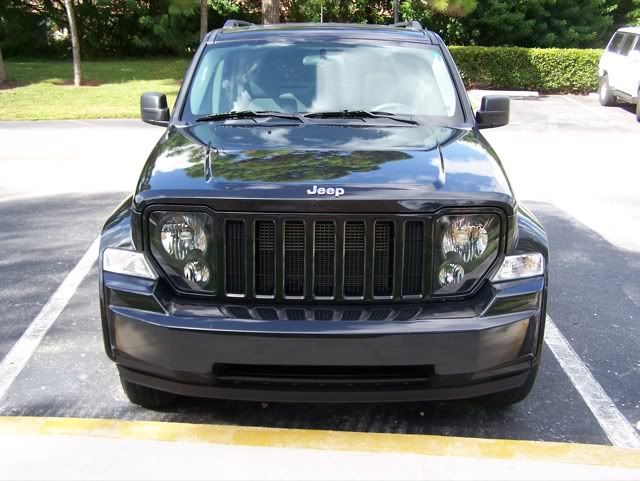
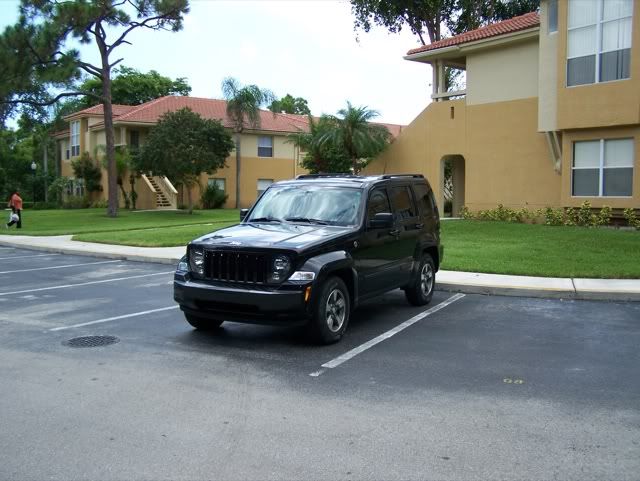
So for around $10 bucks and a few hours of work you can go from this:
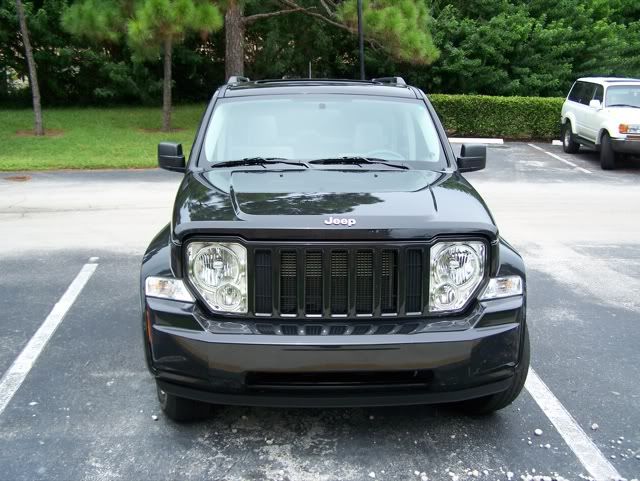
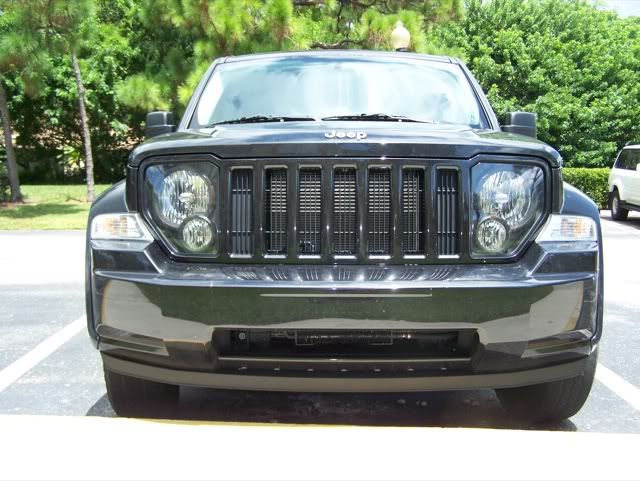
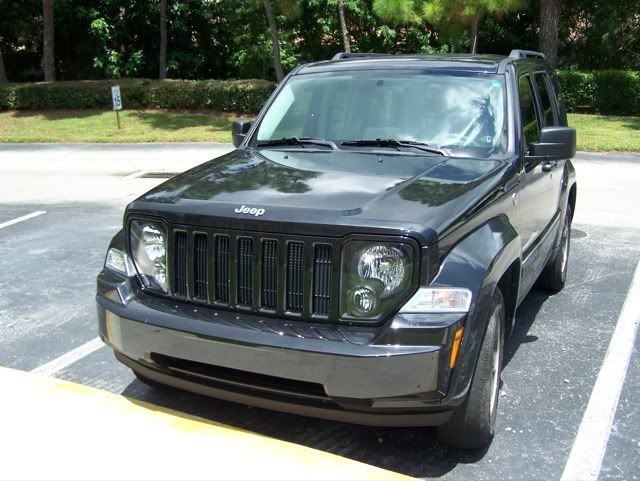
To This:

If anyone has any other methods or ideas I would love to hear em!
Photobucket page with more pics:
http://s1011.photobucket.com/albums/af2 ... rOneActor/Thanks! will be trying tomorrow, Headlight lenses face down or face up in the oven?


