So I purchased the whole kit to do the 100K service on my 2006, cost about $750 shipped. I was not able to find on any website or even the mitchell1 pay car repair website adequate instructions to change the water pump. So here is my stab at a particularly difficult way to accomplish the timing belt and water pump change. I endeavored to not have to take off the intake cam sprocket and was able to get away with only removing the exhaust cam sprocket! In doing so I incurred quite a bit more work for myself, but I had neither cam locking pins nor the cam pulley locking holder. So I was willing to incur extra work, that can be done with hand tools, rather than wait weeks for right tools. total i have about 30 hours of work on it, some being thinking, most wrenching.
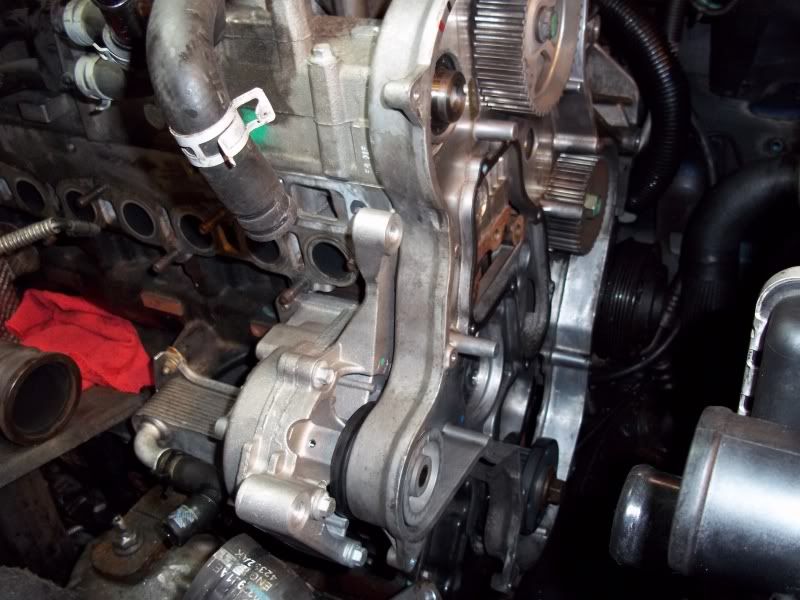
I saw that the timing belt was giving off some rubber dust, especially around the injection pump. it must take alot of power to run that thing and it shows by eating up the belt. I suggest that perhaps the next belt should go on at 160,000K miles not 200,000K. what do others think?
To summarize the following instructions, I removed the exhaust manifold and that enabled me to reach the one hidden water pump bolt, then with the exhaust cam sprocket removed its possible, very hard still, to pull the rear timing cover away from the engine sufficiently to wiggle the water pump in and out. I will also generate a post with instruction with how and what in replace the mechanical fan with a electric. I purchased to install a 2400 CFM fan and a thermostatic fan controller (only $140 total), so that the mechanical fan never goes back on. However once change I did was in process of replacing the thermostat, so if someone foolishly chooses to follow these instructions they can duplicate the modification.
follow these instructions as you see fit, i know this is not the best way to do this job, its just the way i did. so take this for what it is.
I have 5 PDFs that would be helpful, but i have no way of hosting them up, so PM me if you can host up please.
Instructions to replace water pump and timing belt:
Drain all coolant
remove 2x 10mm bolts from overflow bottle
undo hoses
remove coolant overflow bottle
remove clutch and fan and remove with fan shroud. (or remove radiator and pull fan support bearing out whole) use loops rope to hold pulley without damaging unit. (i suggest removing the radiator first so that is does not get damaged)
remove serpentine belt
remove PS drive pulley (3x10mm)
remove idler pulleys (two are reverse threads)
remove crank damper bolts (4x13mm)
remove viscous heater (2x13mm, 1x10mm)
remove all the outer TB bolts (17x7mm)
remove heat shields on exhaust manifold (13mm)
undo turbo V-band (10mm)
undo turbo oil feed line (watch for copper gaskets)(15mm)
undo turbo drain line (2x 8mm bolts)
undo turbo-manifold bolts (4x13mm)
undo turbo bracket (1x10mm)
remove oil feed line at block (~21mm)
pull drain line out of block
remove exhaust manifold bolts, 13mm
undo EGR tube (flat head V-band)
push EGR tube back and slide manifold off
undo PS pump mounting bracket (3x 13mm)
use 6mm key to lock crankshaft to flex plate (by oil filter)
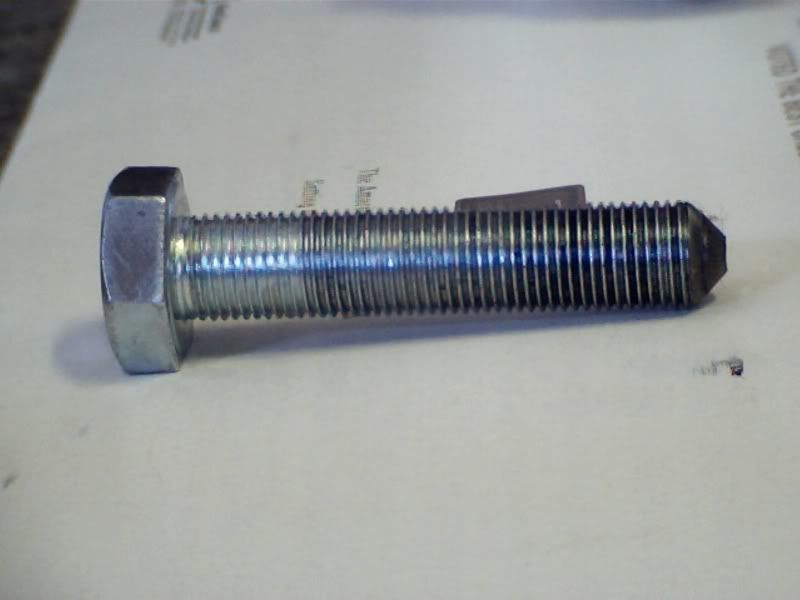
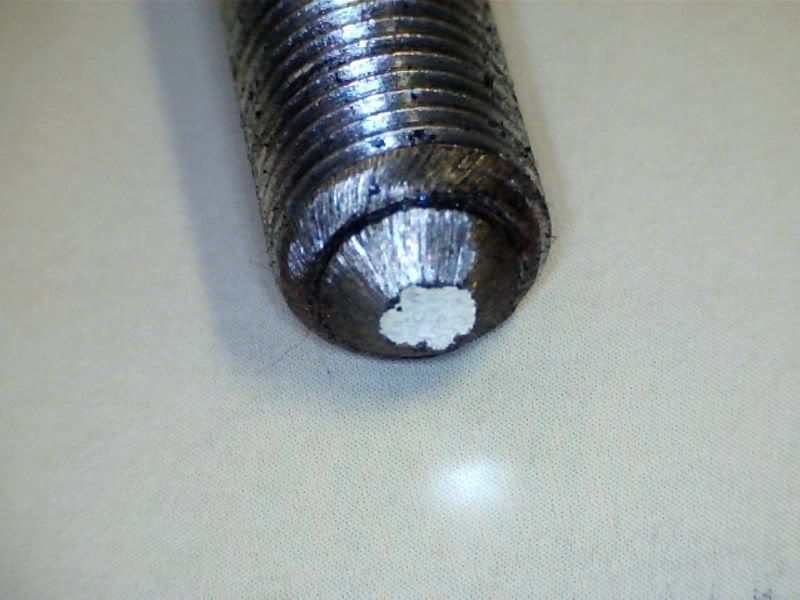
in order to make your own cam locking pins go to home depot and buy two M10-1.0x50mm bolts and one m10-1 nut, grind the end of the bolt into a narrow point and rotate the screw while grinding (using the nut as a bearing) to keep the point centered on the bolt. Also if you drop one of the cam locking pin plugs simply buy two M10-1x20mm bolts and some plastic washers, done.
Mark with a black sharpie the location of the cam sprockets, injection pump and crankshaft pulley
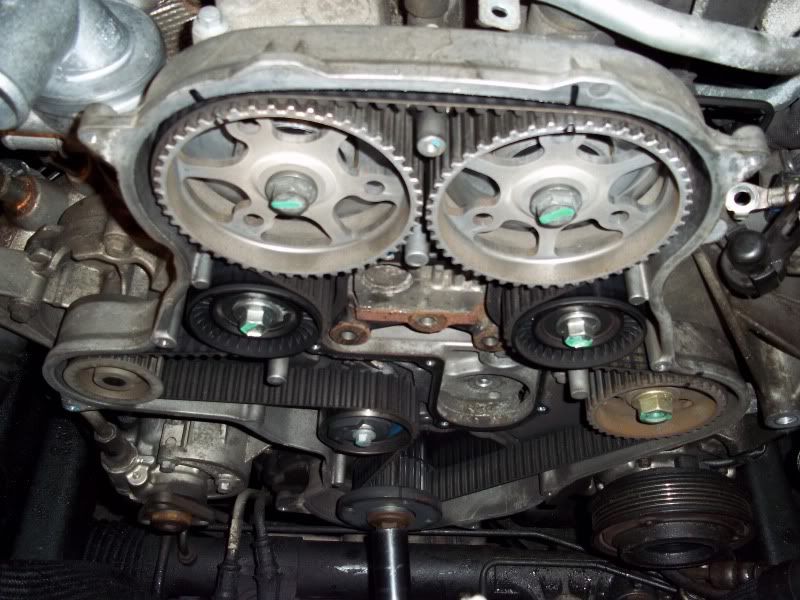
install exhuast cam locking pin, and make sure the camshaft cannot move at all.
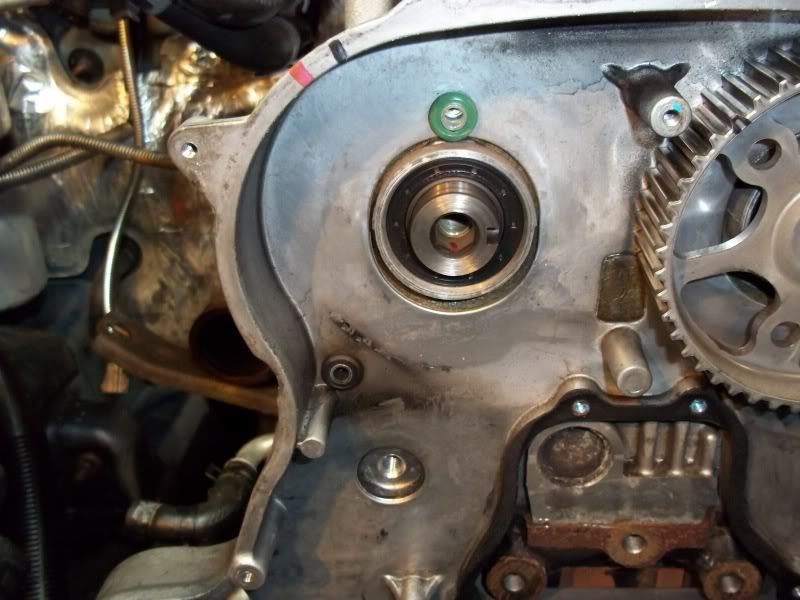
remove exhaust cam sporket bolt (only the bolt) and mark the sprocket hub to the camshaft with alignment marks
undo all the rear timing belt bolts, 4 small ones and three big ones.
undo 4x WP bolts 13mm combo wrench)
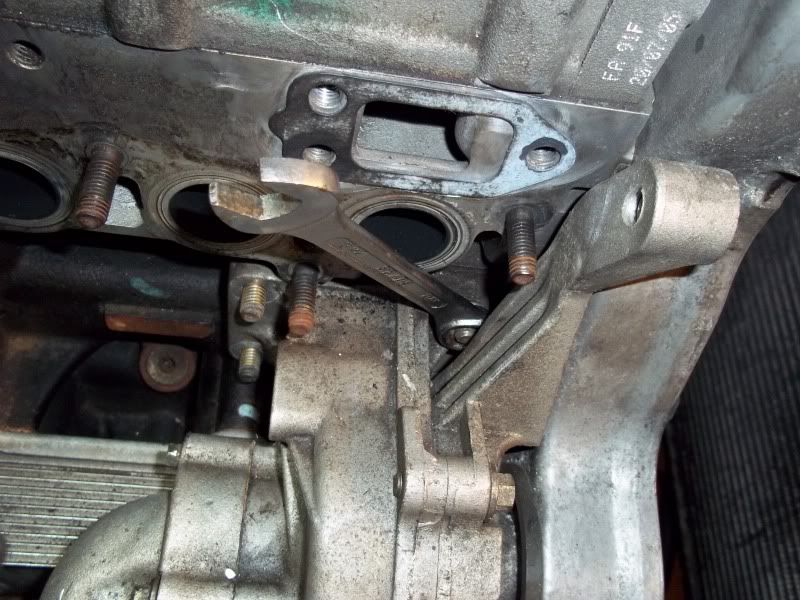
pull rear TB shield forward and work WP off of the studs (make sure both alignment dowels come out of WP mount)
clean block with scotch pad
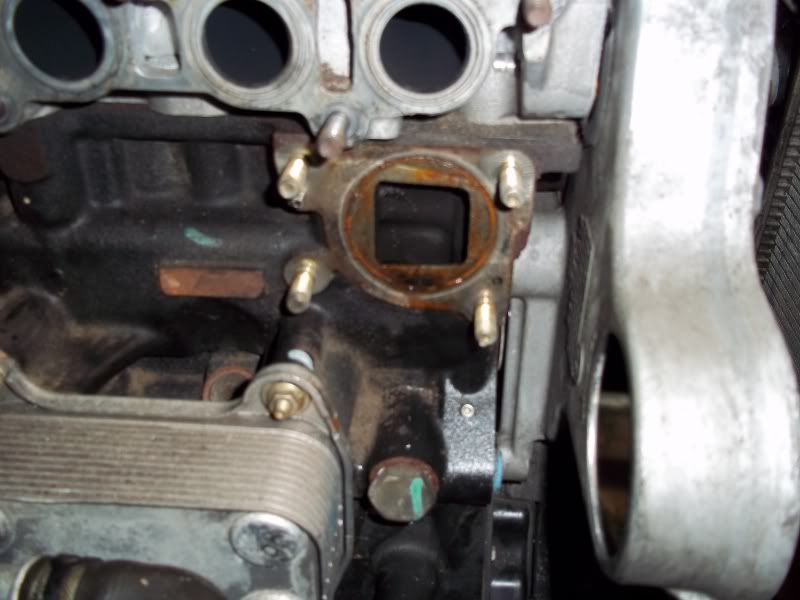
install water pump and torque bolts to 24.4 nm
install exhaust cam sproket with blue locktite, torque to 108 nm (80lbft)
install TB rear cover bolts (10mm bolts 45 nm – 8mm 10.8nm) with blue locktite
install TB tensioner loosely (do this WITHOUT the belt being looped on it, the factory helicoil is EASY to damage)
install intake side TB idler pulley (47/35 nm/lbft)
loop belt on all pulleys, use wedges to hold belt into the teeth between sprockets and inner TB cover
install exhaust side idler pulley, torque to (47/35 nm/lbft)
use two 3mm keys, or other tool to twist tensioner to correctly pre-tension, rotate engine clockwise to seat belt and re-tension as needed . Tighten the tensioner bolt to (36/25) nm/lbft
screw in 17x outer timing cover bolts with blue loctite and torque to 6 nm.
Install fan support bearing 4x 13mm torque to (47/35) nm/lbft
install PS pump pulley bolts and dampener bolts (27/21)
install pump inlet housing with new gasket (connect oil cooler hose first)(don't over tighten these bolts, the spec that I had was wrong and I stripped the new pump housing!!!)(i drilled and tapped for a 1/4-20 bolt to fix)
assemble in reverse order except for notes*
*clean turbo inlet copper gasket mating surfaces and tighten BEFORE tightening the oil supply line to block connection
*I could not find a torque sequence for the exhaust manifold, so I tightened from the center out.
*Triple check all heater hoses and clamps 1) they are connected 2) that the clamp is on right.
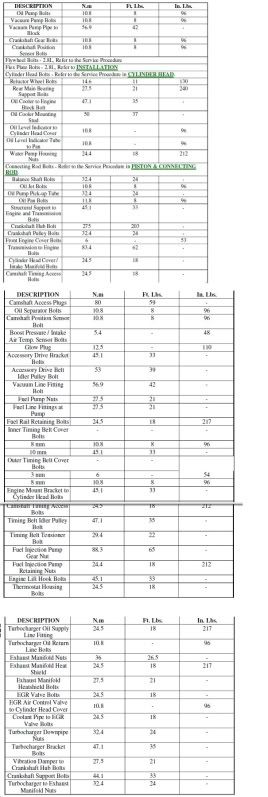
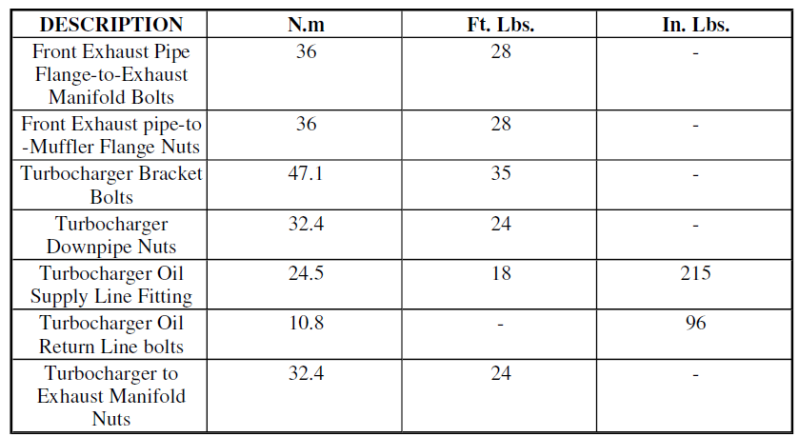
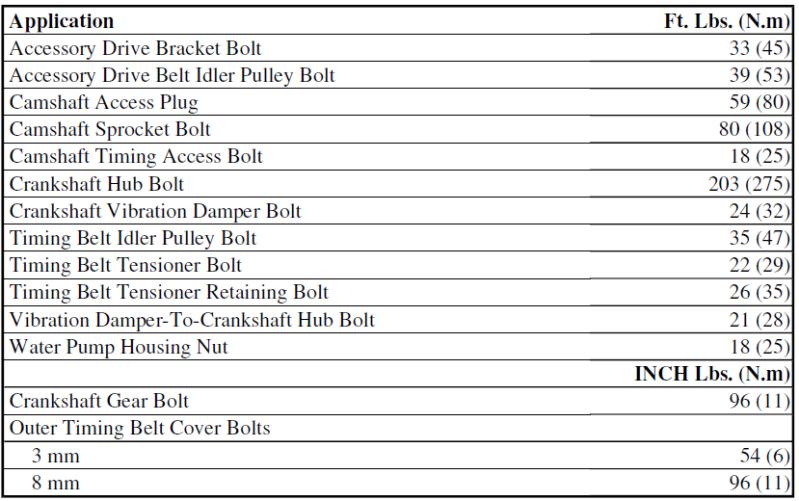
*I got tired of populating torque values so please get values off of the attached PDFs
*install belt tensioner BEFORE the PS pulley
*if the alternator de-coupler pulley is being replaced a no-tool way to get it off the alternator is to weld a piece of metal to the pulley and whack it (using the inertia of the alternators armature to 'hold' the shaft still) hit the metal chunk in the anti-clockwise direction.
*When installing the accessory belt loop it on the alternator last.
*Check the antifreeze protection of the coolant if its being reused. I mixed the old coolant and new Prestone (any color style) together and made sure it was -50F protected.
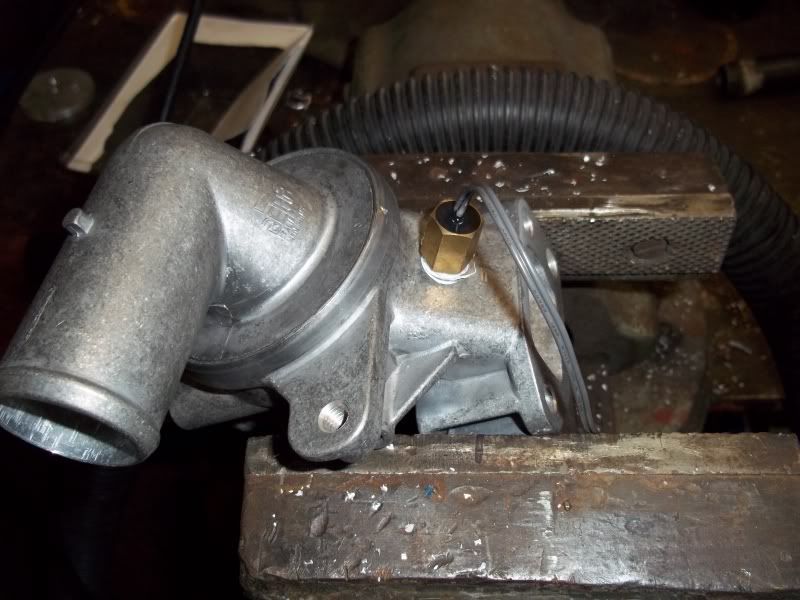
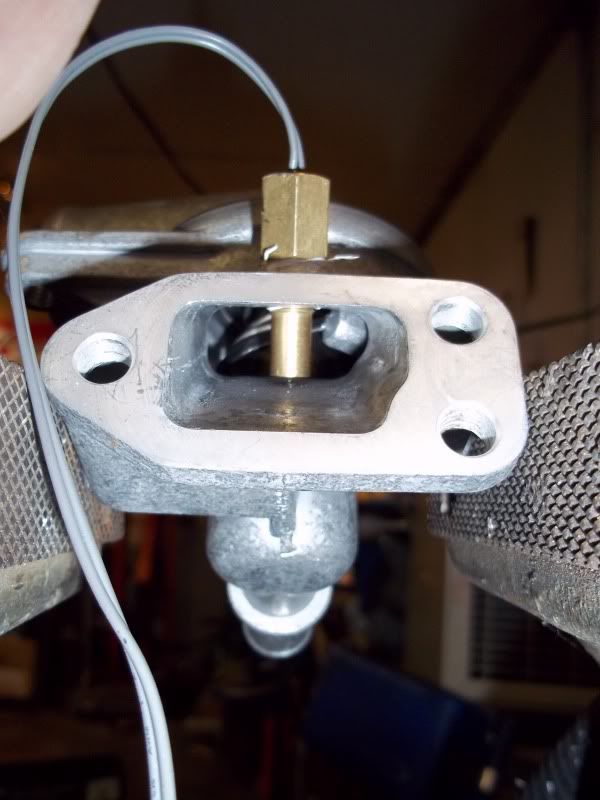
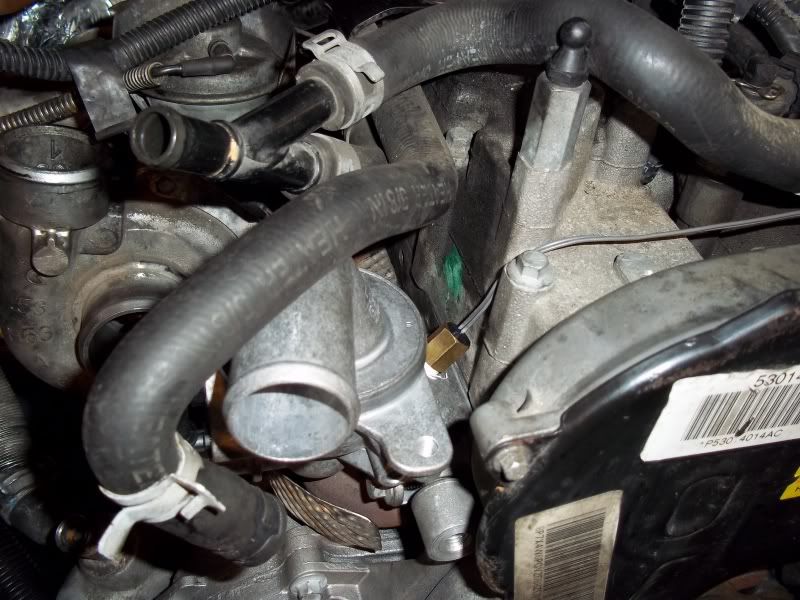
this is the mod i did for the electric fan, i put a coolant temp probe right into the thermostat housing, in the thickest part of the aluminum. Like i indicated i'll do a full write up of the electric fan mod in a different post.