Here is the step by step modification instructions for those who need the procedure:
1) Remove the HVAC control head from the vehicle. Very easy to do, if you have problems with this part, stop here!

2) Remove the control head from the bezel by removing the 4 screws.
3) Remove the white cover from the back of the control head. DO NOT remove the vacuum switch attached to the back of the white cover, it will come off along with the cover just fine. There are 3 screws and about 8 snaps that you have to carefully work to remove the white cover.
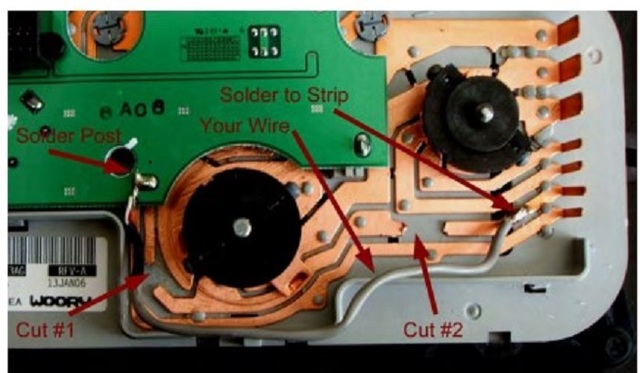
3) Make 2 separate cuts in the copper strip where shown in the attached picture. I used a small pick to elevate the strips very slightly and cut them with wire cutters. Be careful not to rip the strip off the plastic attach points. I cut out a fairly large piece at each place, but it is up to you how big a chunk you want to cut out.
4) Solder an insulated wire from the post as shown on the picture, to a place just before where the connector is. Leave some room for when the white plastic cover is reinstalled. The wire shouldn't have to be a very heavy gage. I used a computer CD audio wire because of the nice cover on it.
5) Reinstall the white cover on the control unit, making sure the vacuum control valve is lined up and engaged properly. Make sure the wire that you just soldered in is not hitting any movable parts in the head, or is getting smashed into the top circuit board.
5) Reconnect all the HVAC control wiring (but not the vacuum lines) and test it's operation. You can do this without installing it onto the bezel for testing. The A/C compressor should now only come on when you press the A/C button, and not any other time.
6) If it works, reassemble the controller back into the bezel and the vehicle.
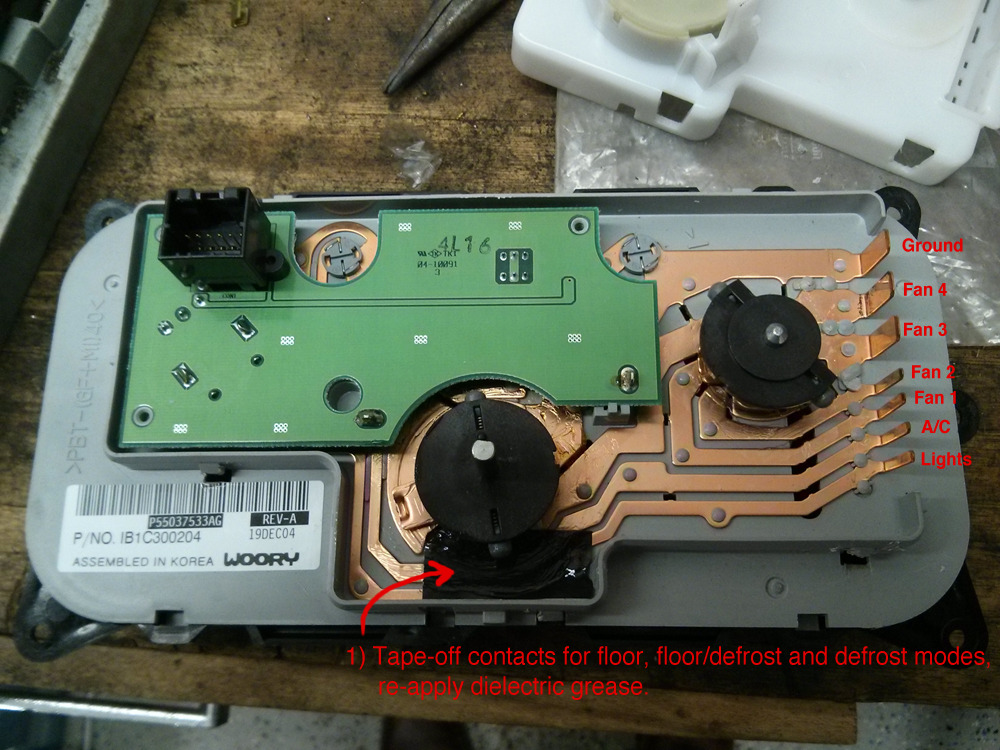
If it doesn't work, check over all the steps carefully. Make sure the cuts and wire attach points look just like the picture. You can always solder your cuts closed and remove your installed wire to take it back to original operation.