LOST JEEPS http://www.lostjeeps.com/forum/phpBB3/ |
|
Kennedy lift pump installation http://www.lostjeeps.com/forum/phpBB3/viewtopic.php?f=98&t=39362 |
Page 1 of 2 |
Author: | KeighJeigh [ Mon Jan 19, 2009 4:35 am ] |
Post subject: | Kennedy lift pump installation |
Since I'm about to install a lift pump in CRD #2, I decided to review my installation of the pump in CRD#1. My homemade bracket and jerry-rigging isn't the best but it was cheap and has worked flawlessly. Nonetheless, I think the pictures may help those seeking to take on this project with an externally mounted lift pump. Here are the hardware pieces I collected including the bracket using angle braces from the hardware store. The fittings are 1/2' with 3/8 nipples. (The only thing that actually comes with the pump from Kennedy Diesel, is the pump.) The idea was to find something that didn't require welding or cutting - and only minor drilling - to fit the pump, allow it to be easily mounted and provided at least minimal protection. The pump mounts are on the top of the pump and there are no through-holes so I wanted a bracket I could mount it to and then mount with a gap between it and the frame so I could access the pump bolts for whatever reason. ![]() Here is the assembled bracket. I would have preferred it ran down below the bottom of the pump but since the pump sits way up under the car I think it's OK. It only serves as basic protection against gravel, mud etc.. but probably isn't needed. ![]() Painted to look nice & ready to install: ![]() Basic mounting done: ![]() 
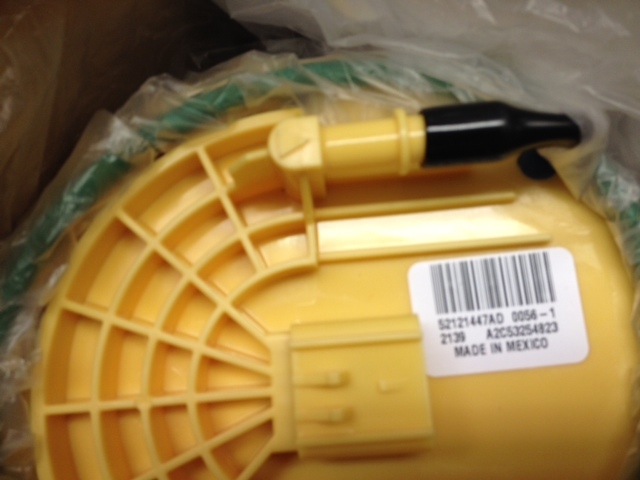
Here is what the infamous Silly-air-sucking fittings look like. They are no longer relevant since you are now pressurizing rather than vacuuming. ![]() A simple, old fashion hose-over-line-with-clamp fitting. I spliced into the plastic line, but you will want to do it more carefully and splice into the 3/8 metal line. By golly, it works just fine and there is no way mine's coming off. ![]() I used the high quality lined hose: ![]() I tracked down the wiring harness by looking under the carpet behind the seat on the drivers side: ![]() But you tap into it from next to the door jam. You can also see my ground wire for the motor here. You will need to tap into the blue/orage wire for your power. This is important. It is not just a wire that energizes when the ignition is on. The correct wire stays on for about 15 seconds when you turn the ignition and then turns off. It stays on continually when the engine is running. TEST it first. I'm not color blind but I found it very difficult to accurate discern color differences. Because there are so many similar looking wires, my first choice, after testing turned out to be wrong. Poke the perceived correct wire with the multimeter, turn on the ignition and the watch to see if it goes off after 15-20 seconds: ![]() The wire bundle. There is a mess of 'em: ![]() OK, now this part was just plain old fashioned painful for me. You need to thread the wiring through a grommet which is located a ways under the under the carpet under the seat. Because it is under the seat, it doesn't lift much. There may be a better way to do it but without removing the seat, I'm not sure what it is. I ended up with some nasty scrapes jamming my arms way up under the carpet to find the grommet. It is easier to thread the wiring up from below but you still have to fiddle around to find it under there: ![]() And here is the grommet you are looking for from under the car. This allows you to thread the power through the floor without drilling another hole. ![]() In place and hooked up. Some claim a reduction in noise, others claim reduction in turbo lag, some claim claim reduction in the incidence of the common cold. I have not noticed the major performance improvement that others claim - except that it doesn't suck air bubbles, which means it runs more regularly, which I suppose IS a major performance improvement. The ease of changing filters and avoiding the major fuel bubble hassle and faulty fuel manager problem I just experienced with CRD#2 makes it worthwhile all by itself: ![]() |
Author: | dgeist [ Mon Jan 19, 2009 9:56 am ] |
Post subject: | nice write-up. |
One comment would be that the harness is already pinned out for your lead under the carpet: http://kj.polter.net/pics/cummins_pump/10.html so that might make the install a little cleaner/safe than splicing into the bundle. Dan |
Author: | gmctd [ Mon Jan 19, 2009 3:40 pm ] |
Post subject: | |
Another potentially leaky fitting is on the in-tank module supply-line connector - that also should be rubber-hosed and clamped - air, being lighter than fuel, will leak into the snap-in fuel connector even tho fuel does not leak out - fuel contracts in winter, becoming denser - slight gelling enhances that situation, meaning your system will pump more air than in warmer seasons Good fix for any aux lift-pumpless KJ CRD is to eliminate those two factory-installed leaks with suitable rubber hose and clamps, allowing your CP3 to do it's assigned tasks, season by season |
Author: | DieselsRule [ Mon Oct 26, 2009 10:30 pm ] |
Post subject: | Lift Pump |
This is an excellent write up and the pictures are great. I have no idea how you come upon the information on the wiring location, color, and test sequence but it made this job possible. I installed a lift pump on my JEEP yesterday afternoon and hope this eliminates the engine quitting in 0º and below weather. We will soon get the test... I went through 3 filters last winter and I was using anti gel. I think the injector just was losing suction. Without this website and the shared information how would we keep these beasts running! |
Author: | dgeist [ Tue Oct 27, 2009 8:16 am ] |
Post subject: | Re: Lift Pump |
DieselsRule wrote: This is an excellent write up and the pictures are great. I have no idea how you come upon the information on the wiring location, color, and test sequence but it made this job possible. I installed a lift pump on my JEEP yesterday afternoon and hope this eliminates the engine quitting in 0º and below weather. We will soon get the test...
I went through 3 filters last winter and I was using anti gel. I think the injector just was losing suction. Without this website and the shared information how would we keep these beasts running! The "how" is mostly curious people poking around under their carpets saying, "hey, there's a lead here that doesn't go anywhere. Let me check the factory wiring manual and see what that is for" (same thing with the fuse). gmctd in the last post (and others) is definitely right about the factory setup being able to handle the job IF all the leaks are plugged, but I personally don't mind the extra insurance against running the fuel injector dry and also would rather do the pump install than chase down pinhole air gaps all over the place ![]() Dan |
Author: | KeighJeigh [ Mon Apr 26, 2010 12:13 am ] |
Post subject: | Re: Kennedy lift pump installation |
Update: This setup has operated flawlessly since I installed it. I forget about it being there until I change the filter - as I did the other day - when I'm suddenly reminded of how much headache this has saved me. Important note to those who use the lift pump when flushing out air bubbles after changing the filter: Once the engine is running, the lift pump stays on, but runs only about 20 seconds or so when you turn the key to the on position without starting the engine. Therefore, you will need to turn the key on & off several times as you bleed it. |
Author: | steve@offroading.net [ Mon Jan 20, 2014 1:20 pm ] |
Post subject: | Re: Kennedy lift pump installation |
Just followed this to install a lift pump in my 2003 2.8 export CRD. There are some wiring differences as below: The feed under the rear passenger seat is in connector C306 and is the dark green/while lead on pin 3 ![]() It doesn't go anywhere so I cut it before the connector and soldered a spade connector to it which connects to the +ve for the pump as per the previous instructions. Also, feed A141 stops dead at connector C102 which is down by the bonnet release. I took a feed from the big white connector next to it, C100, and spliced off the feed into pin 54 (plain white wire) to the dark green/white that goes into C102. This is the blower motor relay feed which is only activated with the ignition on and is covered by a 10amp fuse. There is no feed that runs for 20 seconds then off unless ignition on the earlier exports so the pump is always on with ignition. |
Author: | jthomas999 [ Fri May 02, 2014 8:35 am ] |
Post subject: | Re: Kennedy lift pump installation |
Is there a part number for this pump? Sent from my DROID RAZR HD using Tapatalk |
Author: | ATXKJ [ Tue May 06, 2014 12:17 am ] |
Post subject: | Re: Kennedy lift pump installation |
Geeesh - Zombie threads don't know a part number - but if you left click highlight and right click search Kennedy diesel isn't hard to find I think this one is what folks were using- but the intank is about the same price or cheaper. http://www.kennedydiesel.com/categoryresults2.cfm?Category=1&SubCategory=158 |
Author: | JAFO [ Thu Mar 03, 2016 3:32 pm ] |
Post subject: | Re: Kennedy lift pump installation |
I just spent the last two hours installing a lift pump per the instructions in this thread. I have to say this is something I should have done right from the start! Props for this write up! |
Author: | dhenderz [ Thu Mar 03, 2016 3:47 pm ] |
Post subject: | Re: Kennedy lift pump installation |
Interesting project. I am just curious why would someone choose this setup to solve the fuel issues when you can install the Carter in-tank pump for half the cost? Am i missing something? |
Author: | flash7210 [ Thu Mar 03, 2016 4:29 pm ] |
Post subject: | Re: Kennedy lift pump installation |
The Kennedy pump is just a different way of accomplishing the same goal. For those who don't want to drop the tank or mess with the tank sending unit, this pump is a good reliable option. And even if it does fail, it won't get in the way of fuel delivery and will be easy to replace. There are a dozen ways of accomplishing this. I use a Facet pump. Some use a AC Delco pump for a GM 6.5L. |
Author: | WWDiesel [ Wed May 04, 2016 9:44 am ] |
Post subject: | Re: Kennedy lift pump installation |
Gypsy62 wrote: Question: is there a metal hose-barb for the fuel-supply on TOP of the tank??? If so, what's the minimum disconnect procedure to provide adequate access for a clamped-hose install? It would be ideal to eliminate those bogus connectors by just removing that stretch of OEM fuel-line altogether, and replacing with quality line (with hose clamps). If possible, from the top of the tank to the kennedy, and then on the pump-output side double-clamp the new hose onto the OEM metal line heading downstream. Thoughts? The fitting on the top OEM fuel tank module is plastic, not metal and uses the same quick disconnect fitting as on the gassers. The only easy way to gain access to the fitting is to drop the fuel tank far enough to get at it. Just remember, ANY leak of any kind between the pump you are installing and the fuel tank can suck air into the system...that is why many choose to do the in-tank pump verses an outside pump which puts the entire system under positive pressure thus eliminating any possibility of air inleakage... ![]() |
Author: | Gypsy62 [ Wed May 04, 2016 4:57 pm ] |
Post subject: | Re: Kennedy lift pump installation |
My vast experience modifying ford 6.9s to run on veg-oil compels me to use easily replaceable externally mounted fuel pumps in any custom application. There's no solid evidence from LJ members that the kennedy pump/installation is NOT a long-term reliable alternative to in-tank. Further, in any potential future fuel-supply diagnostic scenario, the pump is completely accessible for evaluation as a suspect component. I absorb the argument that the in-tank's "push" factor reduces/eliminates any potential air-intake throughout the fuel-delivery system, but for stated reasons I prefer an externally accessible pump. I'm going to search for pics of the plastic (bummer) tank-top fitting to evaluate new hose from tank to kennedy. At least that would eliminate two stupid OEM fuel connectors, and double-clamping the new line to the above-tank fitting reduces any future need to drop the tank for diagnostics. I've R&R'd too many fuel tanks on too many vehicles. Imo the procedure is one of the dirtiest known, with endless caked-crap (frequently, also fuel) to the face/eyes. Whenever possible, it's a chore I try to avoid. At least OEM in-tank pumps usually have a removable in-vehicle plate for easy-access. Has anybody cut/fab'd an access plate for their KJ? Pics? |
Author: | WWDiesel [ Thu May 05, 2016 11:37 am ] |
Post subject: | Re: Kennedy lift pump installation |
Gypsy62 wrote: Has anybody cut/fab'd an access plate for their KJ? Pics? If external pump is what you like that is fine, it certainly is better than having no pump! As to the access hatch, see this thread: According to what I have read, only european vehicles have this hatch shown in this thread, US vehicles do not have it, but one could be fabricated and installed if desired... http://www.lostjeeps.com/forum/phpBB3/viewtopic.php?f=98&t=81821&hilit Picture of top of new fuel module: this is one of the plastic fittings (type) you will be dealing with on top of the OEM fuel tank module... ![]() |
Author: | Mountainman [ Thu May 05, 2016 2:16 pm ] |
Post subject: | Re: Kennedy lift pump installation |
Gypsy62 wrote: My vast experience modifying ford 6.9s to run on veg-oil compels me to use easily replaceable externally mounted fuel pumps in any custom application. There's no solid evidence from LJ members that the kennedy pump/installation is NOT a long-term reliable alternative to in-tank. Further, in any potential future fuel-supply diagnostic scenario, the pump is completely accessible for evaluation as a suspect component. I absorb the argument that the in-tank's "push" factor reduces/eliminates any potential air-intake throughout the fuel-delivery system, but for stated reasons I prefer an externally accessible pump. I'm going to search for pics of the plastic (bummer) tank-top fitting to evaluate new hose from tank to kennedy. At least that would eliminate two stupid OEM fuel connectors, and double-clamping the new line to the above-tank fitting reduces any future need to drop the tank for diagnostics. I've R&R'd too many fuel tanks on too many vehicles. Imo the procedure is one of the dirtiest known, with endless caked-crap (frequently, also fuel) to the face/eyes. Whenever possible, it's a chore I try to avoid. At least OEM in-tank pumps usually have a removable in-vehicle plate for easy-access. Has anybody cut/fab'd an access plate for their KJ? Pics? Interesting. My jeep came with one of the cheap inlines, like a carter or something, which are about $50. I would replace it for a Kennedy, but it's passive like the Kennedy, so even if it fails, the CP3 will still keep it running. After dealing with a dozen of these CRD's, and the notorious strength of the CP3s, I wouldn't even add a lift pump if I didn't already have one, unless I was going to do secondary, much finer, filter system. I would just upgrade the fuel head and remove the supply quick connect leaker. I happen to be adding secondary filtration, so I guess if a failed pump means that I'd be stranded (?), then I might carry a spare $50 pump on expeditions. I think the CP3 is one of the best parts we got out of Chrysler, and I'm surprised ![]() |
Author: | Gypsy62 [ Thu May 05, 2016 3:39 pm ] |
Post subject: | Re: Kennedy lift pump installation |
Great pics, useful link. I bought my kennedy months ago (along with Sas-Q 1/2, installed 2 weeks ago) but have been forced to get off my arse to install now because of a fuel-supply issue post injector-R&R. With both of the OEM connectors swapped for dub-clamped hose, I am thoroughly confident that the external pump install is going to be as effective and reliable as the in-tank mod. I'm also adrenalized to see if this helps with turbo-lag, as some have claimed. As 1 in 3 LJ posts will testify, re-pressurizing the fuel system (from head to rail) is a too-common conundrum. That fact alone seems sufficient cause to install an electric pusher. Another fine argument is less abuse of the starter and battery to re-pressurize the system after wrenching on fuel-system components. A BATCH OF IGNITION ON/OFF CYCLES TO "POWER-BLEED" AIR FROM FUEL-HEAD WORKS GREAT! No starter-cranking necessary, just energize pump. In WVO systems, I designed/installed a supply system using switches and gate-valves that allowed the main electric supply pump to also function as a general-use transfer pump. That may be a handy mod for some to consider, but I'm trying to leave my KJ as uncluttered as possible. However, I view an electric pusher as essential, not optional. Even one instance of dead-battery/starter from over-cranking in a remote location would be enough evidence to convict. UPDATE: after a month with Kennedy inline, there's definitely an improvement in launch-lag. Not quite a gassers response, but way less sketchy than before when crossing before oncoming traffic! Have folks who've done "in-tank" pumps had similar results??? |
Author: | Mountainman [ Thu May 05, 2016 5:48 pm ] |
Post subject: | Re: Kennedy lift pump installation |
hmm, the two jeeps that surprised me with their pep both had lift pumps. Maybe they all just suck a little air without one? |
Author: | WWDiesel [ Fri May 06, 2016 11:19 am ] |
Post subject: | Re: Kennedy lift pump installation |
You are dead on about the secondary fuel filter!!!! Every diesel Jeep owner should consider installing a lift pump and a secondary 2 micron final fuel filter in addition to the OEM primary filter. The stock OEM fuel water separator filter is only rated new at ~20 microns and degrades from there over time with use. (Mopar 52129238AA rated at 20 microns) A 2 micron final filter protects the CP3 and most importantly the injectors which do not tolerate contaminated fuel....and injectors are not cheap!!!! A secondary fuel filter is cheap insurance.... ![]() Most of the aftermarket replacement fuel filters like Baldwin, Fleetguard, and Donaldson all have better micron ratings than the Mopar unit... ![]() |
Page 1 of 2 | All times are UTC - 5 hours [ DST ] |
Powered by phpBB © 2000, 2002, 2005, 2007 phpBB Group http://www.phpbb.com/ |