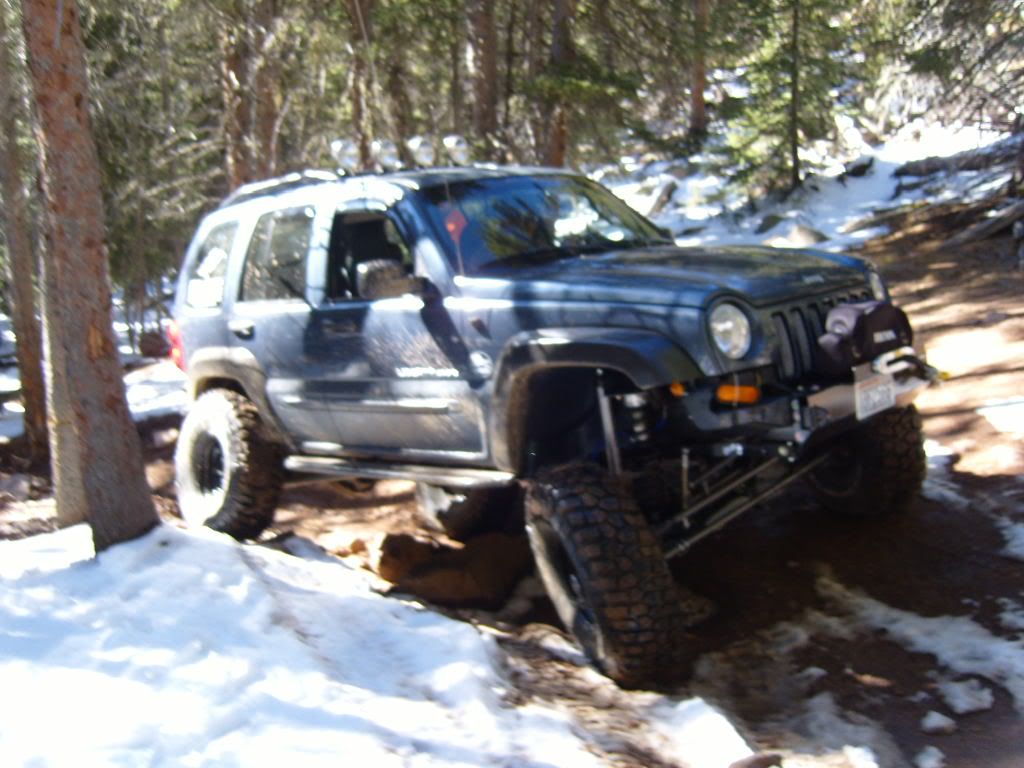
Ok gang, here goes, During this, I did the franken lift, Moog K3199 lower ball joints, new brakes and new upper arms from Jeepin by al. There are other write ups on the lift install, and I belive on the brakes too, so I will deal with the arms and ball joints only in this post.
Here are the parts (I painted the arms, they come as bare steel)

First thing, tools.
You will need a variety of sockets from 19mm up to 35mm (for the axle nut)
Air ratchet is recomended if available.
Large c-clamp style press (with a sleeve/cylinder to guide the old joint out and new in straight and a plate large enough to disperse presure over the top of the ball joint) Can be rented/borrowed from many auto parts stores.
Jack and Jack stands, or lift if available
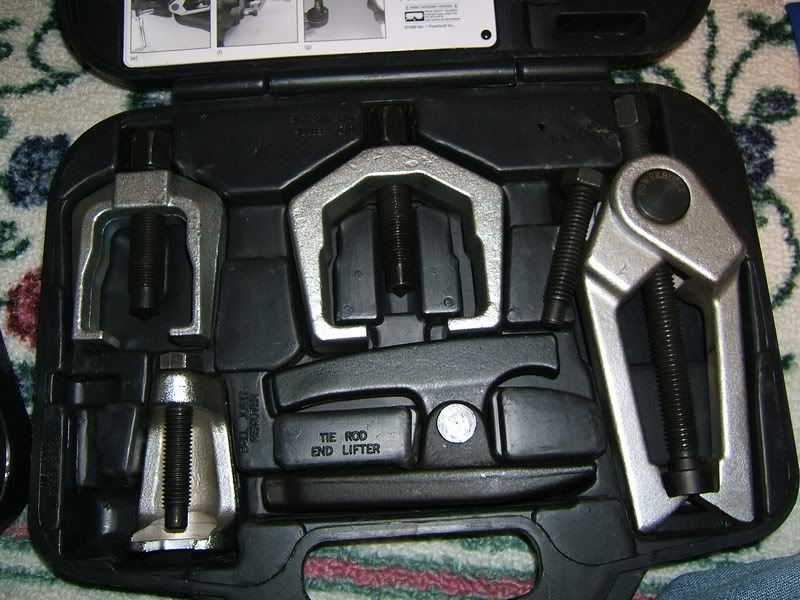
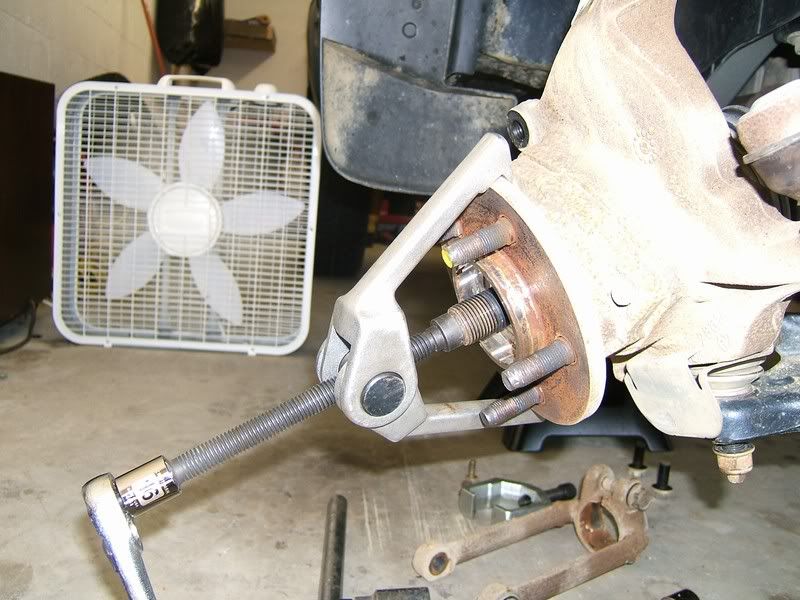
Tie rod end press/remover (I do not recomend a pickle fork) here are pics of the tool I am talking about, these are not of the actual use, just showing what and how it lines up:

Ok, now the job...
First, jack her up, remove the front tires, and place your jack stands.
Next remove your tie rod end and the ball joint nuts (upper and lower) and the hub nut (here is where an air ratchet helps greatly).
Remove the caliper, 2 bolts on the back side of the knuckle. The knuckle is the part with the hub, lug nut studs and the lower ball joint.
Be sure to tie the caliper up and out of the way, do not let it drop and hang on the brake line.
Next your brake rotor will simply slide off of the hub assembly.
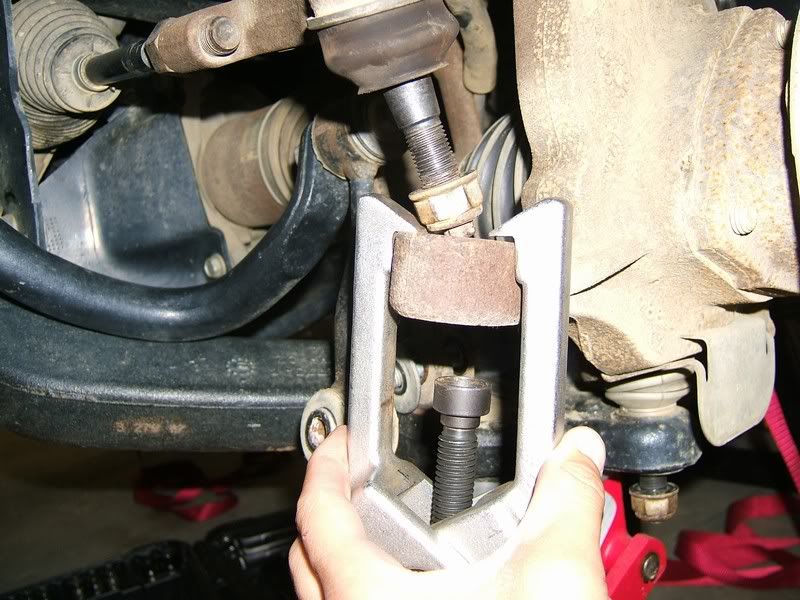
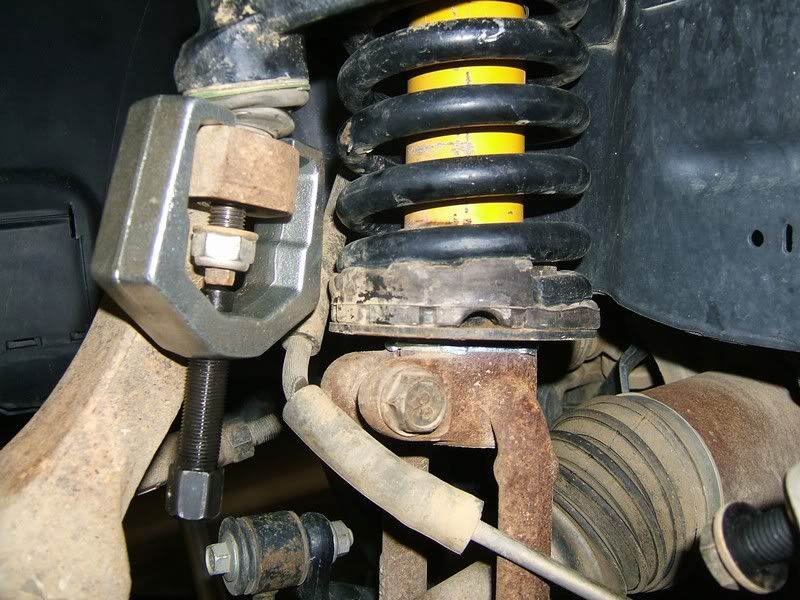
Once everything is unbolted, use the tie rod end remover to push the link out of the knuckle. I use the press to pop the ball Joint studs out of the knuckle and lower arm as well. Sorry I did not take pictures of removing the studs from the knuckle. I do not use a hammer to hit them out because I do not like that method (I go with what I was taught, and it is easy) The tool I use is in any parts store. I believe mine is Performance tools brand. It basically looks like a partially closed "C" with a threaded stud/bolt in the center. It will slide over the lower arm and the upper knuckle arms and is tall enough to fit over the ball joint stud. The studs have a divit in them in the center that the stud of my press fits into perfectly. The other end can be turned with a 3/8" drive ratchet, and tighten until the stud pops out of the hole. Very easy and no risk of swinging and hitting the wrong thing.
Once the studs are loose, lift up on the upper arm, and the knuckle will fall toward you, hold it and lift up, be carefull while pulling the knuckle off. The halfshaft will slide out of the hub, do not let it just drop out. Tie up the end of the halfshaft.
notice how I tied my caliper up and the half shaft :

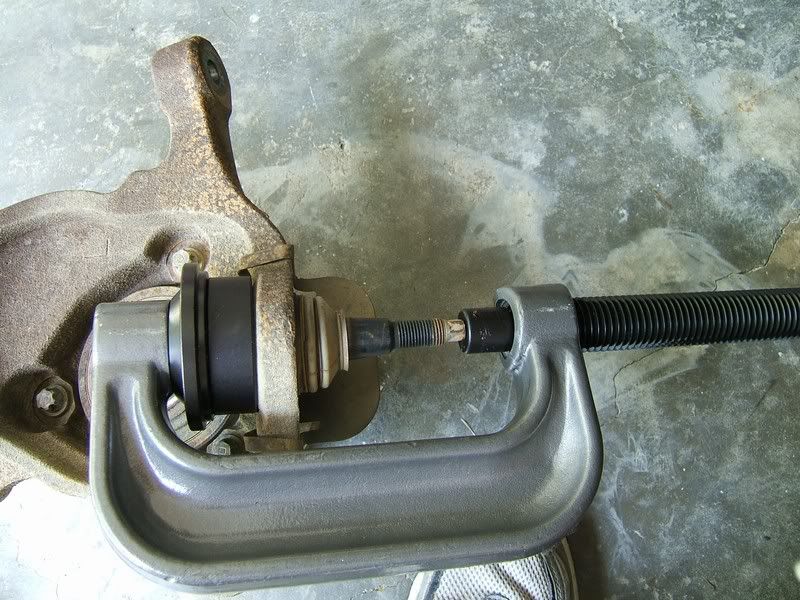
Now that the knuckle is off, take it to the work bench and get the ball joint press.
Here is how I pressed out the old joint:
now you see how you could easily use a large c-clamp and some steel conduit and a piece of metal to make a press if you can not get one at your auto parts place of choice.
Once the old joint is out, I recomend using some grease and smearing it on the ball joint boot and the seat of the joint to ease pressing it in. Be sure to clean the area the joint goes into and the rim it sits on in the knuckle before you press in the new one.
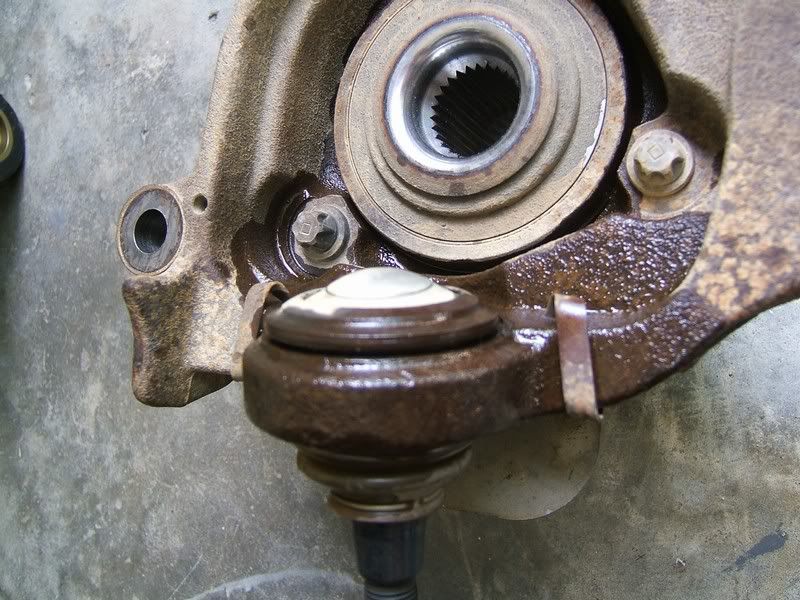
Here you see the new joint in the knuckle:

notice the heat shield can be reinstalled now. (it must be removed to get the old out and new in) It just slides on and basically pinches onto the knuckle. Also notice how much larger the Moog replacement ball joint is!
Now for the upper:
These are real easy!!!
You will need to remove the battery, batt tray, and the air filtr box to access the bolts.

If you look close you will see 2 black metal brake lines below the front diff breather in my pic. You will need to be carefull not to bend them too much. They can be gently pushed out of the way to remove the bolts and nuts. you only need a 19mm (if I remember right) and a 1/2 inch or 3/8" ratchet, your choice and about a foot and a half of extensions to reach the rear nut. You do not need to hold the bolt heads. They have flanges on them that will rotate against the side of the body to hold it for you. This is another point to go slow and watch the brake lines to ensure you do not crush them.
pic of passenger side, looking at the lower part of the pic toward the right corner, you will see the brake line coming up above the head of the bolt for the upper arm. This is the one you need to watch as it turns and the flange rotates up:

Once unbolted, you just pull the bolts out and remove the arm. If your bushings are pushed out as mine were, you will have to pull them off. If good bushings, you may be able to just let them fall out. Here you can see factory vs Al's arm, notice the larger greaseable ball joint.

One thing I noticed while wheeling this weekend, Due to the grease zerk, then you will need to notch the upper suspension bumpstop or the zerk will hit it. I have not done it yet, and will post pics when I do it. It may not be needed on newer KJ's because they have shorter bumpstops (mounted above the upper arm coming out of the fender liner)
Now, assembly...
This is tricky. I put in the new arms w/o help, so it is possible if you have long arms... It is tricky to get the arms lined up with the bolt holes, once lined up push the bolts all the way in. Install the nuts hand tight for now.
Next, untie the halfshaft and guide it into the hub. At the same time slide the lower ball joint back into the lower arm. Next pivot the knuckle upt to slide the upper ball joint into the upper hole in the top of the knuckle. Put the nut on to hold the knuckle onto the upper ball joint stud. (If using Jeepin' Al's arms, they come with a washer holding the boot on, you will need to put this washer on and then the castle nut. Also we have figured out the proper energyu suspension eurethane ball joint boot that works awesome!! (513102)
install the axle nut, and the lower ball joint nut. The Moog joint uses a castle nut and cotter pin to hold it in place. Next put the tie rod end back on the knuckle. Use the new nuts provided with the Moog joints.
I tightened the lower joint first, torque to 60 ft lbs.
Next I jacked up on the lower control arm (just enough to lift the front suspension, not off the jackstands)
I then tightened and torqued the tie rod end link to the knuckle 80 ft lbs.
Next the upper arm, tighten and torque the ball joint 60 ft lbs, and the arm mounting nuts to 90 ft lbs each.
A note on the moog Ball joints.
They provide new lock nuts for the tie rod ends, use them.
For the ball joints, they use a castle nut (looks like the top of a tower on a fort or castle) and cotter pins to hold them in place. Torque the nuts to 60 ft lbs, then look to see if the hole in the stud lines up with a notch in the nut. DO NOT LOOSEN THE NUT TO MEET THE HOLE!!!! Simply slowly tighten further to line the next notch with the hole to slide the cotter key in, then use a flat head screwdriver to split the key and fold the legs around the nut.
Now if using serviceable ball joints, grease them.
Torque the axle nut to 100ft lbs. To do this you will need the other wheel on the ground. At least I did other wise it spun freely ( I have the ARB up front)
Place the brake disk back over the hub, and slide the caliper back over the disk looking on the back side to line up the bolt holes to bolt the caliper back onto the knuckle. They are standard 21mm(if I remember right)bolts, no special socket needed. Torque to 100 ft lbs.
Next lower the side you had jacked up. Install the wheel and then lower the entire side. Repeat if needed for other side.
If you replace the upper arms with Al's, you will need an alignment. Al's arms are for Lifted KJ's ONLY. They will kick the top of your tire out. I had mine aligned afterward, and now actually have room for more adjustment. With the factory arms, I was maxed out, and my alignment was still off. Al's arms fixed that, and they are service able ball joints as well.
I hope this helps, I did it by myself, and due to all I did and the stall rental at the auto hobby shop, I did not take too many picks. a lot of the ones I did take are on my new cardomain site page 2.
http://www.cardomain.com/ride/2169125/2 It is an easy job. If you have the tools available. Mine took a while due to the franken lift, but it is a pretty easy job that can be done with hand tools (if you have a breaker bar) in a driveway or garage(if your jeep fits in it)
If any clarification is needed, feel free to pm me with questions.
Ted