It is currently Fri Apr 19, 2024 5:42 am

All times are UTC - 5 hours [ DST ]


Post new topic Reply to topic  [ 15 posts ] 
Author Message
 Post subject: picture essay no. 1...modify stock '98 TJ...lots of pictures
PostPosted: Mon Oct 13, 2008 5:31 pm 
Offline
Lifetime Member
Lifetime Member
User avatar

Joined: Thu Jul 07, 2005 12:26 pm
Posts: 174
Location: altamonte springs, fla. (orlando)
Last year I spent some time in my garage working on my stock jeep. I took a lot of pictures and put some of them together with some text. I posted it on another forum last year. I thought I'd copy it over to here for anyone interested. It's way too much and I apologize if anyone is annoyed. There are five "chapters", this is the first one. I have since completed a few other things that aren't reported here.


-----------

A little more than four years ago my wife and I purchased a new '04 KJ jeep liberty 4x4 for camping vacations. I discovered the internet jeep discussion forums and I began to modify the KJ in the limited ways that were available for that model. We went to a jeep jamboree and then out to Moab, Utah. As I learned more about the hobby, I decided I would rather drive a TJ model, so I switched.

This is a picture essay of my '98 TJ build-up....I'm reluctant to post because it's more pictures than is appropriate for a short answer forum. The modifications to my jeep aren't anything that thousands of others haven't already done. It isn't intended as a "hey look at me" thing. I wanted to present it as a technical lesson for fellows like me who just got involved in working on a jeep. There's so many pictures, I broke the story down into separate essays. The complete story is up to where I ran out of money for more parts.

I don't claim to know very much more than what you will see in the following....and you might see something here that exposes my ignorance. My advice is you can't believe anything you read on the internet. You should verify with your own efforts.


how I drove around town for the first 18 months....
Image

I picked up a very clean, stock condition, never used, everything worked....'98 sport model with a dana 35 rear axle assembly, 3.07 gears, manual 5 speed transmission, hardtop, 28 inch tires. I knew about the preferable rear dana 44 axle assembly option and I looked for that. But I also considered the condition and mileage and other intangibles as priorities. After looking around for awhile, I found one I liked. I knew I was going to modify the jeep and I wanted to do the work myself if possible. Like many others, I'm on a budget and it was going to require that I enjoy this hobby over a extended period of time.

My opinion is that a useful and interesting education doesn't usually come without some expense....whether through effort or dollars. I didn't want to buy a jeep already built by a previous owner. I didn't want someone else's taste in wheels or tube bumpers. I wanted to have hands on experience with even the most basic stuff that gets discussed on the internet and beside the trail. Six guys standing around kicking the dust with their boots and talking jeeps....and only two know what they're talking about. I wanted to be one of the two.

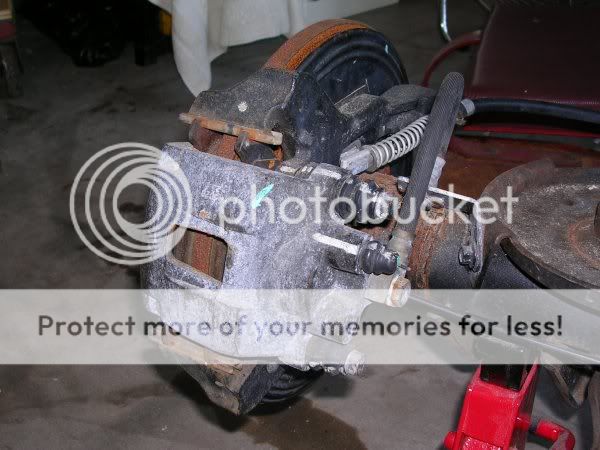
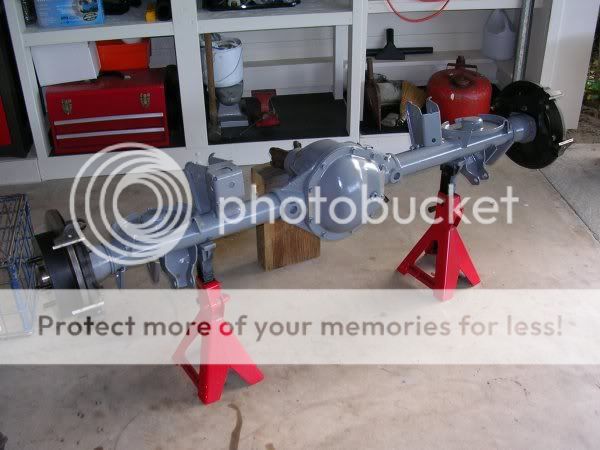
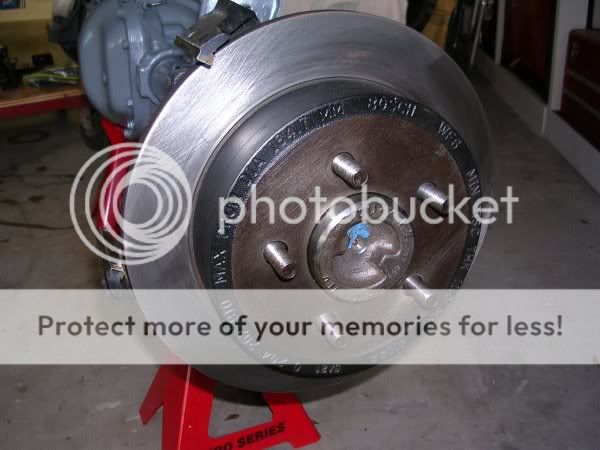
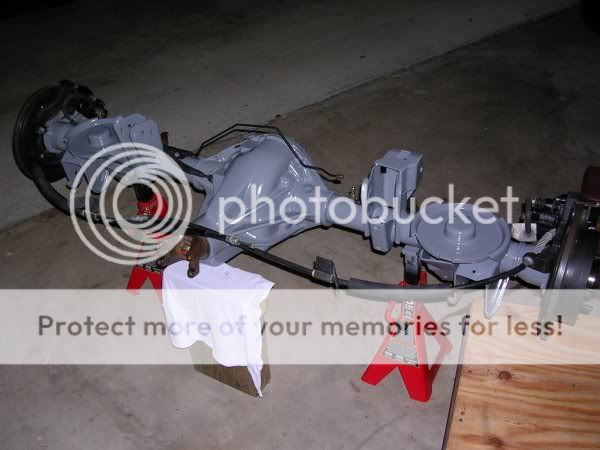
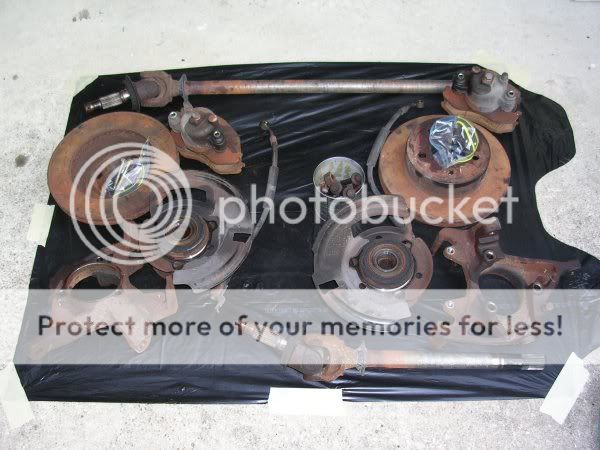
So after I got this TJ, I kept reading the forums, collecting parts for over a year, and stacking them in my garage. I joined the local jeep club and met some folks who taught me a few things. I made my first purchase priority a rear dana 44 axle. Through the club network, I found an '03 TJ rubicon rear dana 44 axle assembly in my own neighborhood. It was complete with air-actuated locking differential, limited slip/posi when unlocked, 4.10 gear ratio, and factory disc brakes....and it bolts right into my TJ without modification.
Image

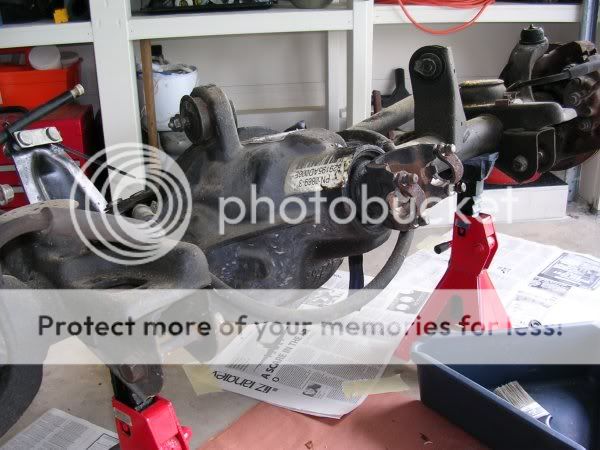
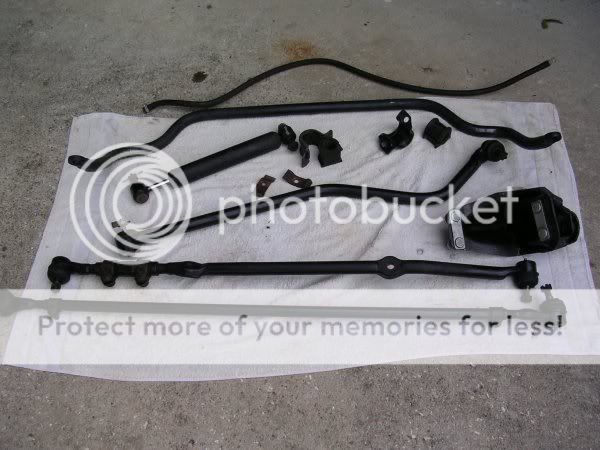
I was also specifically looking for (and found) a front axle from a late '90s XJ with a four cylinder motor. A funny thing about the internet....it seems everyone knows about a $100 axle assembly at their local salvage yard. Well I never found that kind of great dollar deal in my limited search around central florida. I was hoping to find a reliable, stock condition axle. I found what I was looking for but I ended up having to drive about 100 miles. This is a '99 XJ front dana 30 high-pinion axle assembly from a four-cylinder cherokee. With four cylinders I get factory 4.10 gear ratio. I paid a little more than the fellas on the internet brag about...but less than what it would cost me to regear my TJ dana 30. With a junkyard purchase, there's always a risk of bent tubes, bent steering, bad gears, bad bearings, etc. If I'm lucky and the axle isn't junk, I'm gonna get a gear ratio I can live with. As a plus, I get a high pinion (high driveshaft location), spare axle shafts, maybe some reusuable steering and brakes. (I actually ended up selling some of the parts later, the four control arms, some of the steering linkage....beer money, but hey).
Image

I think the YJ wranglers were high pinion front dana 30. I guess there could be some discussion as to why jeep engineers switched when they redesigned and gave us the TJ with a low pinion front. Most everything I decided to do, I based on reading the internet or talking to jeep guys I hardly knew. Swapping in a rear dana 44 and a XJ front dana 30 is frequently suggested.
Image

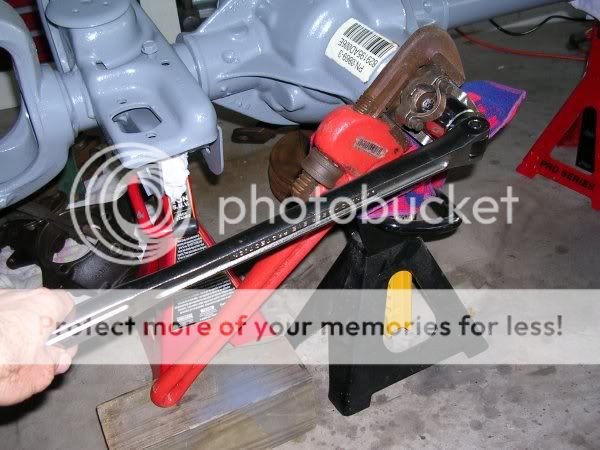
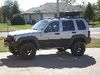
So after I had most everything I needed, I took some time off work. The following pictures are "part one" of a ten day vacation in my garage. I'm now driving the jeep with 33 inch tires after installing/modifying the jeep in the frequently suggested methods....I'm 53 years old, reasonably educated, with a box of tools. I'm not a mechanic. But I did all the following by myself with hand tools and budweiser....
Image

Image

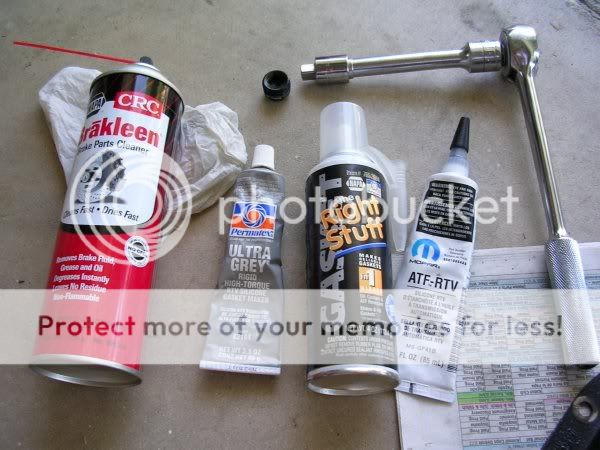
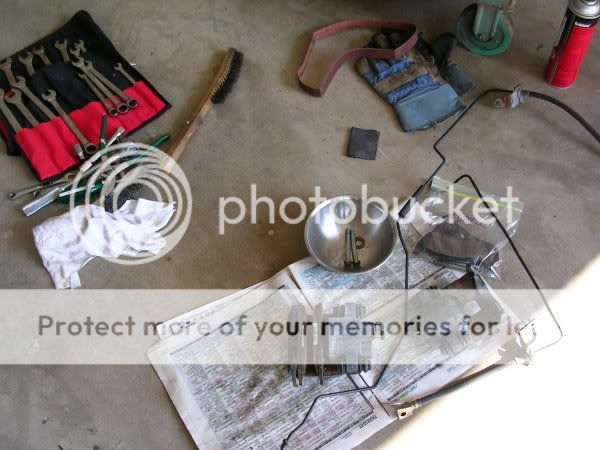
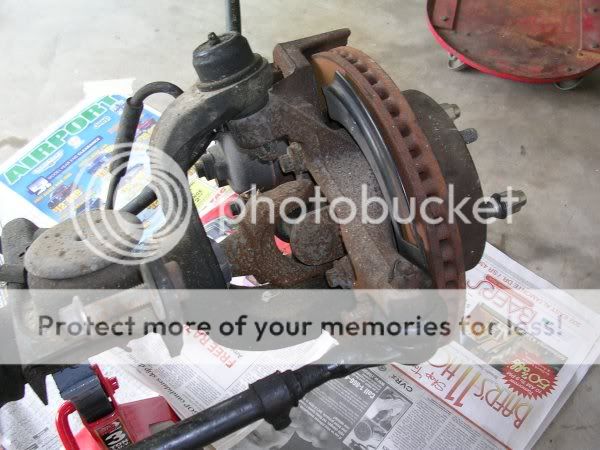
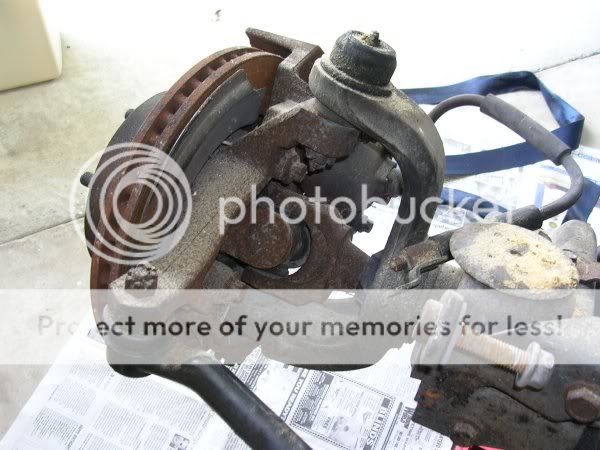
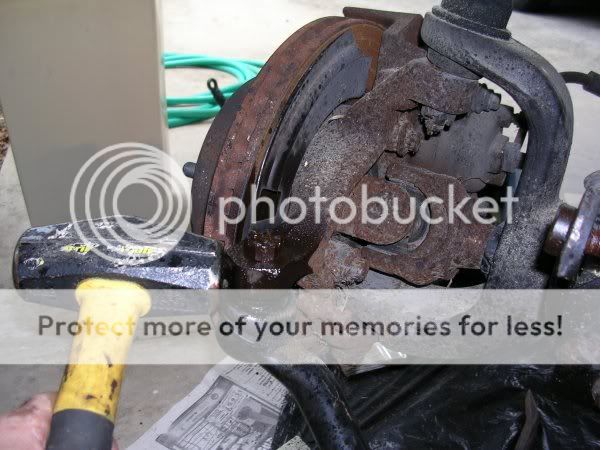
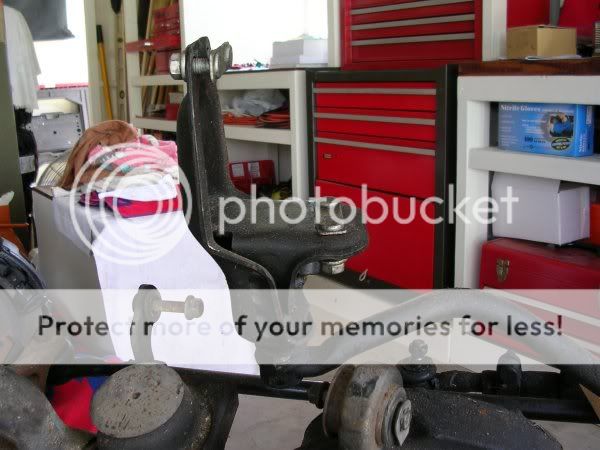
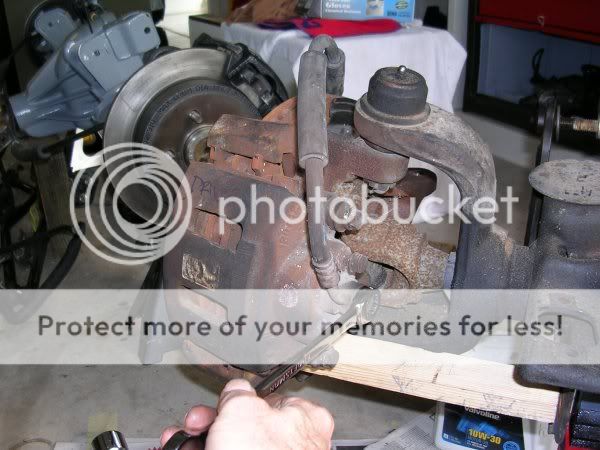
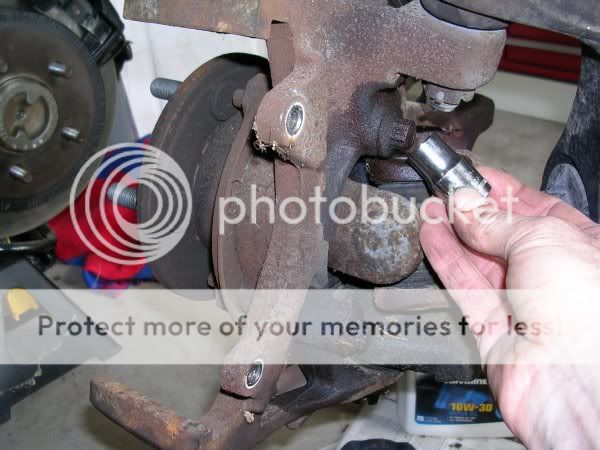
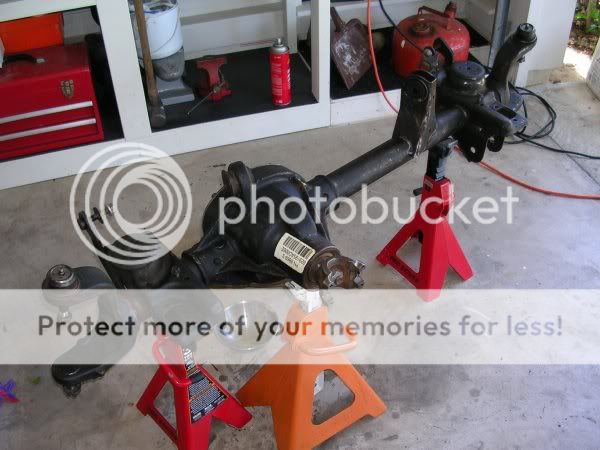
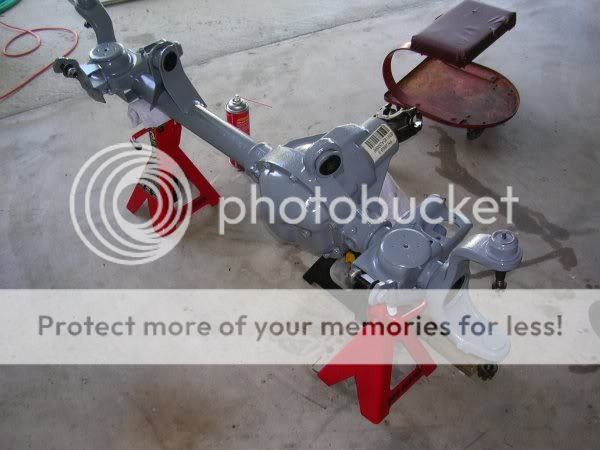
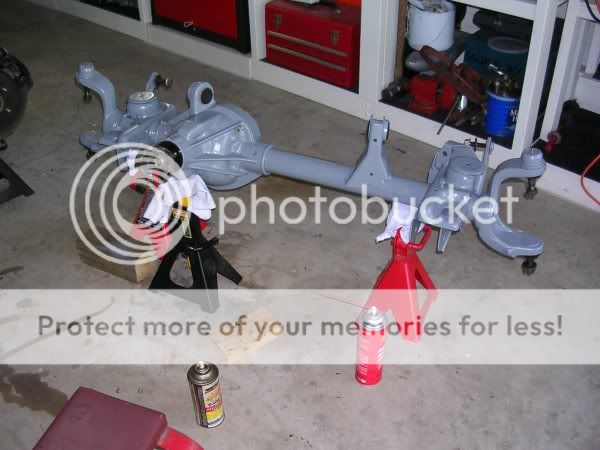
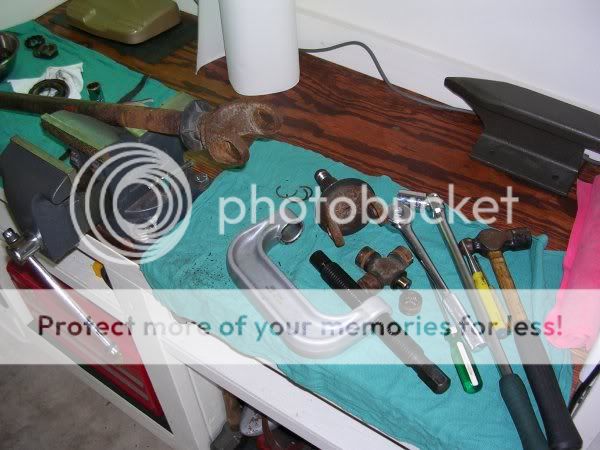
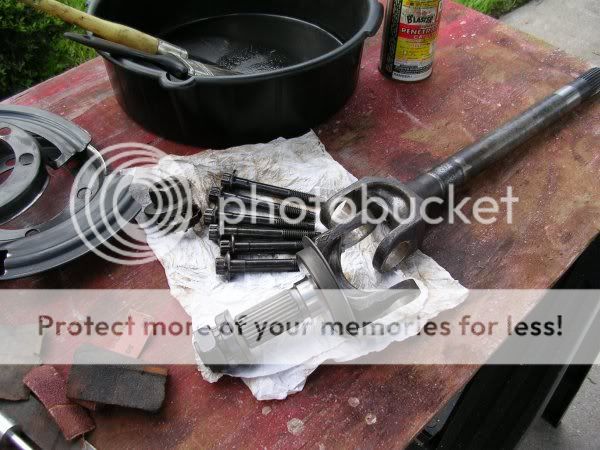
first, I have to clean up my replacement axles....this is the rear dana 44....it came from a reliable source and besides a little surface rust on the brake rotors, it wasn't going to require much preparation.
Image

Image

Image

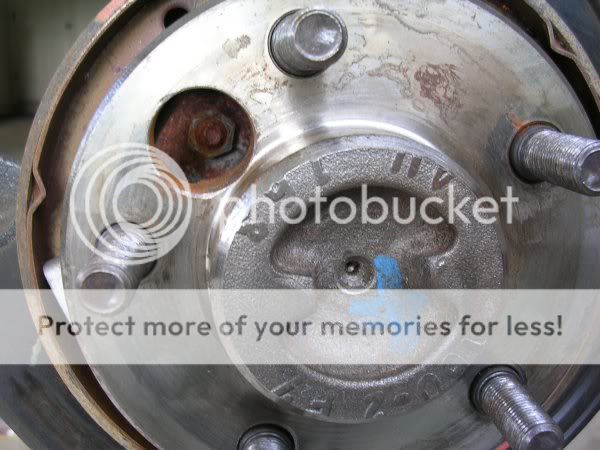
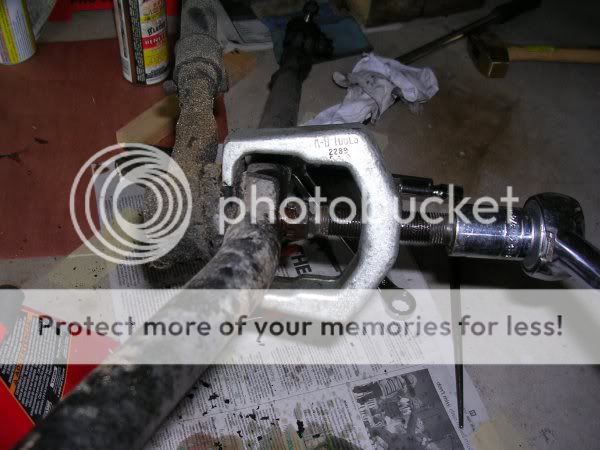
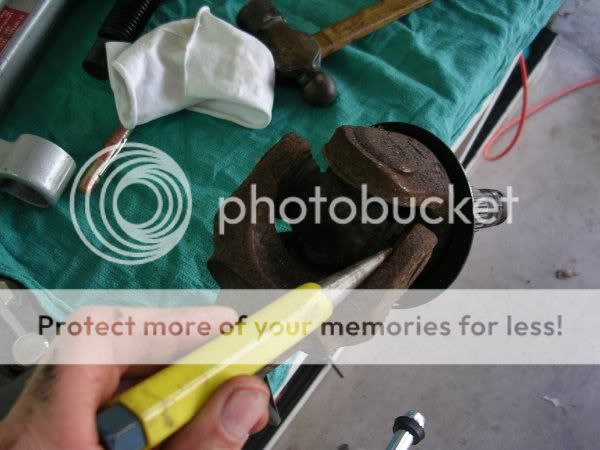
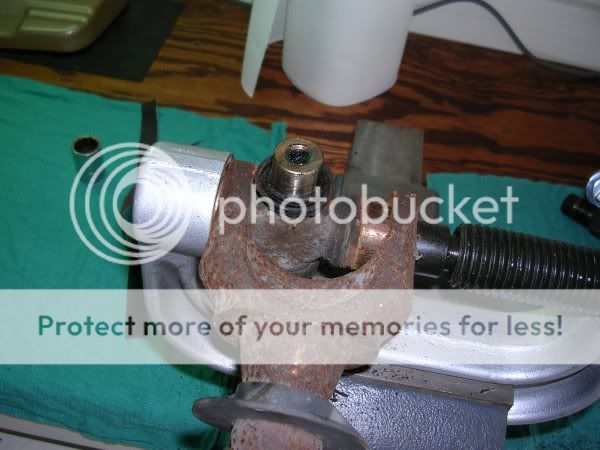
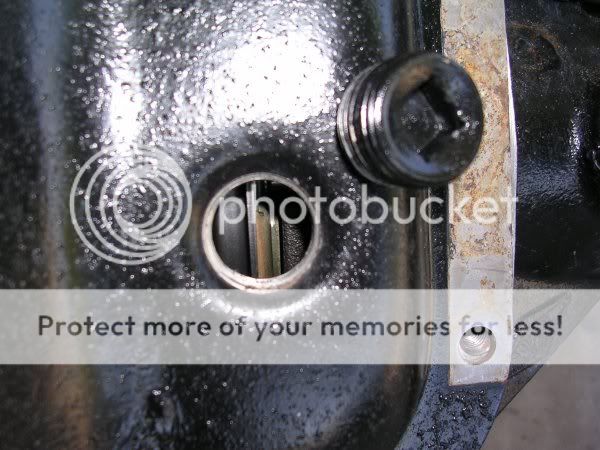
the air locker diaphram is behind the fill plug in the cover....you have to be careful not to thread the fill plug too deeply into the cover or you will contact the locker.
Image


(continued in follow-up post)

_________________
steve

'98 TJ sport gunmetal blue
33's with modifications to make them fit....still need a few more things....

first jeep....
'04 liberty sport 4x4 khaki
modified as recommended by L.O.S.T.....major fun on vacation....

L.O.S.T. (in fla.) #000496


Last edited by camper on Fri Jan 02, 2009 10:34 am, edited 5 times in total.

Top
 Profile  
 
 Post subject: first part of the story (continued...)
PostPosted: Mon Oct 13, 2008 5:34 pm 
Offline
Lifetime Member
Lifetime Member
User avatar

Joined: Thu Jul 07, 2005 12:26 pm
Posts: 174
Location: altamonte springs, fla. (orlando)
These are the factory tags on the rear differential cover. Notice the 4 oz. friction modifier requirement....the source of internet forum confusion. The synthetic 75w-140 gear lube will already have a friction modifier blended in. And the design of the rubicon limited slip/posi doesn't even require a friction modifier....(based on what I've read.....on the internet)
Image

The "thick ring gear" of the rubicon d44....and the rubber air line with a simple wire retainer that is claimed to be suspect. A separate small electric air compressor/pump is designed to deliver about 5 psi to the locker and then switch off. If the hose becomes unattached, obviously the locker will not engage, and also the pump will never cycle off. Later, I read it's common for this hose to come loose. Next time I pull the cover to change gear oil, I'll replace the wire retainer with a better gear style hose clamp.
Image

Image

When the locker engages, a electrical circuit is closed through a two wire plug in the back/side of the pumpkin (plug wire is hanging over the tube on the right). I'll use a lighted rocker switch to fire the locker air pump and a separate indicator light somewhere near the switch. The lighted switch will indicate the locker pump is on....the indicator light will confirm the air pressure has engaged the locker diaphragm. I'll have more detail how I did this in a later chapter.
Image

At this point, I went ahead and buttoned up the pumpkin. I'll add gear oil later when I go to install the axle.

I had changed the automatic transmission filter and fluid in my '04 KJ just before I switched jeeps. I had this rtv gasket maker for automatic transmission fluid (ATF) left over. The cheese-whiz can is recommended by some jeep wrenches I know, but the shelf life for the relatively expensive container isn't great so you have to use it up in a short span of time. The gray rtv has worked satisfactorily for me on several differential covers. And of course, brake cleaner is the bomb for multiple uses....might as well buy it by the case.
Image

With this axle swap, I'll be getting rear disc brakes....
Image

Image

The parking brake cables for rear disc brakes have a different end clip than my cables for my TJ drum brakes. This axle came with the correct cables. I removed all the brake hardware to inspect it and also to prepare the axle for painting.
Image

Image

The picture is intended to show how to unbolt the axle shaft retainer flange....rotate the hub to four positions to remove the nuts. You should then be able to pull the axle shafts out of the tubes. I didn't pull the axle shafts because I was confident that this was a good assembly and I didn't want to introduce any unneccessary problems.
Image

(continued in the following post...)

_________________
steve

'98 TJ sport gunmetal blue
33's with modifications to make them fit....still need a few more things....

first jeep....
'04 liberty sport 4x4 khaki
modified as recommended by L.O.S.T.....major fun on vacation....

L.O.S.T. (in fla.) #000496


Last edited by camper on Fri Jan 02, 2009 10:49 am, edited 3 times in total.

Top
 Profile  
 
 Post subject: some more of this first part.....
PostPosted: Mon Oct 13, 2008 5:36 pm 
Offline
Lifetime Member
Lifetime Member
User avatar

Joined: Thu Jul 07, 2005 12:26 pm
Posts: 174
Location: altamonte springs, fla. (orlando)
Most TJ models come with rear drum brakes. Based on what I've read on the forums, it they are in good repair, they work fine for most owners. The rubicon rear comes with factory disc brakes, which is considered an improvement. They're easier to work on, they self-clean better on muddy trail rides, and they perform better when brakes are worked hard on long hill climbs and descents. When considering the price of a "for sale" rear dana 44, most sellers state you will reuse your existing brake set-up. A disc brake up-grade like the rubicon rear will command a higher price.
Image


I cleaned up the surface rust. The brake pads appeared to have a lot of life left in them. I'm not a brake expert, so I hope I can reseat the pads and won't have any problems with the rear brakes.
Image

Image

rattle can rustoleum smoke gray....I spent some time with a wire brush and some solvents to prep this so the paint would last.
Image

Image

The rear disc brakes bracket has a stainless clip over the casting where the brake pad will slide....this will prevent the pad from wearing a groove into the slide. This is an improvement over the front disc brake pad slide....
Image


The rubicon rear dana 44 pinion yoke uses a spicer 1330 series u-joint (spicer 5-790X) to connect to the rear driveshaft. The dimension across the joint caps is greater than for the 1310 series joints used in most other TJ rear driveshafts....
Image

calipers painted....hard brake lines and parking brake cables reattached....ready to go....
Image

now on to the front axle assembly....please look for a "part two" post in a few minutes.

_________________
steve

'98 TJ sport gunmetal blue
33's with modifications to make them fit....still need a few more things....

first jeep....
'04 liberty sport 4x4 khaki
modified as recommended by L.O.S.T.....major fun on vacation....

L.O.S.T. (in fla.) #000496


Last edited by camper on Fri Jan 02, 2009 10:41 am, edited 2 times in total.

Top
 Profile  
 
 Post subject: the front XJ axle clean-up...
PostPosted: Mon Oct 13, 2008 5:37 pm 
Offline
Lifetime Member
Lifetime Member
User avatar

Joined: Thu Jul 07, 2005 12:26 pm
Posts: 174
Location: altamonte springs, fla. (orlando)
This is a salvage yard purchase.
Image

This is a front axle assembly from '99 XJ cherokee with a four cylinder motor which came with factory 4.10 gear ratio....the four cylinder TJ wranglers also come with factory 4.10 gears but I was looking for the high pinion design from the XJ. Also, since it's late model, the axle shafts use the better universal joints (spicer 5-760x). The front driveshaft attaches to the pinion yoke above the centerline of the axles. The ring gear is driven from the top which is supposed to be stronger in forward motion, and the driveshaft is positioned higher above the trail.

I never saw the vehicle this came from....it wasn't an option for me to remove it myself at the salvage yard. I was given a short term warranty but I knew I wasn't going to get around to installing it for some months. It was grimy but the rotors turned by hand and it felt okay, no grinding, that kind of thing. I took a chance, with the alternate plan of just using my TJ axle assembly if I needed to have this one completely rebuilt. It came with all the steering still attached, and all of the springs, shocks, control arms, sway bar.
Image

Image

Image

Image

I used a pitman arm puller to detach the drivers tie rod from the drag link.
Image

Tapered studs in tapered holes, like tie rod ends and ball joint studs, can usually be knocked loose with a strategic hammer blow...(or two). You don't want to drive the stud out like a nail. Instead, you create a shock wave with the hammer blow that pops the stud free. I leave the castle nut loosely threaded to catch the rod end when it falls.
Image

I guess the track bar on a XJ is attached at the frame with a bolt-on bracket. Must be a unibody thing.
Image

Image

I could choose to reuse the drag link...the tapered stud ends and rubber boots were good. I can use the differential vent hose. I can save the tie rod as a spare, but the factory design isn't considered very durable with larger tires. I won't need to reuse anything else here.
Image

(continued below...)

_________________
steve

'98 TJ sport gunmetal blue
33's with modifications to make them fit....still need a few more things....

first jeep....
'04 liberty sport 4x4 khaki
modified as recommended by L.O.S.T.....major fun on vacation....

L.O.S.T. (in fla.) #000496


Last edited by camper on Fri Jan 02, 2009 11:01 am, edited 3 times in total.

Top
 Profile  
 
 Post subject: more of the front axle stuff....
PostPosted: Mon Oct 13, 2008 5:38 pm 
Offline
Lifetime Member
Lifetime Member
User avatar

Joined: Thu Jul 07, 2005 12:26 pm
Posts: 174
Location: altamonte springs, fla. (orlando)
After the disc brake caliper is removed, the brake rotor comes off...
Image

Image

The front axle shafts are retained at the wheel hub with a single nut threaded onto the end of the shaft. I use a 1-7/16" socket with a 3/4" drive breaker bar. The nut is actually be 36mm but I don't have a socket that size for my 3/4 inch drive.
Image

Once you loosen the axle shaft nut, you can remove the sealed hub bearing assembly. The center is splined to match the axle shaft and the bearing is supported by the steering knuckle. You need a 13mm-12 point socket to remove three bolts.
Image

The axle shafts are not retained inside the differential so they will now just slide out through a oil seal near the inside end of the shaft.
Image

A upper and lower ball joint fastens the steering knuckle to the axle "C". The knuckle has a designed "boss" that can withstand a sharp hammer blow that will shock the ball joint stud loose from a tapered hole in the knuckle.
Image

The axle shaft seal surfaces, threads, and splines looked good....just a lot of surface rust at the yokes. The u-joints were flexible but I will replace them anyway. The steering knuckles cleaned up fine with a wire wheel. The hub bearings turned too loosely and after cleaning up the grime with gasoline and a parts brush, they felt rough. The brake rotors were worn severely. There were two possible rotors used in the XJ around this '99 model year. These in the picture are called full "cast" iron and they can be identified by the sharp 90 degree transition from vertical to horizontal in the center "hat". The other style is called a "composite" rotor and has a radius transition at the top of the hat, and the center section is a different material. There's also some minor but important dimensional differences. There are two slightly different hub bearing assemblies to match the type of rotor used. Depending on the model year of TJ wranglers, the same "cast or composite" front brake rotor issue occurs. If you have a '99 or '00 TJ, then you'll need to be careful when purchasing brake rotors or hub bearings. I didn't bother with saving the calipers. I'll reuse my TJ brakes and hub bearings. Later, I'm going to purchase new hub bearings and call Vanco Brakes in California for a better front brake set-up.
Image

Image

Image

These are the upper and lower ball joints at the axle "C". The ball joints were stiff and smooth in motion so I will proceed and I can check them out a little better when I have the tires/wheels mounted.
Image

(continued below....)

_________________
steve

'98 TJ sport gunmetal blue
33's with modifications to make them fit....still need a few more things....

first jeep....
'04 liberty sport 4x4 khaki
modified as recommended by L.O.S.T.....major fun on vacation....

L.O.S.T. (in fla.) #000496


Last edited by camper on Fri Jan 02, 2009 11:08 am, edited 2 times in total.

Top
 Profile  
 
 Post subject: paint and pinion seal....
PostPosted: Mon Oct 13, 2008 5:40 pm 
Offline
Lifetime Member
Lifetime Member
User avatar

Joined: Thu Jul 07, 2005 12:26 pm
Posts: 174
Location: altamonte springs, fla. (orlando)
No broken gear teeth and the lube wasn't particularly nasty or milky. I man-handled this thing into and out of my TJ and it never leaked any gear lube out of the axle tubes so I hoped the shaft seals were good. I believe it was about a 90,000 mile axle but I don't really know. I'm going to run 33" tires. A popular opinion is that I want 4.56 gear ratio, so if I can absorb some of this expense for awhile, I will look at regearing sometime down the road. That will also bring new bearings and seals.
Image


I squeeze a little rtv gasket maker out and smear it a little with my finger....let it sit for a few minutes and then try to be careful not to slide the cover around too much while I thread the bolts in.
Image

Image

Image

I purchased a new pinion oil seal (part no. 5778V). I didn't get a full sequence of pictures for this. I've seen several forum questions about a leaking pinion seal. As I understand it, for do-it-yourself fellas, the high pinion dana 30 has the advantage in that it does not use a crush sleeve for pinion bearing pre-load. So you just have to retain the same bearing shim/slinger behind the yoke when you tighten it back down. Use a 1-1/8" socket on the pinion nut and a pipe wrench to grap the yoke. I got ahead of myself and forgot to mark the nut location on the threads before I broke it free. So I'll have to put it back together "shade tree" style.
Image

Image

...pulling the yoke out so I can remove the old seal. I deformed the seal edge back away from the cast neck with a small screwdriver and a light hammer. After working around the circumference, it came loose and pulled out easily. The yoke is a spicer 1310 series and uses a spicer 5-785X universal joint.
Image

Remember this is a front dana 30 from a XJ, so the pinion bearing load does not use a crush sleeve like on the TJ dana 30. So I didn't have to worry about some important considerations. The set-up depth of the pinion (shaft/gear) allows the gear to correctly interface with the ring gear. This depth and the ring gear carrier position isn't altered when you change the seal. One of the other important differential set-up factors is called pinion bearing preload. There are two sets of tapered roller bearings supporting the pinion (shaft) in the neck of the pumpkin. The force or tightness of the tapered roller bearings against a bearing race is determined by the tightness of the nut. THIS IS IMPORTANT. When you remove the pinion nut and yoke you loose this preload. After replacing the leaking oil seal, it is possible to overtighten the nut. The correct method of reassembly involves using a inch-pound torque wrench to measure the rotational resistance as the nut is gradually tightened. I'm not claiming I can "feel" it with my hand but thats how I did it and I felt okay with what I was doing. Better a little loose than too tight I guess. The nut is what I call a "deformed thread" nut. It's intentionally smashed so that you can't thread it with just your fingers. It's also not intended to be used twice. However, many shade-tree repairs will reuse the old nut.

I polished the seal surface on the yoke with a worn emory cloth strap and tapped the new seal in place with a wooden dowel working around the circumference. If your seal is leaking, it isn't expensive or difficult to fix it. You just need to understand the consequences of tightening the nut.


(continued below...)

_________________
steve

'98 TJ sport gunmetal blue
33's with modifications to make them fit....still need a few more things....

first jeep....
'04 liberty sport 4x4 khaki
modified as recommended by L.O.S.T.....major fun on vacation....

L.O.S.T. (in fla.) #000496


Last edited by camper on Fri Jan 02, 2009 11:16 am, edited 1 time in total.

Top
 Profile  
 
 Post subject: axle shafts are rusty....
PostPosted: Mon Oct 13, 2008 5:41 pm 
Offline
Lifetime Member
Lifetime Member
User avatar

Joined: Thu Jul 07, 2005 12:26 pm
Posts: 174
Location: altamonte springs, fla. (orlando)
I can't afford new hardened alloy front axle shafts just yet. So I'm going to try to clean these stock axles up and see how they look. They're the same as my TJ shafts, so I'll have two sets.
Image

Image

The TJ and XJ front axle shaft universal joints use a c-clip retainer. Internet forum chatter complains about these clips popping loose under load and allowing the universal joint end caps to damage the axle shaft yokes. The aftermarket hardened axle shafts allow use of a full circle clip. Full circle clips are supposed to help solve that problem.
Image

I think that technically, a axle universal joint is two yokes and a bearing cross. Everyone refers to the cross as the u-joint. The bearing end caps on the cross have to be temporarily removed to allow disassembly / reassembly and it's a close fit design. You first have to press the stub shaft yoke to the side to expose the cap on one end of the u-joint cross. Remove the cap to expose the bearing trunion. Press the u-joint cross the opposite direction to expose the opposite bearing cap and remove it. Then remove the stub yoke. Now just press the cross sideways in the inner shaft yoke to expose cap no. 3. And finally, press the cross in the opposite direction to remove the final cap.
Image

Image

Image

Image

My KJ liberty had some ball joint issues. I have a ball joint press (a large c-clamp) which is convenient to use in a bench vise for u-joints. You can also use a couple of different size sockets and a hammer but its a more violent method.
Image

Image

(now the last part of this part....)

_________________
steve

'98 TJ sport gunmetal blue
33's with modifications to make them fit....still need a few more things....

first jeep....
'04 liberty sport 4x4 khaki
modified as recommended by L.O.S.T.....major fun on vacation....

L.O.S.T. (in fla.) #000496


Last edited by camper on Fri Jan 02, 2009 11:21 am, edited 1 time in total.

Top
 Profile  
 
 Post subject: the final part of the first essay....
PostPosted: Mon Oct 13, 2008 5:46 pm 
Offline
Lifetime Member
Lifetime Member
User avatar

Joined: Thu Jul 07, 2005 12:26 pm
Posts: 174
Location: altamonte springs, fla. (orlando)
I spent a lot of time cleaning old parts. It kills your time budget and fouls your hands, but it makes reassembly much more enjoyable.
Image

Image

The shafts cleaned up fine for use and I replaced the universal joints with spicer 5-760X joints. I will look at my TJ shafts when I get that axle out and decide which I'll use. Either way, I'll have spare shafts and it's good to know how to replace them. After I recover some from the expense of all this, I'll purchase some aftermarket alloy shafts.
Image

When you install new universal joints, you just need to be careful to align the parts before you put much pressure on anything. The joint end caps use needle bearings to ride on the cross trunion. Grease keeps them positioned when you remove the cap, but you want to make sure not to dislodge them before repositioning on the cross. The install of new joints is much smoother and takes less force/violence because there's no rust or siezed parts. The spicer 5-760X joint has no grease fitting.

A universal joint is also known as a cardan joint. A man named Clarence Spicer patented an improved cardan joint allowing the early automobiles to change from sprockets and chains to what became todays driveshafts. It's correct to call it a spicer joint. I think Henry Ford named it a universal joint. The Dana-Spicer Corporation was a major player and is historically important in the U.S. automotive industry.
Image

Okay, so the swap axle is cleaned up and painted. I'll install the shafts and brakes later when I hang it on the front of the jeep. Regarding my XJ axle, I'm taking a chance that old bearings, seals, ball joints, etc. will be okay. Until I can get it under the jeep and rolling on some tires, I won't know for sure. I'm prepared to accept the consequences if I find out in a few days that I have to do more. Now I'll start taking my TJ jeep apart....a 1" body lift and motor mounts are next.

As I explained in the first post, I have lots more pictures and text. There are four more of these long essays. Maybe I should wait and see if I get "booed" before I add the next essay. Thanks for looking.

_________________
steve

'98 TJ sport gunmetal blue
33's with modifications to make them fit....still need a few more things....

first jeep....
'04 liberty sport 4x4 khaki
modified as recommended by L.O.S.T.....major fun on vacation....

L.O.S.T. (in fla.) #000496


Last edited by camper on Fri Jan 02, 2009 11:25 am, edited 3 times in total.

Top
 Profile  
 
 Post subject:
PostPosted: Mon Oct 13, 2008 6:00 pm 
Offline
Lifetime Member
Lifetime Member
User avatar

Joined: Mon May 22, 2006 6:28 pm
Posts: 3880
Location: Wichita/ Pittsburg, Kansas
wow its looking good

_________________
1980 Jeep CJ7 Buggy
SOA, D44/ FF14B, SBC 350, SM465, NP205, 108" WB, 37" MTs

http://www.dpgoffroad.com/
http://www.ucora.org/
http://www.christianoffroad.com/
http://jeepinbyal.com/


Top
 Profile  
 
 Post subject:
PostPosted: Mon Oct 13, 2008 7:49 pm 
Offline
Lifetime Member
Lifetime Member
User avatar

Joined: Thu Dec 29, 2005 9:59 pm
Posts: 5171
Location: Austin, TX
Great documentation.

_________________
2005 CRD
stuff
Skeptic quod gratis asseritur, gratis negatur


Top
 Profile  
 
 Post subject:
PostPosted: Mon Oct 13, 2008 8:28 pm 
Offline
LOST Junkie

Joined: Wed Aug 22, 2007 4:11 pm
Posts: 843
Location: Crystal Lake, Illinois
good read. thanks!


Top
 Profile  
 
 Post subject:
PostPosted: Mon Oct 13, 2008 8:39 pm 
Offline
Lifetime Member
Lifetime Member

Joined: Mon Jul 04, 2005 8:37 pm
Posts: 7928
Location: Big Bear & Lancaster, Ca.
Great write-up Steve! Thanks for sharing on here. we need the tech.

_________________
99 TJ
71 C101
04 KJ
03 SFA KJ Sport
LOST JEEPS So-Cal


Top
 Profile  
 
 Post subject:
PostPosted: Tue Oct 14, 2008 8:37 am 
Offline
Lifetime Member
Lifetime Member
User avatar

Joined: Thu Jul 07, 2005 12:26 pm
Posts: 174
Location: altamonte springs, fla. (orlando)
okay fellas....thank you for taking a look. In the follow up posts, I'll have more on swapping these axles into the TJ.

It might be worth mentioning now that the 6 cylinder TJ wrangler is most commonly found with a rear dana 35 axle with either 3.07 or 3.73 rear ratio. Four cylinder models have 4.10 gears. Some of the 6 cylinder models had an optional rear dana 44, which is a little beefier. The front dana 30 axle is found in all '97 to '06 wrangler models except the '03 to '06 rubicon package. The rubicon TJ comes factory with dana 44 axles front and rear with 4.10 gears. The front rubicon dana 44 is identical to the dana 30 in track width, steering and brake components, hub bearings and outer stub axles, universal joints, and I think axle tube dimensions. The rubicon dana 44 pumpkin is larger and beefier than the dana 30, it has a larger ring gear and carrier, and the pinion yoke is a spicer 1330 series instead of 1310. With reasonable size tires, I didn't feel I needed the larger ring gear of the dana 44 up front.

The earlier YJ wrangler also used a front dana 30 axle. It's different in that it rides on leaf springs and some of the designs have a axle disconnect mechanism in the passenger tube. Also the universal joints were an earlier design. I'm not really up to speed on the YJ stuff so take my information with some caution.

The cherokee XJ also used a front dana 30 axle. And the design was modified over the production years. The later years do not use a passenger side axle disconnect. As I said in the stuff above, the attraction of the XJ axle is that it's dimensionally the same as the TJ, uses coil springs, the brakes and axle shafts are interchangeable, the high pinion ring gear is arguably stronger than the TJ, and it's a common junk yard axle because so many cherokees were sold.

I made an initial decision to run with 33 inch diameter tires. I felt the 4.10 axle ratio of the rear dana 44 would work okay for me in flat florida. Since I don't have the skills to set up deeper gears, I was faced with paying to have my TJ axle geared to match the rear dana 44 I had already bought. Instead, I went hunting for the XJ axle already geared to match. I plan to install a lunch box locker up front before long.

I'll work on adding the next chapter to this forum. It's about the body lift, the slip yoke eliminator, and the belly up skid...and a bunch of other details.

_________________
steve

'98 TJ sport gunmetal blue
33's with modifications to make them fit....still need a few more things....

first jeep....
'04 liberty sport 4x4 khaki
modified as recommended by L.O.S.T.....major fun on vacation....

L.O.S.T. (in fla.) #000496


Last edited by camper on Tue Oct 14, 2008 9:53 am, edited 1 time in total.

Top
 Profile  
 
 Post subject:
PostPosted: Tue Oct 14, 2008 9:26 am 
Offline
Lifetime Member
Lifetime Member

Joined: Mon Jul 04, 2005 8:37 pm
Posts: 7928
Location: Big Bear & Lancaster, Ca.
Looking forward to the other mod write ups. My sons TJ is begging for some wrok. Looks like it might be getting my XJ's front HPD30, NP231 w/ SYE, etc. in the near future.

_________________
99 TJ
71 C101
04 KJ
03 SFA KJ Sport
LOST JEEPS So-Cal


Top
 Profile  
 
 Post subject: picture write up
PostPosted: Tue Oct 14, 2008 9:45 pm 
Offline
LOST Member

Joined: Sat Jul 09, 2005 2:40 pm
Posts: 149
Location: Orange County, Ca
Thanks for the write up lots of good info. Jeep looks great.

_________________
2002 Liberty
W/Lift+Armor+Diff mods


Top
 Profile  
 
Display posts from previous:  Sort by  
Post new topic Reply to topic  [ 15 posts ] 

All times are UTC - 5 hours [ DST ]


Who is online

Users browsing this forum: No registered users and 10 guests


You cannot post new topics in this forum
You cannot reply to topics in this forum
You cannot edit your posts in this forum
You cannot delete your posts in this forum

Search for:
Jump to:  
Powered by phpBB © 2000, 2002, 2005, 2007 phpBB Group. Color scheme by ColorizeIt!
Logo by pixeldecals.com