It is currently Tue Oct 28, 2025 12:54 pm

All times are UTC - 5 hours [ DST ]


Post new topic Reply to topic  [ 14 posts ] 
Author Message
 Post subject: JBA A-A-T Lift Install epic WITH PICS
PostPosted: Mon Jun 07, 2010 11:45 am 
Offline
Lifetime Member
Lifetime Member
User avatar

Joined: Thu Sep 11, 2008 2:03 pm
Posts: 1866
Location: Houston, TX
Ok, here goes. This is long, so long-post haters, turn back now. . .

Bub (KJ 119/ One One Niner) came up from Metairie (New Orleans) and met me at Lee's (mcinfantry) house in Watson (who has a full 2-post vehicle lift) on Saturday for the lift install. Much love and thanks to those two, (and Lee's buddy Fred) for their hospitality and assistance. I would be driving a rental car right now if not for them.

Last week I received two boxes of goodies to add to the JBA 4.5 Upper Control Arms I bought off of tommudd:
Image

This is the "Jeepin' By Al's Adjust-A-Strut (AAT) 2.5" Lift Kit" for the KJ CRD. The Skyjacker box is the rear coils, the long skinny box contained two preassembled coilover strut towers with attached custom clevises, 2 Terraflex bumpstops, 2 (custom?) polyurethane rear bumpstops, stainless steel brake lines, two Bilstein remote-reservoir rear shocks, and stickers various and sundry. The top-right box is some Gen 4.5 JBA UCA's I bought off tommudd about a month ago.

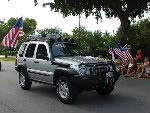
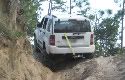
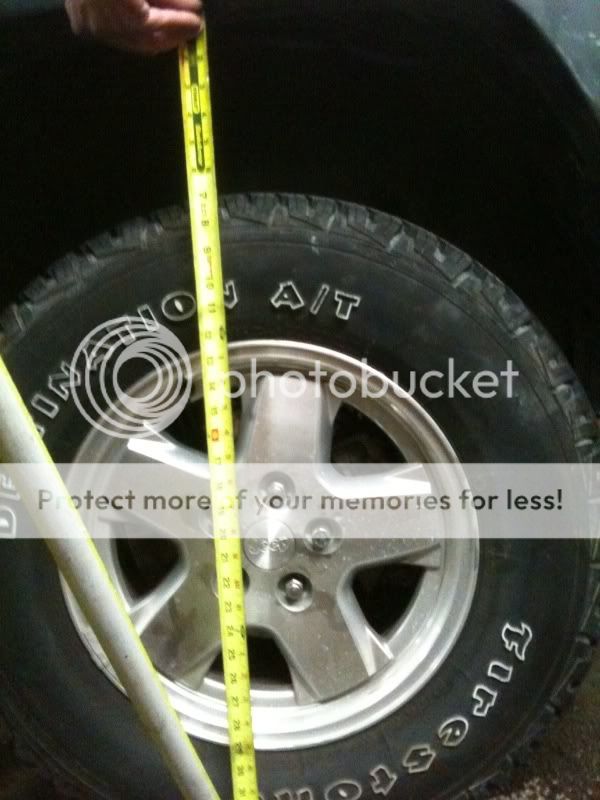
Here are some before pics:
Sagged stock suspension (check out the angle of the CV's in the second pic):
Image
Image

Average measurement from hub center to flare was 18.5", with the driver's side front the worst at 18" even.
(Passenger front)
Image
(Driver front)
Image

We started with the back, and ran into our first roadblock. The supplied stainless-steel brake lines are for the 2005 model, not the 2006, so it was only 2 for the front and one for the rear - frame rail-to-axle. Also, since the "Contents" part of the instruction page was for a different lift, I wasn't sure I had all the parts since the new passenger front strut came with a new, longer clevis bolt (but no nut), the driver's side clevis (different, because of the CRD) had no bolt or nut, and the shipping box was torn open on one corner. I got Marlin on his cell, who told me that I was supposed to re-use the driver's side lower clevis bolt and nut, and re-use the passenger-side lower clevis nut, and that he would send me the ABS brake line kit first thing Monday morning.

With the Jeep up on the lift, Lee and I disassembled and installed the rear first while we waited on Bub to get there:
Image

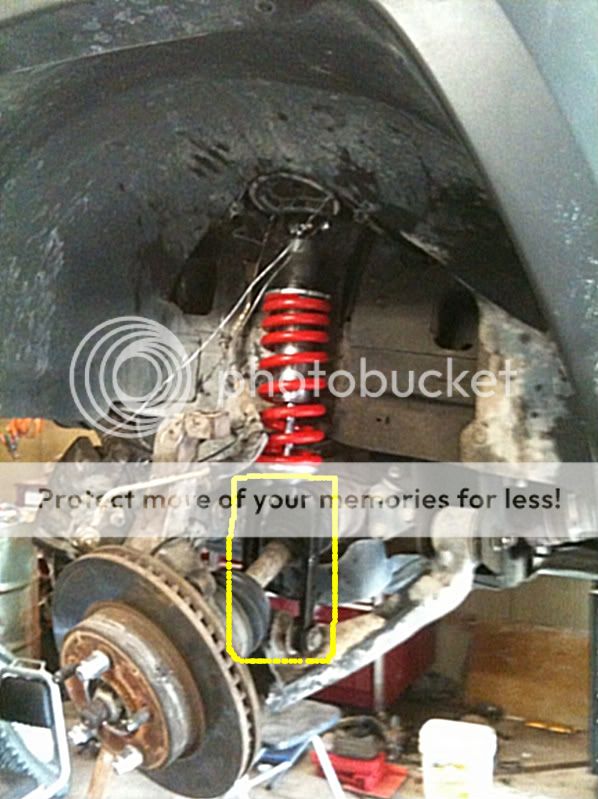
It involved drilling into the lower coil plate to bolt in the new bumpstops ("A Jeep's not yours till you drill that first hole in it") and placing both the bumpstop and the coil into the housing together, then tightening down the Hex-head bolt that holds the bumpstop to the plate. That done, we installed the Bilstein remote-reservoir rear shocks. Bub got there about that time and helped compress the shock pistons while we bolted them in:
Image
Image

We were afraid that attaching the reservoirs onto the shock tube with the supplied bracket would cause it to rub on either the coil or the tire, so we looped the line and tucked the reservoirs up between the frame rail and the splash guard. This is the part that is unfinished, because they are loose in there and rattling quite a bit. I think it's a good place for them, but I have to mess around with fixing the reservoirs in there better before I will be satisfied with that placement.
Image

I wish now that we had wrapped the reservoirs in pipe wrap and zip-tied them to the inside of the splash guard, but we were behind schedule and still needing to get to the front, so we called it good and moved on.

Front disassembly went smooth; the stock stuff was so shot that it offered little to no resistance when we pulled it out. I don't have a lot of pictures of the front because I was concentrating more on the install, and basically forgot to take step-by-step pics.

We started the front install on the driver's side, since it is the most difficult. With the old A-Arms out, we tried to place the new driver's side tower in and ran into the second snag: the strut tower comes preassembled and preset for height, and it was simply too long to cram in the space. We removed the top-plate from the strut tower, installed it in the subframe, and then were able to get the tower in and attach it to the strut plate.
Image

Third snag: the tower was simply too long to mate up to the lower clevis bracket without compressing the strut. Since I had asked - and been assured - that no spring compressor was necessary, we were at a loss. After disconnecting the front swaybar and trying it that, way, we briefly considered disconnecting the lower A-Arm from the lower ball joint to drop it enough to attach the lower clevis. Due to the myriad of things that could go wrong there, we threw in the towel and went and rented a spring compressor.

Long story short, the space between the strut and the coil is too narrow to get a good seat with the compressor, so that didn't work. Then Lee's buddy Fred had the brilliant idea of raising the adjustment collars as high up as possible, then seeing if we could use a prybar in the clevis to compress the assembly enough to bolt in. It worked! When you screw the adjustment rings up about 1.5 inches, the coil is then hand-loose on the tower. So, we used the prybar braced against the lower A-Arm bracket, Fred muscled it into place, and we ran the bolt home and impacted that sucker before it could protest. I wish I had had instructions that told me that. . . . :roll:

After installing the JBA UCA on the driver's side (always a breeze, :lol: ) and bolting everything back together, we moved on to the passenger side and repeated what we learned on the driver's side. It went much easier, since we now knew what we were doing. Starting the passenger side, we were about 8 hours into the lift.
Image
Note the "KJ" in the passenger side clevis - a nice touch, IMHO. . .
Image
. . . and the difference between the passenger-side clevis and the driver's side clevis, due to the tighter CV angle of the CRD.
Image

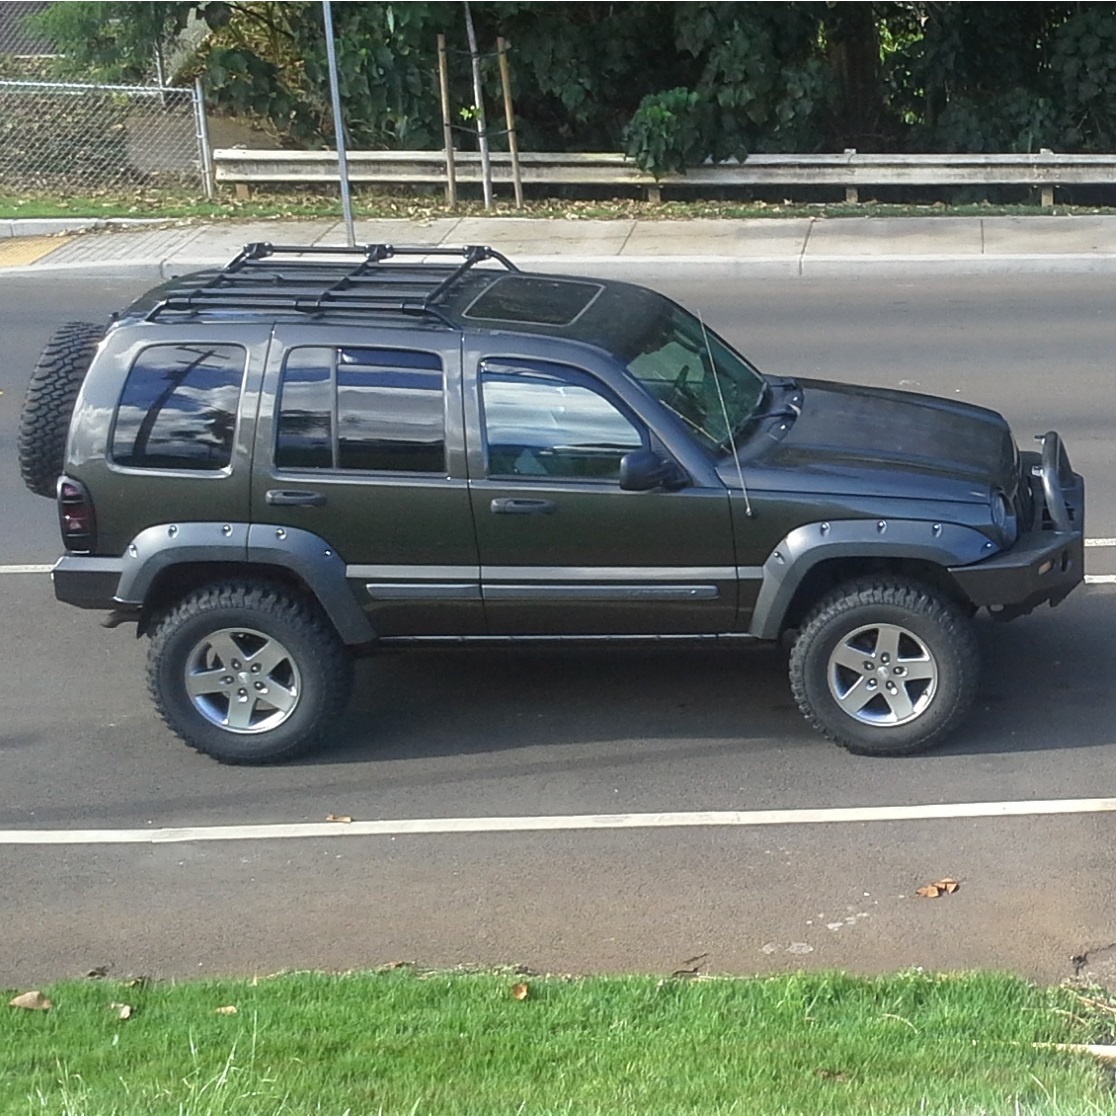
We finished the passenger side re-assembly with new A-Arm after about 1.5 hours, put everything back together under the hood, lowered the adjustment collars on the front struts back to where we marked them before loosening, bled the brakes, and called 'er done. we started at 7:30 am, and finished at about 10:00 pm. Here are some (blurry, sorry) measurement pics after we got Greenie back on the ground:
Image
Image

New measurements were about 21.25" in the front, and 21.5" in the back. Here's a pic after the MUCH-NEEDED alignment:
Image
(again, the before)
Image

So to summarize: I'm happy with the lift - the materials, the height, the adjustability, but I spent a large portion of Saturday being pissed about the lack of instructions. This would have been a comparitve breeze if we had known that we could raise the collars, compress the piston, and lever the clevis into place. Would have saved us at least 3 hours, too. If Marlin updates his instructions rather than re-using the instructions for an old Skyjacker lift, this would be a great kit - and likely even easier than a Frankie, based on what Bub said, who installed a Frankie on his CRD.

:POPCORN:

_________________
In this war of lines, so many have been crossed. Where will it all stop?

2006 Deep Beryl Green CRD Sport *SOLD 1/22/12*
Provent, V6 Airbox, Fumoto, Samcos, GDE ECO & TCM Tune, Euro JK TC, Magnaflow Catback
245/70/16 Destination A/T's
Boiler's Radiator Skid Plate
Jeepin' By Al 2.5 inch Adjust-A-Strut Lift, JBA Gen 4.5 UCA's (6/5/10)

Image


Top
 Profile  
 
 Post subject: Re: JBA A-A-T Lift Install epic WITH PICS
PostPosted: Mon Jun 07, 2010 11:57 am 
Offline
LOST Member
User avatar

Joined: Sat Apr 10, 2010 9:44 pm
Posts: 290
Location: Stafford Va
Definitely looks better. I'd hate to go through that process though. My lift only took 6 hours, and that was going slow and BS'ing. Hope it all works for you though, and that it was worth the cost. Speaking of, what was the grand total after it was all said and done?

_________________
IT'S BUSINESS TIME!
..Chris.....
2004 KJ Sport 4wd Gasser
Front hooks, Rusty's Gas skid, CURT hitch with a Pirate Hook!
OME HD Springs, Koni shocks, Teraflex bumpstops, Sumitomo A/T's 245/70/16 on Moabs.
K&N "Cold" air intake.


Top
 Profile  
 
 Post subject: Re: JBA A-A-T Lift Install epic WITH PICS
PostPosted: Mon Jun 07, 2010 1:30 pm 
Offline
Lifetime Member
Lifetime Member
User avatar

Joined: Thu Sep 11, 2008 2:03 pm
Posts: 1866
Location: Houston, TX
Thanks, Powerman. It wouldn't have been nearly as much of a hassle if the instructions had been more detailed, and written for this particular lift rather than recycled Skyjacker instructions. If that had been the case, the brake lines had been correct, and we hadn't been installing UCA's as well, it would have been a 6 hour or less job. You'd be surprised how much of a hassle those A-Arms are - it is incredibly difficult to get to the rear bolts.

The ride is great. I won't say pillow-soft or anything, but worlds better than stock. One thing specifically I noticed is that, under hard braking and acceleration, the nose doesn't dive or rise anymore. The progressive-rate springs really make a difference in that respect.

It was expensive; my wife was kinda shocked. But, I don't spend on myself very often, so it isn't like she's going to force me to take it off and sell it. She even kissed me and massaged my shoulders when I got home dirty and WHOOPED Saturday night. Total cost, including 3-day shipping, was about $350 more than a CRD Frankenlift with 3-day shipping. That was with the $200 discount Marlin did Memorial Day weekend, though - without which, I don't know if I would have pulled the trigger.

_________________
In this war of lines, so many have been crossed. Where will it all stop?

2006 Deep Beryl Green CRD Sport *SOLD 1/22/12*
Provent, V6 Airbox, Fumoto, Samcos, GDE ECO & TCM Tune, Euro JK TC, Magnaflow Catback
245/70/16 Destination A/T's
Boiler's Radiator Skid Plate
Jeepin' By Al 2.5 inch Adjust-A-Strut Lift, JBA Gen 4.5 UCA's (6/5/10)

Image


Top
 Profile  
 
 Post subject: Re: JBA A-A-T Lift Install epic WITH PICS
PostPosted: Mon Jun 07, 2010 1:52 pm 
Offline
JACKRABBIT
JACKRABBIT

Joined: Sat Dec 13, 2008 4:26 pm
Posts: 3970
Location: Phoenix, AZ
how much and where did you get those rear shocks?

_________________
Steve
2018 RAM 1500 Rebel
2003 KJ
Mods:Exterior: Frankenlift + 2 extra rear iso, JBA UCAs, ARB Bumper w/XRC8, Safari Snorkel, 265/75/16 AT, Mopar Skids, Boulderbars, RL Gecko Sport Rack
Interior: Infinity Reference speakers, 12" Alpine Type R Sub, Alpine radio, Gauge Pods (Oil, Volts), Cobra Cb, All J Interior Rack


Top
 Profile  
 
 Post subject: Re: JBA A-A-T Lift Install epic WITH PICS
PostPosted: Mon Jun 07, 2010 2:23 pm 
Offline
Lifetime Member
Lifetime Member
User avatar

Joined: Thu Sep 11, 2008 2:03 pm
Posts: 1866
Location: Houston, TX
STINGN wrote:
how much and where did you get those rear shocks?


It was a kit from Jeepin' By Al, so I don't know how much the shocks alone cost.

Try this link and in the drop-down for rear shocks, it would be the Bilstein 7100 with remote reservoir. http://jeepinbyal.com/prod-2_5__Lift_Sp ... J-696.aspx

You could use that link to put together the specs for your Jeep, add it to the cart, then see the total cost.

_________________
In this war of lines, so many have been crossed. Where will it all stop?

2006 Deep Beryl Green CRD Sport *SOLD 1/22/12*
Provent, V6 Airbox, Fumoto, Samcos, GDE ECO & TCM Tune, Euro JK TC, Magnaflow Catback
245/70/16 Destination A/T's
Boiler's Radiator Skid Plate
Jeepin' By Al 2.5 inch Adjust-A-Strut Lift, JBA Gen 4.5 UCA's (6/5/10)

Image


Top
 Profile  
 
 Post subject: Re: JBA A-A-T Lift Install epic WITH PICS
PostPosted: Mon Jun 07, 2010 10:30 pm 
Offline
LOST Addict
User avatar

Joined: Mon Jan 29, 2007 12:54 am
Posts: 3865
Location: Draper, UT
There's no way JBA uses a skyjacker instruction sheet... each product is thoroughly researched and beta tested under real-world conditions.... you knew you were a beta tester ..... right?


It took my friend and I 30 mins to install my Franky II lift.

_________________
2006 CRD http://www.UtahPowderCoatings.com/ http://www.gorecon.com/ I'm kind of a big deal.
RL rear bumper, ARB front bumper, Mile Marker winch, Power Tank, Skids by Mopar & Skid Row, RL Super Skink Sliders, 235/85R16 MTR, Air Flow Snorkel, DTT, 4.10 gears, Frankenlift II, Katskin leather, JL Audio stereo, Rosen video.


Top
 Profile  
 
 Post subject: Re: JBA A-A-T Lift Install epic WITH PICS
PostPosted: Mon Jun 07, 2010 10:46 pm 
Offline
Lifetime Member
Lifetime Member
User avatar

Joined: Thu Sep 11, 2008 2:03 pm
Posts: 1866
Location: Houston, TX
JL Rockies wrote:
There's no way JBA uses a skyjacker instruction sheet... each product is thoroughly researched and beta tested under real-world conditions.... you knew you were a beta tester ..... right?


It took my friend and I 30 mins to install my Franky II lift.


Ahhhhh, now this thread is complete! :rockon:

I was waiting for it. . .

Yeah, I am the second CRD with this lift that I know of, and I haven't communicated with the other one. The only people that seem to have a JBA lift that I can identify and have communicated with (one with your help) are Diggerfreek, Tokyojoe, and DirtyKK - only one of those is a KJ.

While I admire your command of grammar, you'll have to pardon my doubt of your command of the space-time-continuum for a 30 min Frankie install. . . :5SHOTS:

_________________
In this war of lines, so many have been crossed. Where will it all stop?

2006 Deep Beryl Green CRD Sport *SOLD 1/22/12*
Provent, V6 Airbox, Fumoto, Samcos, GDE ECO & TCM Tune, Euro JK TC, Magnaflow Catback
245/70/16 Destination A/T's
Boiler's Radiator Skid Plate
Jeepin' By Al 2.5 inch Adjust-A-Strut Lift, JBA Gen 4.5 UCA's (6/5/10)

Image


Top
 Profile  
 
 Post subject: Re: JBA A-A-T Lift Install epic WITH PICS
PostPosted: Mon Jun 07, 2010 10:58 pm 
Offline
LOST Junkie
User avatar

Joined: Fri Jan 30, 2009 9:04 am
Posts: 824
Location: Canada
JL Rockies wrote:
There's no way JBA uses a skyjacker instruction sheet... each product is thoroughly researched and beta tested under real-world conditions.... you knew you were a beta tester ..... right?


It took my friend and I 30 mins to install my Franky II lift.


Yeah lol.... I hate bad/Poor instructions. Doing my OME/Rancho setup with no instruction took 4 hours.


Top
 Profile  
 
 Post subject: Re: JBA A-A-T Lift Install epic WITH PICS
PostPosted: Tue Jun 08, 2010 2:38 pm 
Offline
LOST Addict
User avatar

Joined: Thu Oct 29, 2009 5:59 pm
Posts: 2127
Location: Navarre FL
hows it ride 8)
and when are we going to have another Eglin Range run again :D


Top
 Profile  
 
 Post subject: Re: JBA A-A-T Lift Install epic WITH PICS
PostPosted: Tue Jun 08, 2010 3:33 pm 
Offline
LOST Addict
User avatar

Joined: Mon Jan 29, 2007 12:54 am
Posts: 3865
Location: Draper, UT
I ordered the kit pre-assembled. I jacked the back up and started to take stuff apart under hood, when I was done under hood he was done in back. I put the rear wheels on and lowered the rear. When I was done with that the stock fronts were out. By the time I changed the socket on my impact gun the pass side top bolts were ready and when the airbox was back in the DS was ready. When I was putting the DS back together, the PS wheel was on and I had to get out of his way so he could put the DS wheel on..... 30 mins and the offroad sexual tyrannosaurus was born.... space/time continuum still intact.

My friend is the UT equivalent to tjkj2002 only sightly more expensive in that he only works for beer and not Mountain Dew. Peeps who do this stuff for a living tend to be extremely fast since it's all muscle-memory for them; us hobbyist-types have to look and analyze and we don't have all the cool tools.

_________________
2006 CRD http://www.UtahPowderCoatings.com/ http://www.gorecon.com/ I'm kind of a big deal.
RL rear bumper, ARB front bumper, Mile Marker winch, Power Tank, Skids by Mopar & Skid Row, RL Super Skink Sliders, 235/85R16 MTR, Air Flow Snorkel, DTT, 4.10 gears, Frankenlift II, Katskin leather, JL Audio stereo, Rosen video.


Top
 Profile  
 
 Post subject: Re: JBA A-A-T Lift Install epic WITH PICS
PostPosted: Tue Jun 08, 2010 4:17 pm 
Offline
Moderator / Lifetime Member

Joined: Thu Jul 07, 2005 5:49 pm
Posts: 27226
Location: NOW Southeastern Ohio/ Tanzania
JL
Funny, I have yet to sit and read how to do a lift on a Liberty, but ask RenegadeMarine how long it took to do his!
Took longer to go get lunch!

With the JBA lift though it is somewhat different and seems like the real hold up was not knowing you could compress the springs until later, that would of helped a lot

_________________
MUDD'S MOTORSPORT'S We do IFS lift installs ,
03 OVERLAND EDITION /Kilby-Skidrow-Mopar-4XGuard skids/ 2.5 inch TOTAL CONTROL JBA coilovers -JBA Arms/MOABS-31 FALKEN WILDPEAK AT3W / 4.10's etc, 04 Kilimanjaro Edition loaded, plus 05 KJ limited


Top
 Profile  
 
 Post subject: Re: JBA A-A-T Lift Install epic WITH PICS
PostPosted: Thu Feb 24, 2011 4:06 pm 
Offline
Lifetime Member
Lifetime Member
User avatar

Joined: Fri May 28, 2010 5:03 am
Posts: 1379
Location: Hawaii
Any update on the lift? Hows the ride offroad, how about the short driver's CV angle, and problems there yet?

Could you have gone up to JBA's 4"?

_________________
Image

05 CRD Sport Dark Kahki

RRO: Adventure Rack/Rails ** MOPAR: Skids/Renny Flares & 255/75r17 (32.1) BFG M/T on JK wheels ** ARB: Bumper/IPF lights/790/948/shocks ** GDE: TCM/Hot Tune ** ROCKLIZARD: Super Sliders/Komodo Bumper

My Build Thread
US Army Infantry


Top
 Profile  
 
 Post subject: Re: JBA A-A-T Lift Install epic WITH PICS
PostPosted: Sat Feb 26, 2011 7:51 pm 
Offline
Lifetime Member & Advertising Vendor
User avatar

Joined: Mon Sep 06, 2010 5:52 pm
Posts: 2172
Location: NEVADA
I know its too late now and you installed it 8 months ago, but all you had to do was loosen the cam bolts on the lca's to get more droop to fit those Badarse coilovers in there. :dizzy:

_________________
2010 KK 4WD BRILLIANT BLACK
Fox/King/Bilstein ATH BUMPERS ATH RACK GY DURATRACS


ATHFAB.com


Top
 Profile  
 
 Post subject: Re: JBA A-A-T Lift Install epic WITH PICS
PostPosted: Sat Feb 26, 2011 9:21 pm 
Offline
Moderator / Lifetime Member

Joined: Thu Jul 07, 2005 5:49 pm
Posts: 27226
Location: NOW Southeastern Ohio/ Tanzania
shouldn't have to loosen the cam bolts at all
I think he did it to help installation but he could of ran the coil down some ( to shorten the shock give more play) and it would of went in, much the same as doing any lift with extras

_________________
MUDD'S MOTORSPORT'S We do IFS lift installs ,
03 OVERLAND EDITION /Kilby-Skidrow-Mopar-4XGuard skids/ 2.5 inch TOTAL CONTROL JBA coilovers -JBA Arms/MOABS-31 FALKEN WILDPEAK AT3W / 4.10's etc, 04 Kilimanjaro Edition loaded, plus 05 KJ limited


Top
 Profile  
 
Display posts from previous:  Sort by  
Post new topic Reply to topic  [ 14 posts ] 

All times are UTC - 5 hours [ DST ]


Who is online

Users browsing this forum: No registered users and 12 guests


You cannot post new topics in this forum
You cannot reply to topics in this forum
You cannot edit your posts in this forum
You cannot delete your posts in this forum

Search for:
Jump to:  
Powered by phpBB © 2000, 2002, 2005, 2007 phpBB Group. Color scheme by ColorizeIt!
Logo by pixeldecals.com