It is currently Mon Oct 06, 2025 7:09 am

All times are UTC - 5 hours [ DST ]


Post new topic Reply to topic  [ 335 posts ]  Go to page Previous  1 ... 9, 10, 11, 12, 13, 14, 15 ... 17  Next
Author Message
 Post subject: Re: Well, here I go... pulling the motor.
PostPosted: Fri Nov 06, 2020 6:16 pm 
Offline
LOST Junkie

Joined: Sat Oct 01, 2016 8:24 pm
Posts: 652
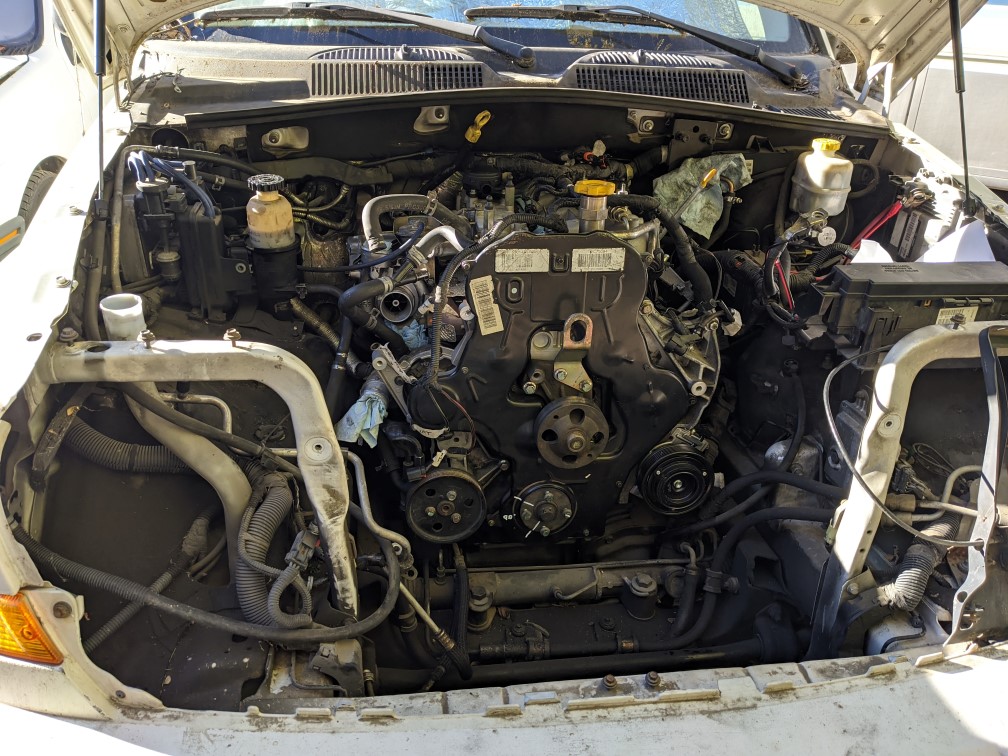
One upside of having to pull the manifold back off was that I remembered to clean it up a bit this time....

Image

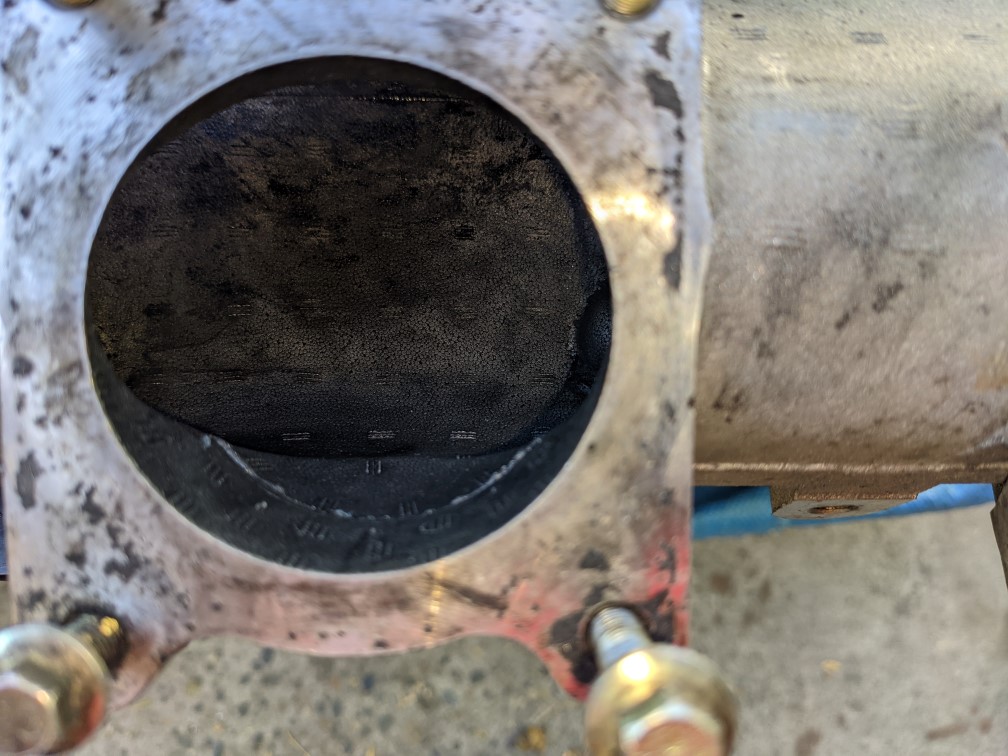
It's far from perfect - the runners are still a bit gnarly, but at least the plenum is clean. I'm sure it's no surprise to anyone here, but what came out was nasty. Literally chunks of goop. I'm pretty tidy when it comes to cleaning car parts, but this effort left a trail of crap on my driveway. Whoops!

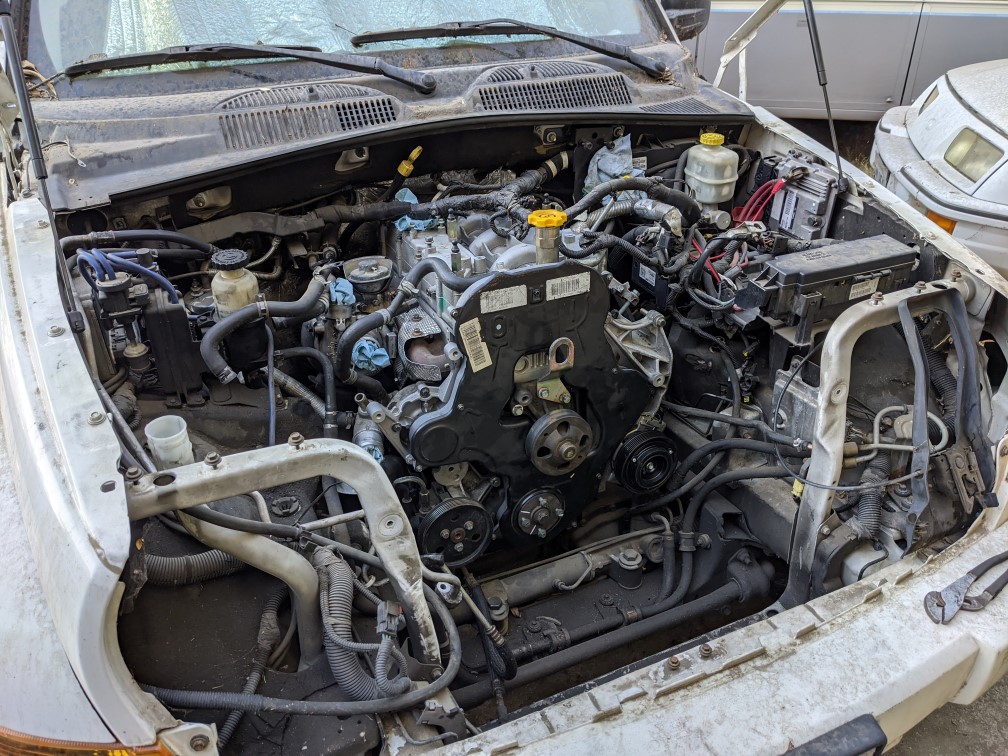
The parts pile is a bit less crazy in there than I thought, which is good. Nothing sucks worse than taking something and then forgetting where everything goes.

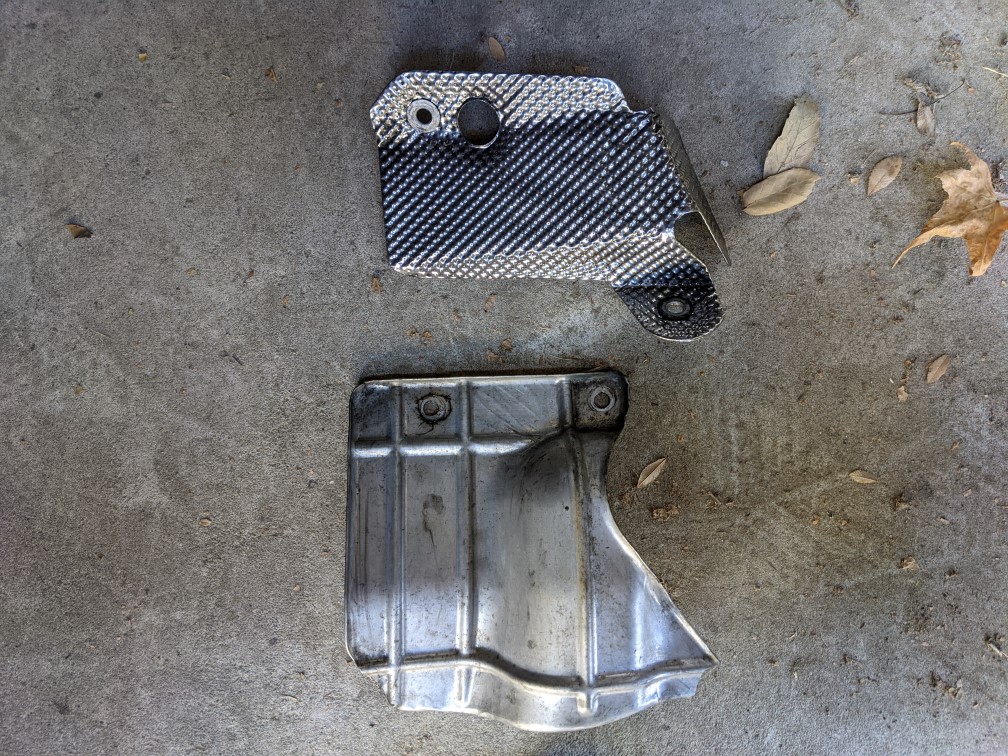
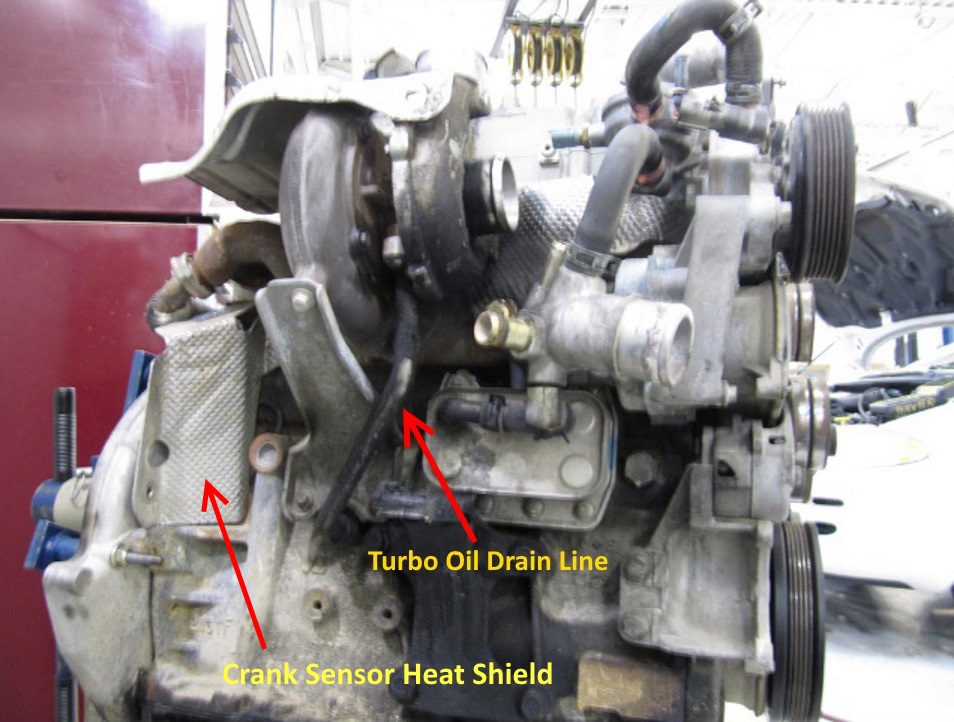
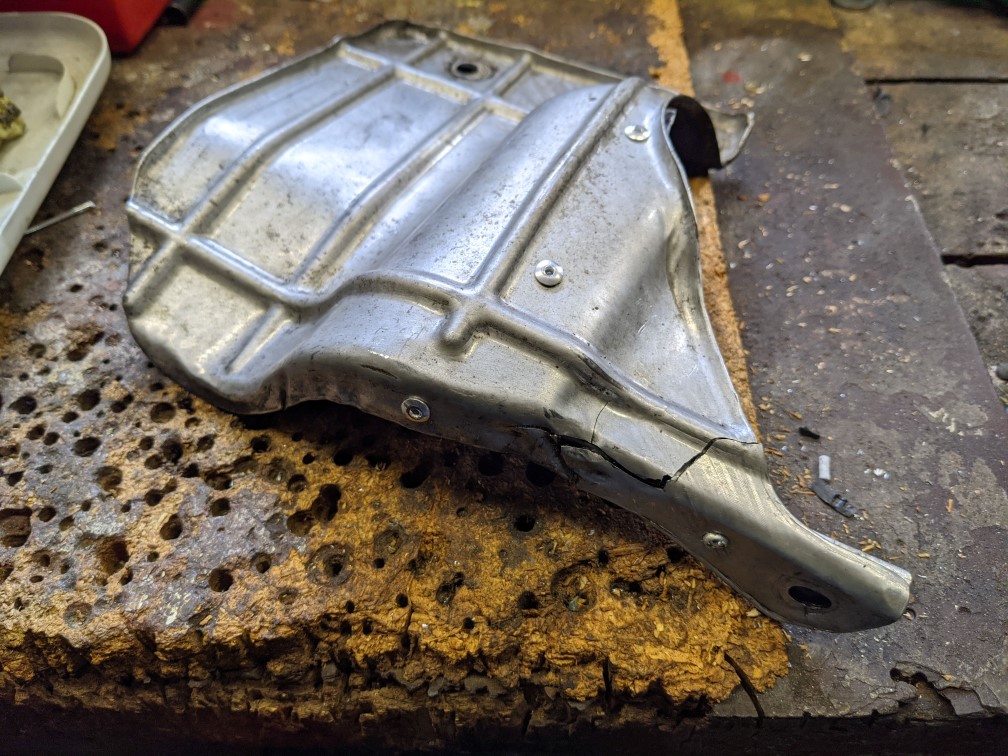
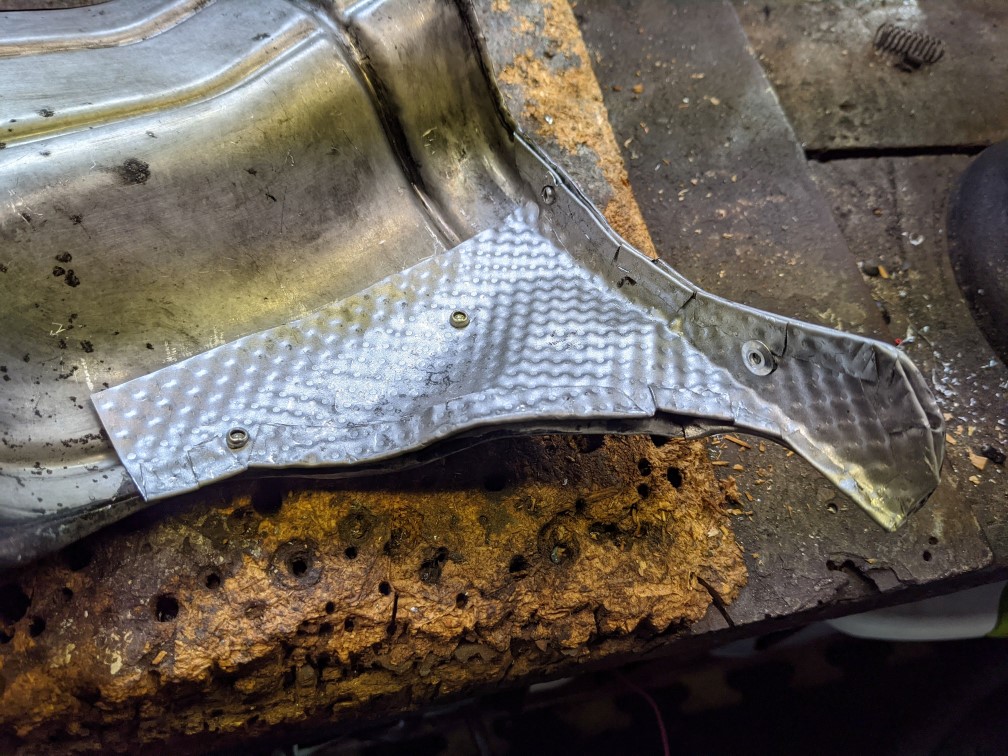
The only thing I can't immediately identify is a bracket that might be the turbo support bracket.

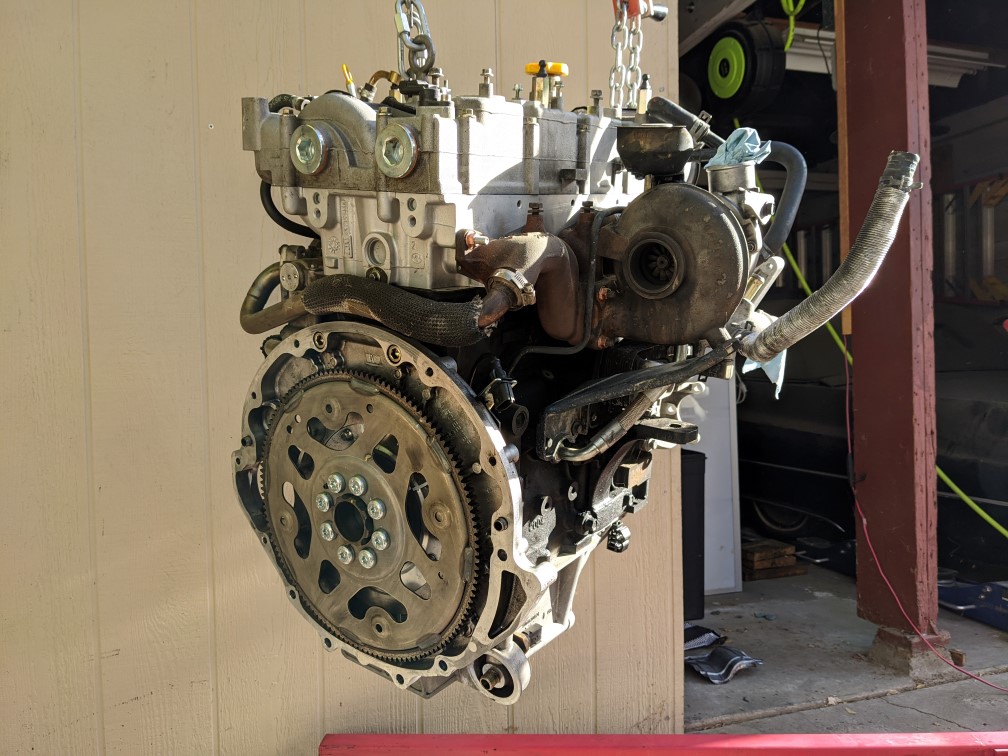
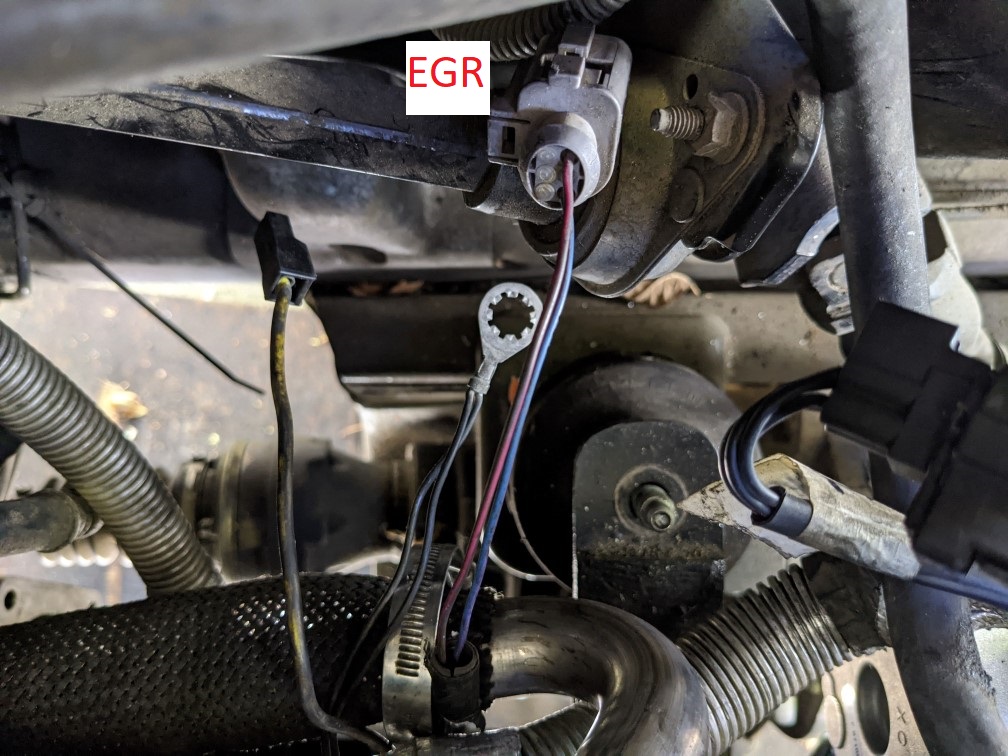
I need to get the camifold back on, and the EGR pipe reinstalled (no, I can't delete it). Then flex plate and bell housing adapter.

Other motor-related parts that I'm wondering about:

1. Viscous heater
2. Crank pulley
3. Serpentine belt idler pulleys
4. Intake elbow

Is there any reason this stuff should go on the motor before putting the motor in the car? Less stuff to get in the way during install is always nice. :)

Also, I have a replacement updated fuel head & new filter to go in... I assume there's no problem installing this after the motor is in, but is there any reason to do any of the work beforehand? I know there is a wiring change, but it looks pretty accessible.

That basically leaves a bunch of hoses & pipes, the alternator, and the starter which will go in when I get the thermostat.


Top
 Profile  
 
 Post subject: Re: Well, here I go... pulling the motor.
PostPosted: Mon Nov 09, 2020 1:12 am 
Offline
LOST Junkie

Joined: Sat Oct 01, 2016 8:24 pm
Posts: 652
Put the top of the engine back on this morning. Cranking the motor around this time resulted in no sproing sounds, so that was encouraging. Cam timing stayed intact across another 12 or 18 rotations, so, well, moving on!

Put the engine back on the hoist, got the bell housing adapter and flex plate installed. I left off all the parts in the post above - I couldn't see a reason they needed to be installed ahead of time.

Image

I couldn't find torque specs for the adapter, so I set them to good & tight. Hopefully nothing flies apart.

Getting the engine back in took far less time than getting it out - I found what I think it the optimal method for hoisting it...

Image

This work fabulously!

I ended the day with the engine mostly where it belongs....

Image

I got some questions I'm hoping someone can help with.

1. Can anyone direct me as to where these three bellhousing bolts go? I know two (guessing the matching two) go at the top... what about the other two?

Image

2. Where does the heatshield at the top go? I think somewhere around the crank position sensor, but I can't figure out the orientation. Maybe it's bent?

Image

3. Anyone have a turbo heatshield (one on the bottom in the photo above)? I can probably repair or replicate this one, but if someone has a good one I'd just assume have a part in better shape.


Top
 Profile  
 
 Post subject: Re: Well, here I go... pulling the motor.
PostPosted: Mon Nov 09, 2020 1:41 am 
Offline
Moderator
Moderator
User avatar

Joined: Sat Aug 24, 2013 11:36 pm
Posts: 7366
Location: Central GA
Quote:
2. Where does the heatshield at the top go? I think somewhere around the crank position sensor, but I can't figure out the orientation. Maybe it's bent?

It is the heat shield for the crank position sensor.

Image

_________________
Supporting Vendor and Moderator of LOST
05 Jeep Liberty CRD Limited :JEEPIN:
Ironman Springs/Bilstein/Shocks
Yeti StgIV Hot Tune
Week's BatteryTray
No FCV/EGR
Samcos/ProVent
SunCoast/Transgo
Carter Intank-pmp
2mic.Sec.Fuel Filter
Flowmaster/NO CAT
V6Airbox/noVH
GM11 Bld.fan/HDClutch
IronrockArms/wwdieselMount

98 Dodge Cummins 24 Valve


Top
 Profile  
 
 Post subject: Re: Well, here I go... pulling the motor.
PostPosted: Mon Nov 09, 2020 1:06 pm 
Offline
LOST Junkie

Joined: Sat Oct 01, 2016 8:24 pm
Posts: 652
Ah, got it.... When I was trying to figure it out the bell housing adapter wasn't on the motor so I couldn't see how it fit... should have looked again!

I think I am going to go ahead and plan on replacing the CPS. I don't know how old it is, it's easy to replace now. :)


Top
 Profile  
 
 Post subject: Re: Well, here I go... pulling the motor.
PostPosted: Tue Nov 10, 2020 6:17 am 
Offline
LOST Member

Joined: Mon Jul 18, 2016 6:33 am
Posts: 419
Location: Central KY
Too late for you now but might help in the future:

When I did my headgasket I knew it would be hit & miss (but wasn't thinking 2 years of hit & miss...) So for each part I took off I put all the little bits in a ziplock and labeled it. Then everything went into boxes in the order they came off. Plus I took pictures.

Still I had questions about routing wires & hoses etc. Thankfully my dad's KJ is just a mile down the road so I'd go & peek at his when needed.

Good luck and hope you finish soon,

_________________
2005 Liberty CRD. New rockers, exhaust valves; Provent, EGR block & butterfly delete & V6 air box at 100K

1998 XJ 4.0L, 2" lift

First Jeep: 1962 Willys CJ-3B


Top
 Profile  
 
 Post subject: Re: Well, here I go... pulling the motor.
PostPosted: Tue Nov 10, 2020 11:52 am 
Offline
LOST Junkie

Joined: Sat Oct 01, 2016 8:24 pm
Posts: 652
I use a parts organizer to keep fasteners together, and that has always worked for me. But, after a year the memory starts to fade and it doesn't help the guy who worked on this before me failed to reinstall a fair amount of hardware.... That makes my grouping approach not work right. :(


Top
 Profile  
 
 Post subject: Re: Well, here I go... pulling the motor.
PostPosted: Tue Nov 10, 2020 3:24 pm 
Offline
LOST Junkie

Joined: Sat Oct 01, 2016 8:24 pm
Posts: 652
For anyone following along, there was a little diversion down this thread:

viewtopic.php?f=5&t=87537&p=946454#p946454

where I figured out where the bell housing bolts go, and which ones the shop lost. :)

I gotta order:

1x 06102026 = M10 x 1.50 x 70.00 - $10.50
3x 06022266 = 3/8-16 x 1.50 - $5.50

And, eh, if I'm pissing money away on hardware I might as well order 4x 1949765, the little bolts that secure the torque converter to the flywheel.


Top
 Profile  
 
 Post subject: Re: Well, here I go... pulling the motor.
PostPosted: Wed Nov 11, 2020 1:26 am 
Offline
LOST Addict
User avatar

Joined: Thu Sep 06, 2007 9:51 pm
Posts: 6302
Location: Somewhere between Heaven and Hell... But it is really hot here on Earth...
The torque converter bolts ARE special ones (shallow heads) and also are supposed to be one-time-use b/c of how they are torqued.

DO NOT OVERTIGHTEN THEM. But DO put lots of locktite on them before installing!

_________________
Proud supporting vendor of LOST Jeeps
TRAVELING CRD TECH. I come to you!
Need help? Just ask! I've taken it apart more than most.
Email jeep [at] maincomputer [dot] com - BOARD MESSAGING IS BROKEN
Over 225 CRDs currently driving with my valves, timing belt, rockers, or ARP Studs.
Bad noises = REALLY bad things.


Top
 Profile  
 
 Post subject: Re: Well, here I go... pulling the motor.
PostPosted: Sat Nov 14, 2020 9:59 pm 
Offline
LOST Junkie

Joined: Sat Oct 01, 2016 8:24 pm
Posts: 652
Well, moparpartsgiant screwed me by shipping the bolts promptly, so I have no excuse not to continue with this....I decided to not climb back under today as the ground was quite wet, so instead I focused on some other stuff. First up was attempting a repair on the turbo heat shield. Here's what I came up with:

Image

Image

Image

I think this will work out great, assuming the little ear doesn't rattle. I suppose even if it does I won't hear it over the engine anyway. ;)

Somehow, I managed to label every wire but these....

Image

I'm assuming the single quick disconnect is for the starter, and the ring terminal grounds on the block.... Sound right?


Top
 Profile  
 
 Post subject: Re: Well, here I go... pulling the motor.
PostPosted: Sun Nov 15, 2020 12:35 am 
Offline
Moderator
Moderator
User avatar

Joined: Sat Aug 24, 2013 11:36 pm
Posts: 7366
Location: Central GA
Is that cover aluminum or steel?
They make some rods you can weld aluminum just using a simple propane hand torch.
Alumaloy 20 Rods - 1/8" x 18" Simple Aluminum Brazing/Welding Rods, for Aluminum Repair
https://www.amazon.com/ALUMALOY-Pound-A ... B01MQX8QJY

If it is steel, I would weld it with a brazing rod.

The wires look right, but you could look at the Factory wiring diagrams and compare color codes for the wires.
There is also some good diagrams in the FSM in the wiring section that shows where each connector goes, and it also has a section that shows grounds as well.
Ask if can't figure it out. :wink:

_________________
Supporting Vendor and Moderator of LOST
05 Jeep Liberty CRD Limited :JEEPIN:
Ironman Springs/Bilstein/Shocks
Yeti StgIV Hot Tune
Week's BatteryTray
No FCV/EGR
Samcos/ProVent
SunCoast/Transgo
Carter Intank-pmp
2mic.Sec.Fuel Filter
Flowmaster/NO CAT
V6Airbox/noVH
GM11 Bld.fan/HDClutch
IronrockArms/wwdieselMount

98 Dodge Cummins 24 Valve


Top
 Profile  
 
 Post subject: Re: Well, here I go... pulling the motor.
PostPosted: Sun Nov 15, 2020 12:43 am 
Offline
LOST Junkie

Joined: Sat Oct 01, 2016 8:24 pm
Posts: 652
The heat shield is a composite material - a multilayer thing. It's ferrous to some degree, but I'm not sure specifically what's involved. I think it'll be plenty sturdy - the material underneath is also headshield material, it's stout.


Top
 Profile  
 
 Post subject: Re: Well, here I go... pulling the motor.
PostPosted: Sun Nov 15, 2020 9:37 pm 
Offline
LOST Junkie

Joined: Sat Oct 01, 2016 8:24 pm
Posts: 652
It doesn't look like much, but this step cost four hours. :)

Image

Engine & trans are fully bolted up, torque converter reattached to the flex plate, and the starter installed. Some minor other things, but those were the big accomplishments. I'll get the intake elbow installed here next week, but the next steps require some parts - injector seals and a thermostat. I'll try and get them en route so I can install them over Thanksgiving. If I'm lucky, this thing will at least start by the end of the long weekend! (It'll be a bit longer before it's roadworthy though.... I'm going to do an electric fan conversion, and that'll take some coin)


Top
 Profile  
 
 Post subject: Re: Well, here I go... pulling the motor.
PostPosted: Sun Nov 15, 2020 11:21 pm 
Offline
Moderator
Moderator
User avatar

Joined: Sat Aug 24, 2013 11:36 pm
Posts: 7366
Location: Central GA
Looking good!
I got a brand new genuine Mopar thermostat never installed still in the box with the Mopar gasket if you are interested.
Price will be less than online vendors for genuine Mopar part.
PM if interested.

_________________
Supporting Vendor and Moderator of LOST
05 Jeep Liberty CRD Limited :JEEPIN:
Ironman Springs/Bilstein/Shocks
Yeti StgIV Hot Tune
Week's BatteryTray
No FCV/EGR
Samcos/ProVent
SunCoast/Transgo
Carter Intank-pmp
2mic.Sec.Fuel Filter
Flowmaster/NO CAT
V6Airbox/noVH
GM11 Bld.fan/HDClutch
IronrockArms/wwdieselMount

98 Dodge Cummins 24 Valve


Top
 Profile  
 
 Post subject: Re: Well, here I go... pulling the motor.
PostPosted: Mon Nov 16, 2020 6:55 pm 
Offline
LOST Junkie

Joined: Sat Oct 13, 2018 10:09 pm
Posts: 561
Location: Australia
Many small steps get you to the end of the journey quickest thesameguy. Watching your progress motivates me to get on with my 2007 rebuild. Thanks for all your posts.

_________________
Australian KJ CRD 2006


Top
 Profile  
 
 Post subject: Re: Well, here I go... pulling the motor.
PostPosted: Mon Nov 16, 2020 7:01 pm 
Offline
LOST Junkie

Joined: Sat Oct 13, 2018 10:09 pm
Posts: 561
Location: Australia
WWDiesel wrote:
Is that cover aluminum or steel?
They make some rods you can weld aluminum just using a simple propane hand torch.
Alumaloy 20 Rods - 1/8" x 18" Simple Aluminum Brazing/Welding Rods, for Aluminum Repair
https://www.amazon.com/ALUMALOY-Pound-A ... B01MQX8QJY

:


Hi WW, Do you have any experience with E4043 welding rods? I have welded aluminum with a TIG many times. Yesterday I was given a 1lb pack of E4043 rods and asked to try them & say what I thought of them. Thought it worth asking the brains trust here!

_________________
Australian KJ CRD 2006


Top
 Profile  
 
 Post subject: Re: Well, here I go... pulling the motor.
PostPosted: Mon Nov 16, 2020 8:06 pm 
Offline
LOST Junkie

Joined: Sat Oct 01, 2016 8:24 pm
Posts: 652
layback40 wrote:
Many small steps get you to the end of the journey quickest thesameguy. Watching your progress motivates me to get on with my 2007 rebuild. Thanks for all your posts.


One nice thing about this project is that at the end of the day, I'm in no hurry whatsoever. If I had a deadline, this would have been a major chore. While I never wanted an 8 month (or three year!!!!!) break, working a little bit at a time has kept frustration levels basically non-existent. I have the end of the road in sight at this point, so probably my greatest fear is finding out something isn't right....

Yesterday after installing the torque converter bolts (having to turn the motor over a few more times) I paused from the work to one more time install the alignment pins in the crank & cams so I could be 100% sure the timing was set. I did notice that it was actually becoming quite difficult to do so at times, so I actually think the valves are seating better. I need to jack the front up to torque the bottom two bell housing bolts (my torque wrench won't clear the ground) and then I will very likely put oil in it and use the starter to turn it over a bunch, see if I can get the valves seated the rest of the way and give everything more more change to go sideways. ;)

After that, the only thing really left is if that leak were to reappear... man, I don't wanna think about it. I keep turning it over in my head and I just gotta believe the issue was the rear bearing carrier not sealing - either the o-ring failed, or the five bolts securing it to the block didn't stay seated. Something. There's just nothing else back there that could dump that much oil.

I will mention that during this time I have done MOUNTAINS of other car work on a half dozen other cars, including two transmissions and an engine on Saab 9-3s. The difference is that I know those cars well..... In the actual work time it's taken me with this Jeep I could have put a dozen transmissions or engines in 9-3s. :) Everything on the Liberty is a learning process, and I have zero confidence in everything. :D


Top
 Profile  
 
 Post subject: Re: Well, here I go... pulling the motor.
PostPosted: Mon Nov 16, 2020 10:32 pm 
Offline
Moderator
Moderator
User avatar

Joined: Sat Aug 24, 2013 11:36 pm
Posts: 7366
Location: Central GA
layback40 wrote:
WWDiesel wrote:
Is that cover aluminum or steel?
They make some rods you can weld aluminum just using a simple propane hand torch.
Alumaloy 20 Rods - 1/8" x 18" Simple Aluminum Brazing/Welding Rods, for Aluminum Repair
https://www.amazon.com/ALUMALOY-Pound-A ... B01MQX8QJY:

Hi WW, Do you have any experience with E4043 welding rods? I have welded aluminum with a TIG many times. Yesterday I was given a 1lb pack of E4043 rods and asked to try them & say what I thought of them. Thought it worth asking the brains trust here!

Never used them, but would love to try them. I have used the Alumaloy rods and they work for some minor aluminum repairs.
But always searching for a better solution without having to purchase an expensive tig outfit. :lol:

_________________
Supporting Vendor and Moderator of LOST
05 Jeep Liberty CRD Limited :JEEPIN:
Ironman Springs/Bilstein/Shocks
Yeti StgIV Hot Tune
Week's BatteryTray
No FCV/EGR
Samcos/ProVent
SunCoast/Transgo
Carter Intank-pmp
2mic.Sec.Fuel Filter
Flowmaster/NO CAT
V6Airbox/noVH
GM11 Bld.fan/HDClutch
IronrockArms/wwdieselMount

98 Dodge Cummins 24 Valve


Top
 Profile  
 
 Post subject: Re: Well, here I go... pulling the motor.
PostPosted: Tue Nov 17, 2020 5:52 pm 
Offline
LOST Addict
User avatar

Joined: Thu Sep 06, 2007 9:51 pm
Posts: 6302
Location: Somewhere between Heaven and Hell... But it is really hot here on Earth...
layback40 wrote:
WWDiesel wrote:
Is that cover aluminum or steel?
They make some rods you can weld aluminum just using a simple propane hand torch.
Alumaloy 20 Rods - 1/8" x 18" Simple Aluminum Brazing/Welding Rods, for Aluminum Repair
https://www.amazon.com/ALUMALOY-Pound-A ... B01MQX8QJY

:


Hi WW, Do you have any experience with E4043 welding rods? I have welded aluminum with a TIG many times. Yesterday I was given a 1lb pack of E4043 rods and asked to try them & say what I thought of them. Thought it worth asking the brains trust here!


I'm not familiar with the E4043 rods, but are these that Aluminum brazing rod thing? I've tried some of those and the results have been just "meh" for me, not impressed. But I found a video by "project farm" on Youtube where he tried a bunch of these and the discovery is that the temperature control is VERY critical with these.

I'm a halfway-decent MIG welder - my welds might be ugly but at least they are weak! But I've never gotten into TIG, that's a goal for the future.

_________________
Proud supporting vendor of LOST Jeeps
TRAVELING CRD TECH. I come to you!
Need help? Just ask! I've taken it apart more than most.
Email jeep [at] maincomputer [dot] com - BOARD MESSAGING IS BROKEN
Over 225 CRDs currently driving with my valves, timing belt, rockers, or ARP Studs.
Bad noises = REALLY bad things.


Top
 Profile  
 
 Post subject: Re: Well, here I go... pulling the motor.
PostPosted: Tue Nov 17, 2020 8:18 pm 
Offline
LOST Addict

Joined: Sat Apr 17, 2010 3:29 pm
Posts: 1167
Uhhh, geordi; your quote:

"I'm a halfway-decent MIG welder - my welds might be ugly but at least they are weak! But I've never gotten into TIG, that's a goal for the future."


Don't you mean to say that your welds may be ugly but at least they are NOT weak?

I just spoke to PZKW108 as he is a professional welder... he thinks that any method other than TIG is second class.


Top
 Profile  
 
 Post subject: Re: Well, here I go... pulling the motor.
PostPosted: Tue Nov 17, 2020 9:58 pm 
Offline
Moderator
Moderator
User avatar

Joined: Sat Aug 24, 2013 11:36 pm
Posts: 7366
Location: Central GA
geordi wrote:
I'm not familiar with the E4043 rods, but are these that Aluminum brazing rod thing? I've tried some of those and the results have been just "meh" for me, not impressed. But I found a video by "project farm" on Youtube where he tried a bunch of these and the discovery is that the temperature control is VERY critical with these.
I'm a halfway-decent MIG welder - my welds might be ugly but at least they are weak! But I've never gotten into TIG, that's a goal for the future.

Welding aluminum with the aluminum brazing rods is an art, you have to heat the metal to just below its melting point but high enough that it actually melts the welding rod when you touch it to the hot metal. You don't heat the rod, only the metal. It is kind of like soldering in reverse. The final product is quite strong for small thin jobs but for any bigger/thicker metal it would never work.

And yes, a Tig weld is the cat's meow, but not everyone has the money to run out and buy a whole new welding outfit just to make a couple of welds in aluminum.
It is cheaper to take it to someone who already has a Tig outfit and pay them to weld it.
I too am a very good mig and stick welder, sometimes they may not turn out to be the prettiest welds I want, but looks are not what is really important, penetration and strength are what really count in the end.
I have had a local certified welder inspect some of my welded brackets and they passed. He did give me a few pointers to try going forward. :D

_________________
Supporting Vendor and Moderator of LOST
05 Jeep Liberty CRD Limited :JEEPIN:
Ironman Springs/Bilstein/Shocks
Yeti StgIV Hot Tune
Week's BatteryTray
No FCV/EGR
Samcos/ProVent
SunCoast/Transgo
Carter Intank-pmp
2mic.Sec.Fuel Filter
Flowmaster/NO CAT
V6Airbox/noVH
GM11 Bld.fan/HDClutch
IronrockArms/wwdieselMount

98 Dodge Cummins 24 Valve


Top
 Profile  
 
Display posts from previous:  Sort by  
Post new topic Reply to topic  [ 335 posts ]  Go to page Previous  1 ... 9, 10, 11, 12, 13, 14, 15 ... 17  Next

All times are UTC - 5 hours [ DST ]


Who is online

Users browsing this forum: No registered users and 77 guests


You cannot post new topics in this forum
You cannot reply to topics in this forum
You cannot edit your posts in this forum
You cannot delete your posts in this forum

Search for:
Jump to:  
Powered by phpBB © 2000, 2002, 2005, 2007 phpBB Group. Color scheme by ColorizeIt!
Logo by pixeldecals.com