Here's what I did though:
1. Removed front skid. No need to jack anything up unless you want more room to work.
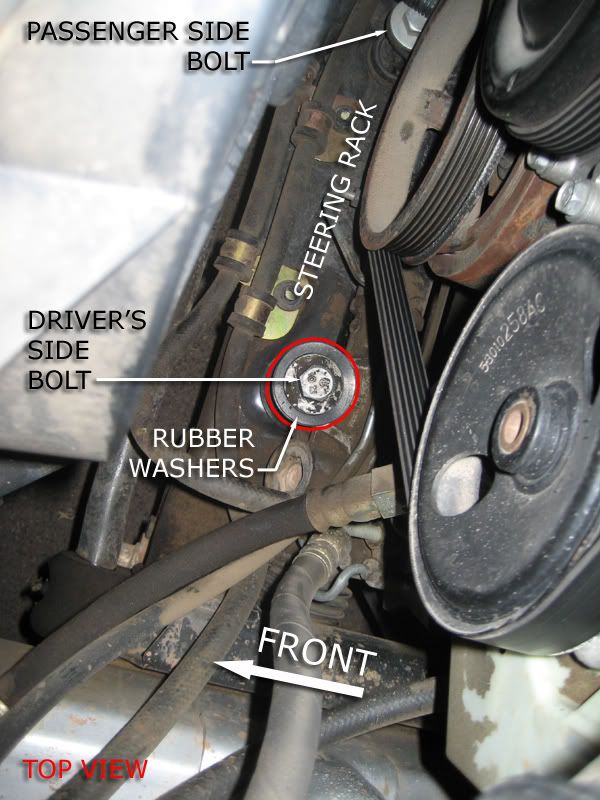
2. Used a large adjustable wrench on the top driver's side bolt and let it rotate against the frame to offer leverage in order to loosen the bottom bolt. Used a 24mm socket with a breaker bar to loosen the bottom bolt.
3. The bolt slides up and out very easily since it nests inside a steel collar within the bushing itself.
4. I didn't touch the passenger side bolt at all. The rack can now be pushed towards the engine a bit - but not enough for the bushing to come out of the bottom.

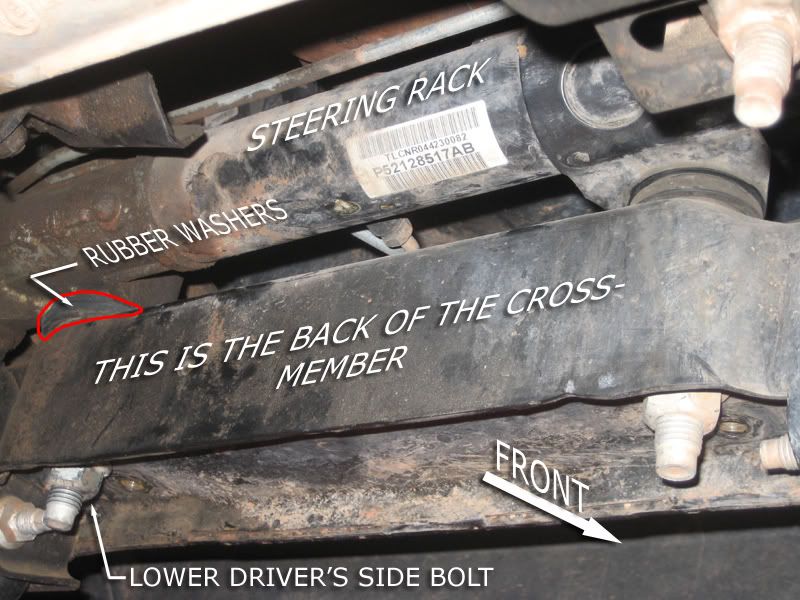
It's a flanged bushing (with flanged collar), so it only comes out from the bottom.
5. Cleaned up the surfaces. I noted some grime, but not a lot.
6. From below I reached up and grabbed the driver's side tie rod close to the end and pushed up. The rack moves easily, pivoting upward about the passenger side bolt.
7. I then slipped two of the new washers in place stacked between the rack and the frame. I checked to see that they were close to lining up with the hole.
8. I put the other two washers on the bolt below the large steel top washer and dropped it in place, making sure I went through the lower washers. The rubber washers are between the steel washer and the top of the rack.
9. Placed the adjustable wrench back in postion at the top bolt, and tightened it from below. The manual calls for 120 lb of torque. Not having a torque wrench that goes that high, I used my breaker bar to get it as tight as I could. I'll keep checking it periodically to make sure it's snug.
There's additional rubber thickness than the stock bushing overall, so the rack probably has slightly more movement than if the bushing were replaced correctly, but it's solid and holding. Today I probably put close to 100 miles on it - mostly highway at 65mph. Did some full lock to lock turns and wheeled a couple gnarly 4" speed bumps, too. It feels great - like it never failed.
TL