| LOST JEEPS http://www.lostjeeps.com/forum/phpBB3/ |
|
| New JBA A-Arms came in! http://www.lostjeeps.com/forum/phpBB3/viewtopic.php?f=3&t=36444 |
Page 1 of 2 |
| Author: | JeepinMaxx [ Thu Oct 02, 2008 11:17 pm ] |
| Post subject: | New JBA A-Arms came in! |
The new JBA (Jeepin By Al) upper control arms came in this week. Ordered them from JBA Thursday around 1pm - they shipped the same day - showed up on Monday (great customer service too). New factory UBJ/arms were quoted $800 for a pair installed at the stealership So when the ball joints went on the Liberty for the 3rd time
The instructions have me getting at the A-Arm bolts from the engine compartment and removing the battery, air box, and all sorts of other stuff under the hood I appreciate the feedback of JBA Gen 4.5 folks - Thanks |
|
| Author: | Dje Ryu [ Thu Oct 02, 2008 11:26 pm ] |
| Post subject: | |
Actually they make it easier to have aligned. As for getting to all the bolts from below: not possible. you'll have to remove the battery and air box, as well as disconnect a driver side brake line bracket to get around the line for the front mount. Otherwise, you have to disconnect the line itself. You'll see what I mean when you do it. (Dis)connecting the driver side rear bolt is the hardest part. |
|
| Author: | JeepinMaxx [ Thu Oct 02, 2008 11:43 pm ] |
| Post subject: | |
Dje Ryu wrote: Actually they make it easier to have aligned. As for getting to all the bolts from below: not possible. you'll have to remove the battery and air box, as well as disconnect a driver side brake line bracket to get around the line for the front mount. Otherwise, you have to disconnect the line itself. You'll see what I mean when you do it. (Dis)connecting the driver side rear bolt is the hardest part.
Thanks for the input - glad that the JBA arms are OK for alignment. |
|
| Author: | tommudd [ Fri Oct 03, 2008 12:10 am ] |
| Post subject: | |
I am lazy... I never removed the battery only the air box, other than the left rear bolt its a walk in the park |
|
| Author: | Pablo [ Fri Oct 03, 2008 12:12 am ] |
| Post subject: | |
I would not drive 200 miles before getting the alignment checked, as the probability of eating your tires is very high. |
|
| Author: | Dje Ryu [ Fri Oct 03, 2008 12:58 am ] |
| Post subject: | |
Pablo wrote: I would not drive 200 miles before getting the alignment checked, as the probability of eating your tires is very high.
Agreed. I went about 75 but I made sure about half of those were some nice rough wheelin'! |
|
| Author: | Jeep4me99 [ Fri Oct 03, 2008 6:15 am ] |
| Post subject: | |
i didn't remove the battery either, but did remove the air box, the passengers side was much easier than the drivers. that rear one is a PITA!!!! but I did it by myself in about an hour. |
|
| Author: | JeepinMaxx [ Fri Oct 03, 2008 8:00 am ] |
| Post subject: | |
Pablo wrote: I would not drive 200 miles before getting the alignment checked, as the probability of eating your tires is very high.
I plan on having it aligned before driving it anywhere - just wanted to make sure it was easy/able to align it after the JBA arms were installed. So... the rear driver side bolt is a PITA? What's the best way to attack that one? |
|
| Author: | tommudd [ Fri Oct 03, 2008 8:54 am ] |
| Post subject: | |
JeepinMaxx wrote: Pablo wrote: I would not drive 200 miles before getting the alignment checked, as the probability of eating your tires is very high. I plan on having it aligned before driving it anywhere - just wanted to make sure it was easy/able to align it after the JBA arms were installed. So... the rear driver side bolt is a PITA? What's the best way to attack that one? with extensions and swivel from the front, snaking it back through to the nut, not hard but time consuming or more so than the rest. I would snug mine up and then when on the ground finish torquing them, if you tighten them when its up in the air it preloads them and it will set way high, either that or take it out and go through some dips etc before the alignment to settle the new arms in |
|
| Author: | Sport [ Fri Oct 03, 2008 9:12 am ] |
| Post subject: | |
Those arms are sweet much improvement from the old. I need to upgrade my gen 3 for these |
|
| Author: | tommudd [ Fri Oct 03, 2008 9:45 am ] |
| Post subject: | |
Sport wrote: Those arms are sweet much improvement from the old. I need to upgrade my gen 3 for these
lots, no LOTS of difference between the 3s and the 4.5s for sure, much better design/engineering |
|
| Author: | jeepkj02 [ Fri Oct 03, 2008 10:11 am ] |
| Post subject: | |
Sport wrote: Those arms are sweet much improvement from the old. I need to upgrade my gen 3 for these
JBA Upgrade Program: http://jeepinbyal.com/cat-Als_Upgrade_Program-28.aspx |
|
| Author: | JeepinMaxx [ Fri Oct 03, 2008 10:11 pm ] |
| Post subject: | |
Thanks for the tip on the install! Doing a wrenchfest tomorrow to get it done in time for the Columbus weekend ride. If anyone is interested in helping/learning - we are wrenching in North Eastern CT - Pizza and Beverages on me (PM me) I'll try to document the install for the next newbies to learn from |
|
| Author: | JeepinMaxx [ Sun Oct 05, 2008 12:10 am ] |
| Post subject: | |
Got them in today. As expected - Driver side was a pain. Thanks to the suggestions and tips from LOST folk - we were successful Follow JBA instructions (nice install info + pictures) Some install notes: Driver Side: removing all the battery, battery tray and fuse block makes it easier. Using a 18mm swivel socket on a long extension + impact gun helps taking out the back bolt in 5 minutes (thanks for the tip Tommudd Passenger side: The same swivel socket(21mm this time) + extension + impact gun worked great for the ball joint bolts (learned that one on the driver side after the wife practiced rowing a boat using a ratchet and a pipe for leverage on the passenger side A pickle fork works good for separating the old ball joints Have a bottle jack available to compress / support the lower control arm during the install Installing the passenger side arms takes a few minutes if you have a helper/second set of hands Installing the drivers side is a PITA - You have to reach your arm across several flesh cutting protrusions to insert the bolt- after that - use the previously mentioned swivel socket & extension New v Old
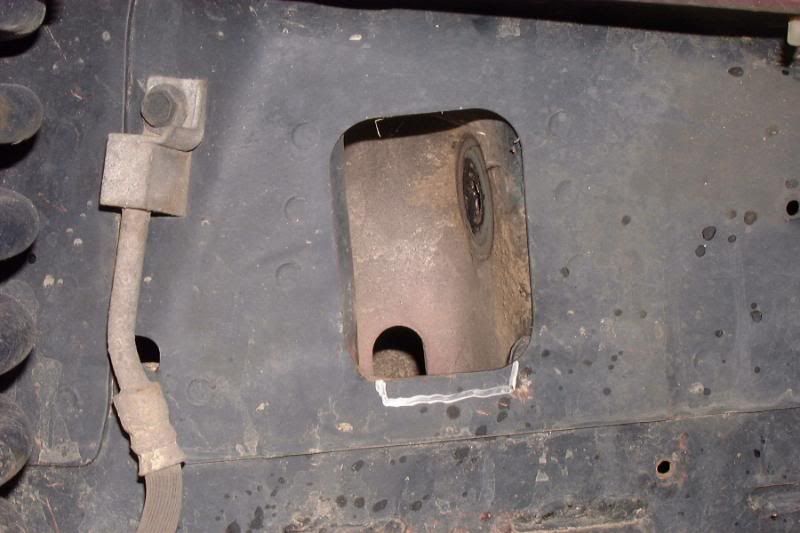
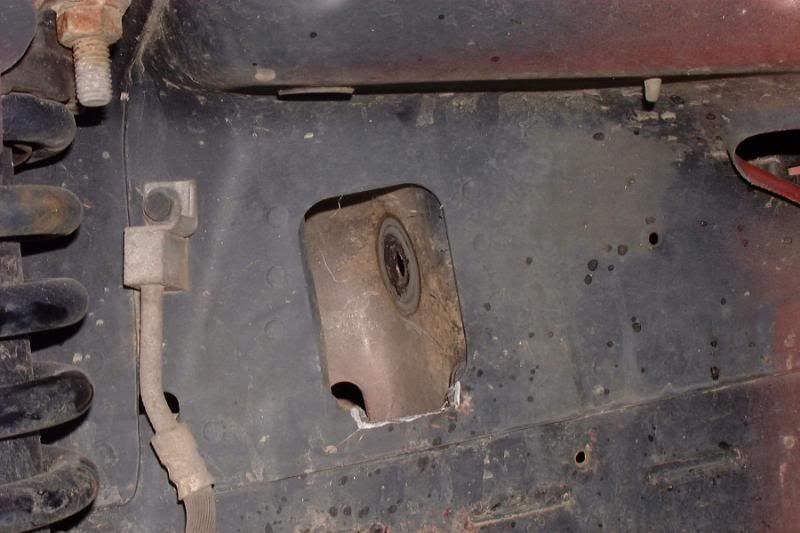
Clearanced the pockets for more droop
Finished product
|
|
| Author: | RAYMAN975 [ Sun Oct 05, 2008 11:42 am ] |
| Post subject: | |
those are awesome!! im going to definitely have to get a set of those! i got my passenger side replaced under my extended warranty, as well as the tie rod ends, because right after the lift they wouldnt align it because those parts were worn. otherwise if i had to pay, i would have just gotten the JBA arms i would recommend you getting the teraflex bumpstops in the front upper. and notch it out for the grease zerk fitting, so when the arm goes up, it wont possibly break off the fitting. and if you dont get the upper teraflexes right away, i would drill a hole where the grease zerk would touch so it can go up inside the bumpstop i helped jon install these on his, they are very beefy arms, well made! but yes, taking out the battery, batterybox, and airbox takes the most time. the left rear bolt is a PITA, but what everybody else said, more of a patience thing, than being actually hard to do |
|
| Author: | spoonplugger1 [ Sun Oct 05, 2008 10:16 pm ] |
| Post subject: | |
Guess I've been asleep at the wheel, didn't know there was anything wrong with my black set, why would I need to change again? To late now anyway. |
|
| Author: | AdamIsAdam [ Tue Oct 07, 2008 10:26 pm ] |
| Post subject: | |
I upgraded my Gen 3's for the 4.5's. My old ones were creaking for some reason. Not sure if UBJ's were wearing out or the bushings were, but they seemed ok other than the noise. Anyway, I just did a writeup for www.jpfreak.com on them (and also on www.jeeptales.com). Marlin got me the new arms quickly as he always does (amazing service). Also, on mine, where I had tires rubbing on the old arms, they do not rub on the new ones. I went off roading with them two weeks ago right after the install, and they were great. Tight turns, etc. If you have the older ones, Marlin suggests checking around the welds by the ball joints regularly for signs of cracking. If they appear ok, there's no need to upgrade. But the new ones are substantially better made and designed. I personally feel safer with them. |
|
| Author: | tommudd [ Tue Oct 07, 2008 10:50 pm ] |
| Post subject: | |
Talking about checking around the welds is a great idea, I bought a set of the Gen 3 from a member on here. He said they were good but when I got them and started to sand them down to repaint them I noticed that they had some small cracks along the welds, almost unnoticeable to the naked eye if you were just glancing at them. The member that I bought them from had no idea that they were bad (and made it right with me) BUT just saying check them close around the ball joint where its welded! |
|
| Author: | JeepinMaxx [ Tue Oct 07, 2008 11:50 pm ] |
| Post subject: | |
Got the alignment done today - it took two test drives - but it worked out... The tech commented on the new JBA arms and liked how easy it was to align the new arms vs stock |
|
| Author: | dieselenthusiast [ Wed Oct 08, 2008 12:49 am ] |
| Post subject: | |
JeepinMaxx wrote: Got the alignment done today - it took two test drives - but it worked out... The tech commented on the new JBA arms and liked how easy it was to align the new arms vs stock
Wow, that's good to know, I'm surprised it made any difference at all concerning it's ease for alignment. |
|
| Page 1 of 2 | All times are UTC - 5 hours [ DST ] |
| Powered by phpBB © 2000, 2002, 2005, 2007 phpBB Group http://www.phpbb.com/ |
|