Pics:
Candied Euros:

Regular:


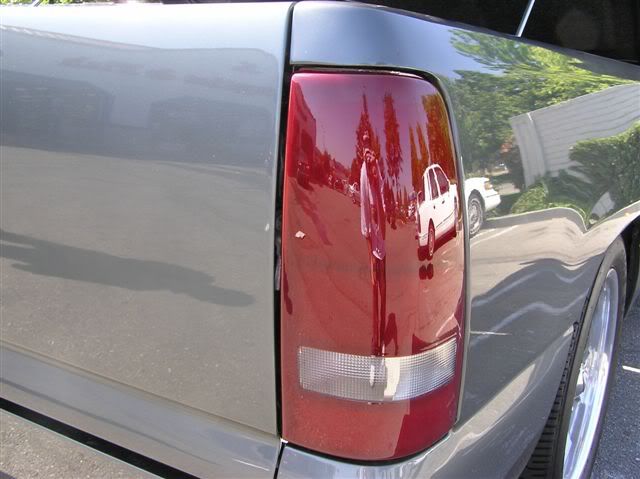

1. Sand the lights. Do you want to remove the "dot" and other markings? Use 220 on them. They'll look pretty roughed up after that (i only used 220 where the actual markings were to burn them down quick) Then you'll want to use 320 to smooth everything up. Go ahead and do the whole light with 320 (even the sections you are going to mask off) Then you'll want to go to 400 and then 600. I'd recommend wetsanding with these grits as well to keep everything nice and smooth, plus the water will clean the dust off as you sand.
2. Ok, you've now prepped your light, it looks like a hazy mess, you might think it is ruined...trust me, it isn't. Clean it really well, make sure to remove all the sanding residue, if you see areas you have missed, go over them again as with any painting, prep work is KEY. If you want to tape off the reverse light now is the time to do it, I used blue painters tape on mine, came out nice. You'll also want to put some tape over the bulb holes and any other areas you don't want paint on. Make sure the edges of all the tape are smoothed down nicely. Don't use "regular" masking tape as the paint will just seep under the edges.
3. You have prepped, prepped some more, and masked off the areas you don't want red. Now is time to spray your paint. You can use testors candy apple red (found at hobby stories) or any candy paint that you want. I've had good luck with testors, i've also bought some candy red that I had custom mixed to make it darker than the testors, i have yet to use it though. Put a light flash coat on the light, don't put too much now, as it could run. Let that set up and tack for 5 minutes or so, and then come back and put your coat on. Wait and give that coat time to tack up nice and come back with various more coats until you are satisfied with the tint of the light.
4. Let it dry completely, I left mine over night and pulled off the tape the next day exposing my reverse light.
5. Wetsand. after everything was dry I pulled my tape off and went back to my sandpaper to even up the candy paint. If any trash fell in it while painting, don't freak out, it'll sand right off the top layer. I used 600 wet to wetsand to make sure my paint was nice and even and had a good look to it. The paint will look hazy after it is wetsanded and the taped off areas will still be hazy from previous sanding, this is ok, and nothing is wrong with the light, it doesn't need to be shiney at this point, don't bother with grits over 600 or 800 at this point as it is just wasting time.
6. Time for the Clear Coat. Clean the light again, make sure all your sanding residue is gone and get ready to spray your clear. I used dupont automotive grade clear on my lights after wetsanding. I didn't have any reaction from the clear and the testors paint, but be warned, i've heard others have, likely from not letting the testors fully dry, or bad prep. I put two coats of clear on and left it sitting again to cure overnight. Some people use Testors clear coat out of the can, i'm sure this is "ok" but it won't look as nice as automotive clear. Also, it is much easier to paint out of a spray gun than a can. The testors cans leave a lot to be desired and will sputter, be careful with them, especially when they are almost out, they sputter a lot when almost empty and can mess up all of your work and you'll be stuck with reprepping the light again.
7. This step is optional, you'll notice the light is nice and shiney now, all the hazy spots (taped off areas, candy red areas) are no longer hazy and have a great shine to them. If you want them to have a really nice shine, you can wetsand again. This is what those high grit papers are made for. Finish up wiht 2000 here then buff out wiht a 3m product such as their Fine Cut Swirl Remover. I have some that says it buffs out up to 1500 grit sanding scratches. Wetsanding the clear will also level everything up and remove any trash that fell on top of the clear when it was curing. I haven't done this step yet, but plan to when I have the time.

 Login
Login Register
 FAQ
FAQ Search


