At The Helm for the win. Ok, I'll do a brief write up below, accompanied by images since the instructions are really only useful (for a Liberty) for the pictures of how the Westin Bull Bar actually assembles.
To begin, the lower grill
HAS to be cut, theres no way around it. It's cut in two columns off on each side (leaving the middle two columns). As seen, in the picture below, the bracket will not fit (no matter how you shimmy it) otherwise. And my problem was, you actually cant even see the second bolt holes until you
cut the upper plastic portion of the lower grill off (look like theyd be close to the wheels on each side, because there are visible holes there... NOPE).

So naturally, the first step is taking a hack saw to these little grill sections.

They are extremely thin plastic and can be cut through like butter. Took a lot of stress out here.

But aside from just the columns being removed from each side, you also HAVE to remove an upper shroud or the brackets cant mount up to the frame holes. Pic below shows how I cut around the under/upper side of the lower grill to allow room for the Westin Bracket. Line up the proper bolts (one is a literal metal bar about 3" long with two screw ends off each side, slide it up and in sideways until its over the rear hole, then press it in through the frame holes)... same for each side (the driver side has the rad hoses in the way, we'll get there in a sec... and no I didn't cut the mesh cover over the tubes, it was actually already like that). Hand tighten the nuts on the ends of the bolts to make sure they dont fall off; don't fully tighten them yet.


Simply assemble the attachment brackets onto the Westin Bull Bar (literally one big washer and screw for each side), not fully tightened, allowing for the attachment brackets to move freely without falling off. Hold this up to your Liberty's front bumper to make sure the attachment brackets line up with your now mounted bull bar brackets on your vehicle. If they line up, FULLY tighten the mounting brackets ON YOUR VEHICLE. The driver side is a p.i.t.a. because of the hoses, but just use some man-power, hold em' back and tighten them:

From the front/non under view, the brackets installed look like this (below). This was BEFORE I cut the second row of the lower grill off on the driver side. Only the passenger side bracket is mounted in this photo:

Once you're done playing with the saw and cutting the stupid plastic lower grill (again I DIDNT remove this because I did NOT want to REMOVE MY ENTIRE BUMPER) you're at the easy part. Sit nice and close to the Jeep, hold the Westin Bull Bar in your lap and fit it up against the two mounted brackets on your vehicle, making sure they still line up... Stuff the appropriate washers on the bolts, and thread the bolts through the mounting adapters into the Jeeps now mounted Westin Bull Bar Brackets. Rench n' rachet time... you know the drill!

Now, either remove your lower valance, or push that lower most plastic valance back... it bends, trust me. Hold it back or have a friend hold it for you, and while elevating your bullbar into its proper vertical alignment NOW tighten the backs of the bolts we previously allowed loose for the bull bar's attachment brackets (not the ones on the jeep).

The most satisfying part; Remove the stainless steel protective film. Enjoy every second of it.

Enjoy! This was an EXTREMELY easy install, once my new Jeep friend above helped me locate the proper brackets, and once you figure out how to properly shimmy the studded bar into the frame of your Jeep. Basic tool set assembly.

I disliked the stainless steel (didn't match), so I plastidipped that black with some glossifier on top. Heres the final product! (again, I know many of you hate on the hood applique; I like the look of it. If they made a vented hood, I'd probably own that instead).

HUGE thank you to
At the HELM for taking the time to look into this with me; Much appreciated. Love knowing a community like this exists-- and I hope this might help others who get stuck on what should have been the most simple modification ever


 Login
 Register
 FAQ
 Search


 ... spent 1.5 hr looking for darn holes.......


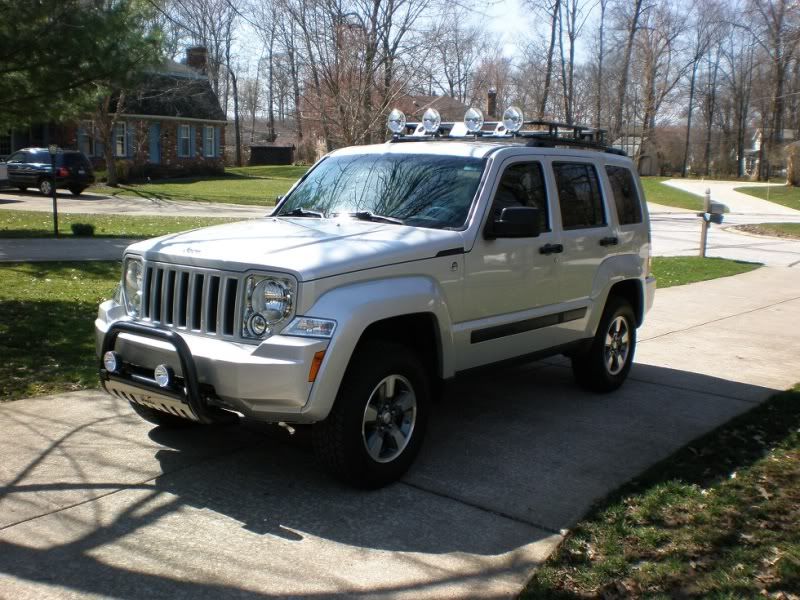


 Check back in a few hours and I'll have closer pictures posted KrazyKK! Thanks for the kind words about my Liberty!

