It is currently Sat Sep 13, 2025 8:28 am

All times are UTC - 5 hours [ DST ]


Post new topic Reply to topic  [ 25 posts ]  Go to page Previous  1, 2
Author Message
 Post subject:
PostPosted: Mon Feb 19, 2007 10:00 am 
Offline
Lifetime Member
Lifetime Member
User avatar

Joined: Fri Dec 30, 2005 11:50 am
Posts: 802
Location: 15 acres of goodness in Fleetville, PA
I really didn't want the Lotek because I wanted to keep my handle (And because They won;t produce the 3-pod one, which pisses me off).

I kept the handle! pics coming soon...

_________________
-oooooo- ---Craig, L.O.S.T. #CT068103
/______\ ---http://jeep.allgris.com
O||||||||O ---'02 Sport 4x4, 5-spd,
[]--------[] ---2.5" BDS lift, 245/75/16 MT/Rs, Moab Rims, Locked and Regeared!
[]_____[] ---The list got to long, go to my web site for more!


Top
 Profile  
 
 Post subject:
PostPosted: Mon Feb 19, 2007 10:33 am 
Offline
Lifetime Member
Lifetime Member
User avatar

Joined: Fri Dec 30, 2005 11:50 am
Posts: 802
Location: 15 acres of goodness in Fleetville, PA
Image
Image

Sorry for the crappy quality. Snapped them with my phone on break.

I wanted the handle, so I removved it from the stock pillar cover and dremeled holes into the lotek pod where they should go. The handle ends up sitting about 3/4" higher up the pillar than the stock setup. I drilled holes into the A-Pillar through the handle mounting holes and tapped them to fit the stock screw. Once they were mounted up I checked them for strength (They don't move at all)

With the stock cover, there is a recessed area for your hand, and the handle sits on the edges of that. When I put the handle on there were large gaps where the contour of the handle and lotek didn't match up. I needed to fix that.

I put a coat of JB Welk Quickset adhesive on the outside to hole everything in place. I removed the lotek pod and brought it inside where it's warm. I applied another coat of the JB Weld adhesive to the outside and a heavy dose to the inside to hold it all snug. When it was dry and hard 10 minutes later I used JB Weld putty to mold the contours so that it flows smoothly. It's not a masterpeice, but once it's painted, I'm pretty sure you won't be able to tell that it's not supposed to be there.

Anyone know what color spraypaint I'd need?

The JBWeld is weird. I used 2 small tubes of the kneed-together kind. One tube came out almost black (The top molding) and the other tube came out almost white (bottom molding). I needed them for the same amount of time. Both got hard at the same speed and are the same hardness now, but they are 2 completely different colors. I checked the packaging to make sure and they are the exact same part #. weird.

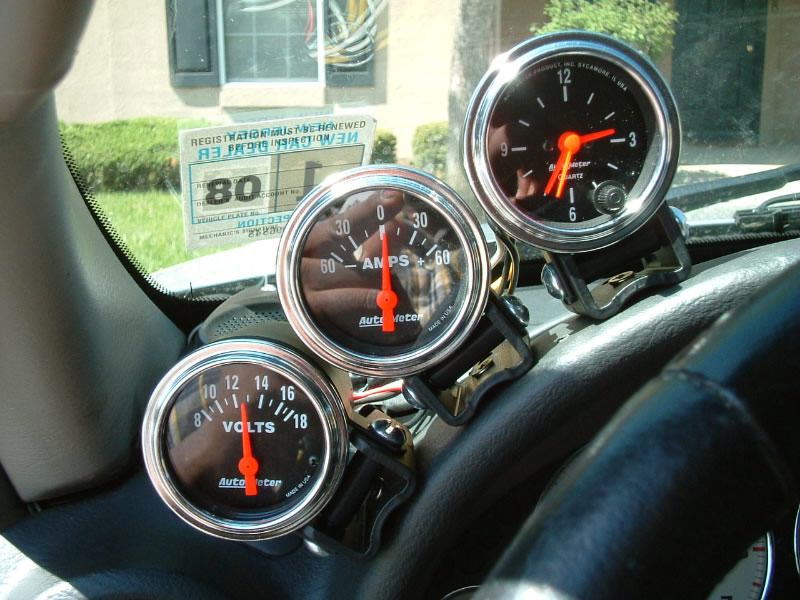
So now I have my gauges AND my handle.

P.S. When I get home, I'll replace these pictures with better ones.

P.P.S. The ProSport AFR/Volt gauge I got is going back. The description said it shows the AFR in LEDs around the outside and shows the Voltage in the center. What it doesn't say is that for 19 minutes, the center shows you the numerical value of the AFR< then for 1 minute it shows you voltage. I needed a voltage meter, the AFR was just a bonus. They say there is no way to change it so that the Voltage show up more frequently so it's going back.

_________________
-oooooo- ---Craig, L.O.S.T. #CT068103
/______\ ---http://jeep.allgris.com
O||||||||O ---'02 Sport 4x4, 5-spd,
[]--------[] ---2.5" BDS lift, 245/75/16 MT/Rs, Moab Rims, Locked and Regeared!
[]_____[] ---The list got to long, go to my web site for more!


Last edited by Gris on Thu Feb 22, 2007 11:43 am, edited 1 time in total.

Top
 Profile  
 
 Post subject: xtra gauges
PostPosted: Mon Feb 19, 2007 12:59 pm 
Offline
LOST Member
User avatar

Joined: Thu Jul 07, 2005 7:01 pm
Posts: 222
billforde wrote:
Here is where I had my guages mounted before I got my GuagePod.
Image


I like the arrangement and the mechanical look. I think the added info from the gauges outweighs any appearance issues that I might have. Good job. :D


Top
 Profile  
 
 Post subject:
PostPosted: Mon Feb 19, 2007 10:11 pm 
Offline
LOST Member

Joined: Sun Jul 10, 2005 6:30 pm
Posts: 443
Location: Phoenix, AZ
Nice work Gris...I may have to add that to my setup. It should look great once it is all painted. Very nice.

_________________
2005 Black CRD Sport
All J CRD Frankenlift with 500 fronts, Boulderbars, and Superskid
Kilby Gas Skid
Yukon Rear Axles
265/75 16 TrXus M/T's and Bridgestone Revo's
Fumoto Valve
Aero Turbine 2525
Rock Lizard Komodo Bumper
Sundance Custom's Front Bumper


Top
 Profile  
 
 Post subject:
PostPosted: Tue Feb 20, 2007 12:55 am 
Offline
Lifetime Member
Lifetime Member
User avatar

Joined: Sat Nov 26, 2005 1:55 am
Posts: 862
Location: Los Angeles, CA
Nice job Craig, excellent work again!

_________________
Jeep Liberty Wikibook
# cd /home/fuzzymuzzle.com


Top
 Profile  
 
Display posts from previous:  Sort by  
Post new topic Reply to topic  [ 25 posts ]  Go to page Previous  1, 2

All times are UTC - 5 hours [ DST ]


Who is online

Users browsing this forum: No registered users and 17 guests


You cannot post new topics in this forum
You cannot reply to topics in this forum
You cannot edit your posts in this forum
You cannot delete your posts in this forum

Search for:
Jump to:  
Powered by phpBB © 2000, 2002, 2005, 2007 phpBB Group. Color scheme by ColorizeIt!
Logo by pixeldecals.com