It is currently Sat Jan 17, 2026 11:52 pm

All times are UTC - 5 hours [ DST ]


Post new topic Reply to topic  [ 14 posts ] 
Author Message
 Post subject: Rock Lizard Super Sliders Installed - with install pictures
PostPosted: Tue Dec 11, 2007 7:49 pm 
Offline
Lifetime Member
Lifetime Member

Joined: Thu Jun 07, 2007 6:50 pm
Posts: 133
Location: Long Beach CA
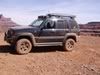
Results -- Bottom line up front:
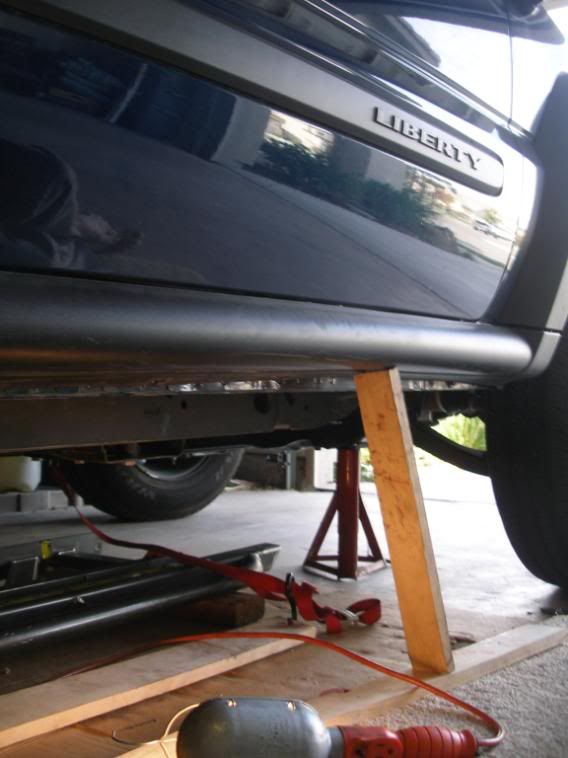
I really like the look of these sliders on my Liberty. :D
PICs

Image
Image
Image


Rock Lizard (RL) instructions:
Here are links to the RL instructions so I won’t repeat what is already said. The RL instructions are good but I found some things that I thought might be augmented.

http://www.rocklizardfabrications.com/i ... s_05kj.htm
http://www.rocklizardfabrications.com/instructions.htm


05-06 Rocker Cover Preparation and Trimming:
The RL instructions stated that the plastic rivet on the end may need to be removed – I found no need to remove these rivets and if I had, I’m not sure how I would have reattached the pieces.
The hammer worked fine to pull the panel covers down and a pair of pliers easily pulled the plastic brackets out of the covers or out of the sheet metal – wherever the bracket was left.

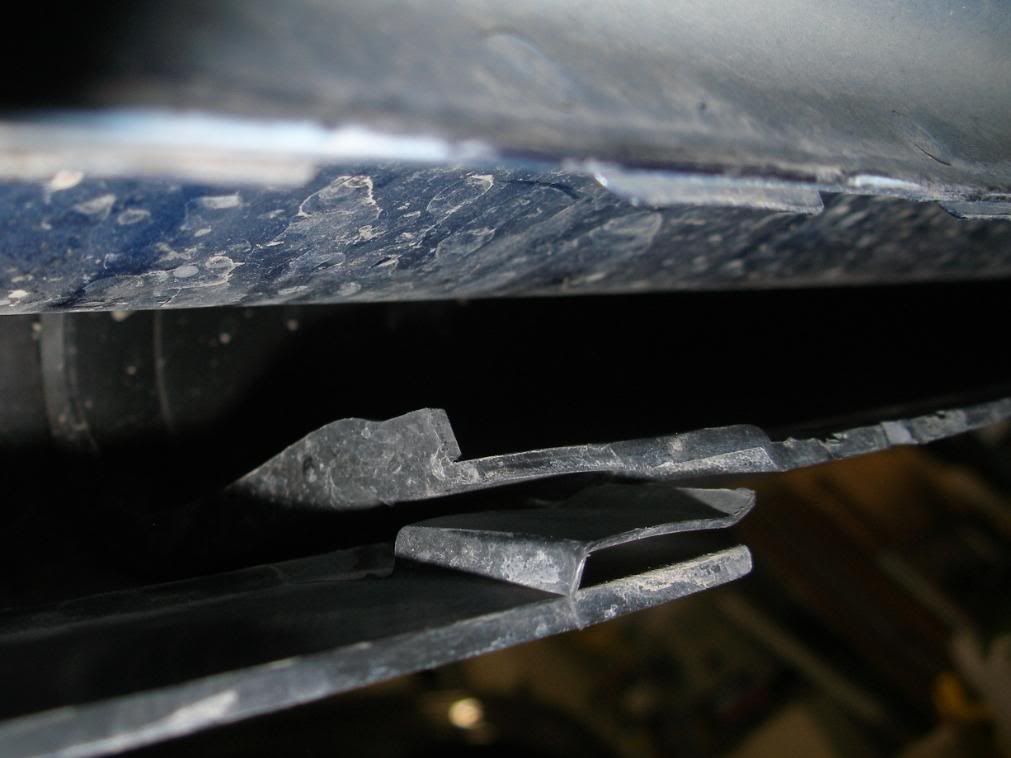
I cut the square notch out of the overlapped rocker cover with a pair of tin snips. However the back of these covers also need to be trimmed, so they will lay flat (and thin) against the sheet metal. One side has a tab that needs a razor scraper to shear it off flat. The other has a ridge that needs to be trimmed far enough back to gain clearance for the cover to lay flat when pressed up into position.

Image


Template Error:
When I put the template on the pinch seam mount I found the holes did not align.
Image


So I flipped the template down on the brace, aligned the center holes, and then scratch a center line on the template in line with the center of each pinch seam mount hole (using the hard tipped center punch provided by RL). Flip the template back on the pinch seam mount with the same center holes aligned and the “scratch” marked side facing the pinch seam mount. Then tape it in place as per RL directions.


Alignment:
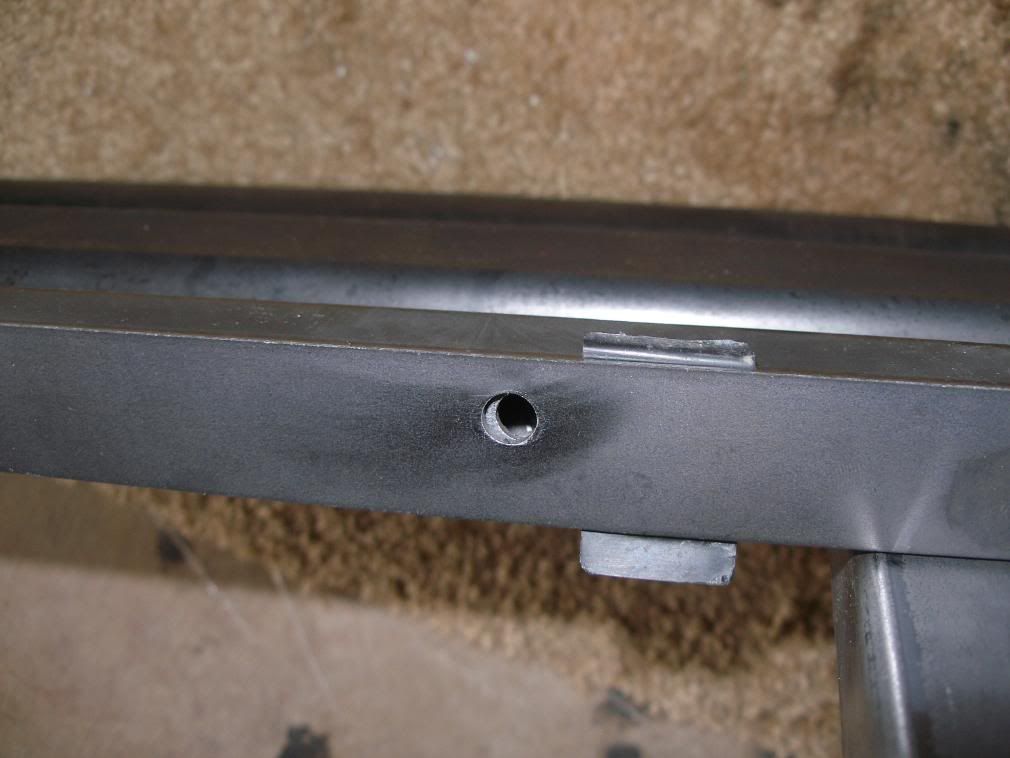
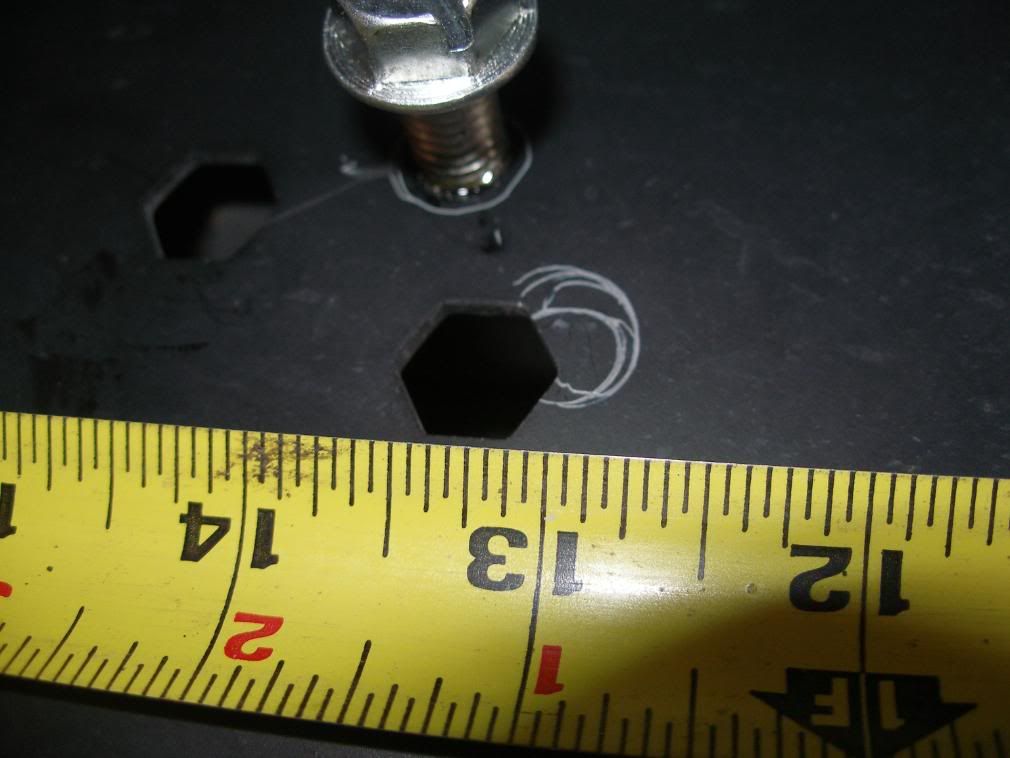
The rails are longer that the flair to flair described but will overlap the flairs – I found the front of the rail to about divide the front flair worked well. However, after I got the pinch seam mount holes drilled on the first side, and placer the sliders up to address the foot holes, I discovered that the “Nutzert” holes on the frame, where the front slider foot rests, is in the same area as the foot’s trailing hole. The hole I needed to drill slightly overlapped this Zert hole. I know RL stated that all bolts didn’t need to be installed, but I drilled another hole in the upper end of the foot so I could have three bolts in. In the picture below, the scratched circles just above the # 13 are from the original foot hole. The bolt above is from the extra hole I drilled. I hit the frame with some brown paint for contrast for the second picture.
Image
Image


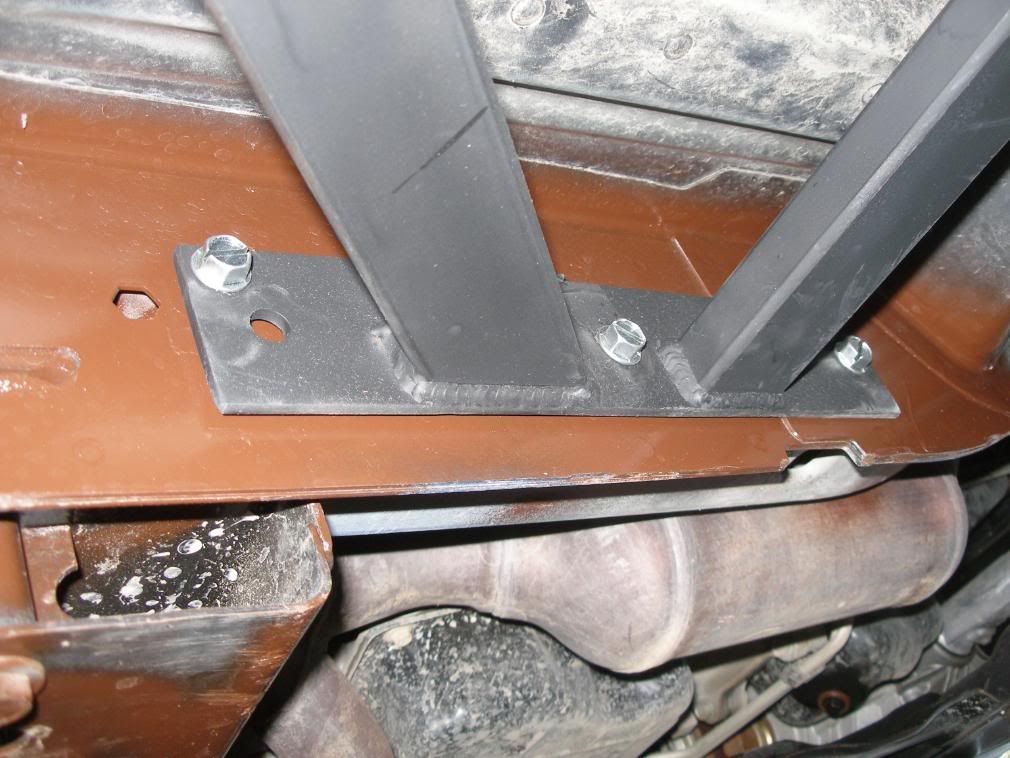
On the other side I aligned the slider a bit forward so the foot’s mounting hole would miss the Zert hole. Image


I wasn’t prepared for the foot to not snug up to the frame for each bolt. The frame is reinforced where the ends of the feet set leaving a gap for the other two bolts. I would have liked to have been provided a shim that would slide under the foot, drilled for these two holes and fill the gap.

Image


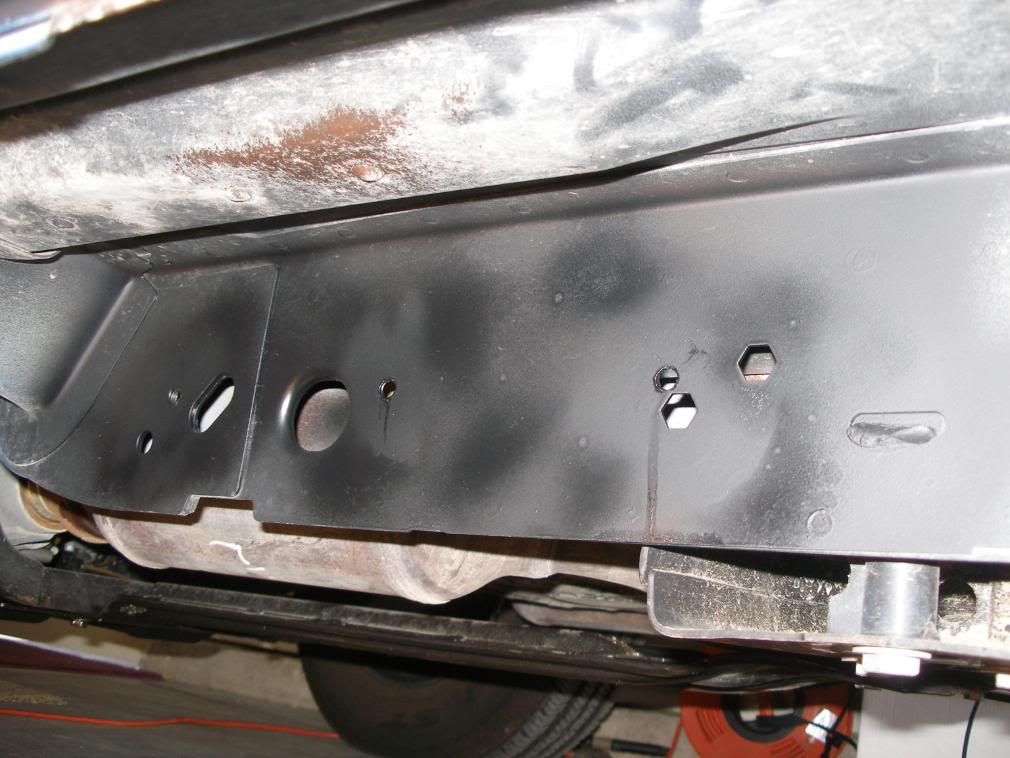
I did notice that at least one bolt on each foot could be reached inside the frame through holes in the bottom of the frame. If these bolts striped one could likely use a large washer and nut inside the frame.


Template Placement for Marking:
My template was wider than the pinch seam mount rail, so when positioning the slider, be sure the template is NOT pressing against the plastic cover but is between the cover and the pinch seam. This will insure the pinch seam mount is up as high as possible so the holes drilled will not be near the bottom of the pinch seam.
Image


Holding the Sliders Steady:
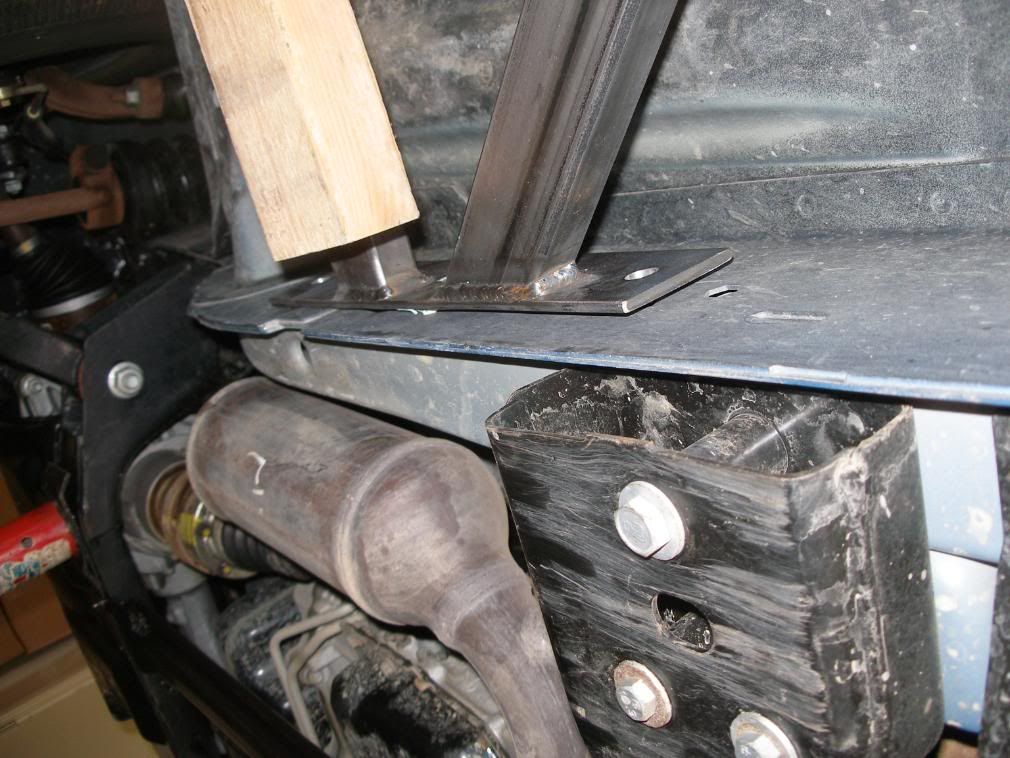
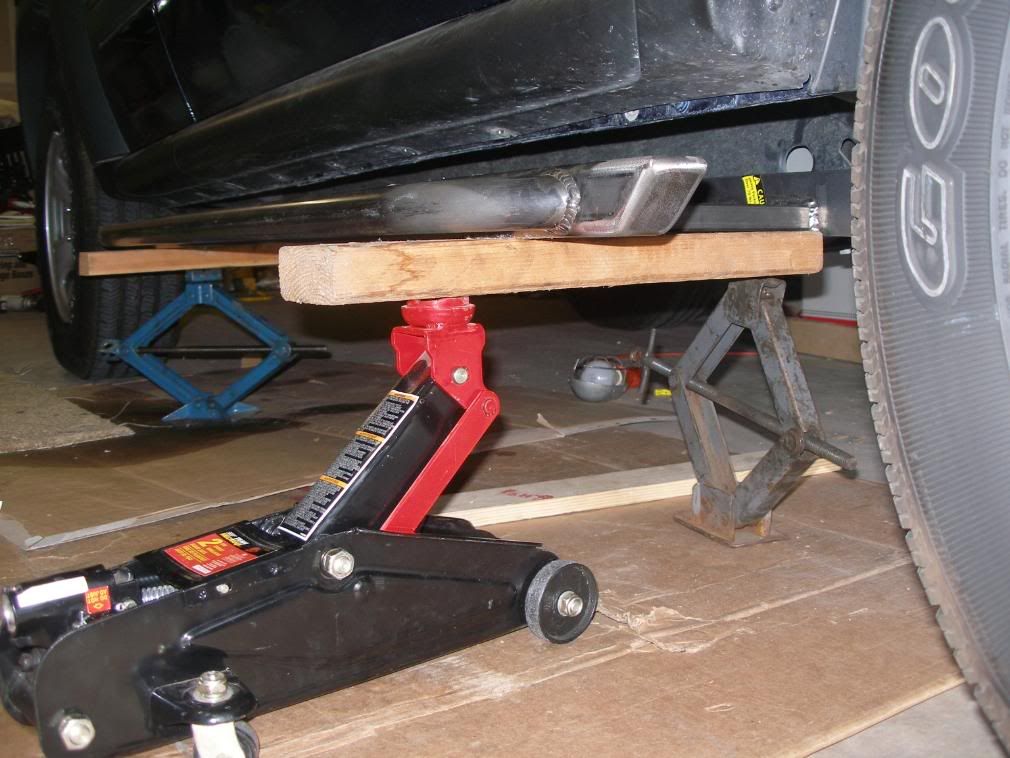
To insure correct alignment, before clamping the template or marking the foot holes, I found it worked best for me to lightly press the sliders and rocker covers in place with jacks. I used two at one end of the sliders to adjust tilt and one at the other end (using 2x4 scraps to protect the sliders). I felt it was important to start with the pinch weld mount as high and tight as possible.
Image
Image


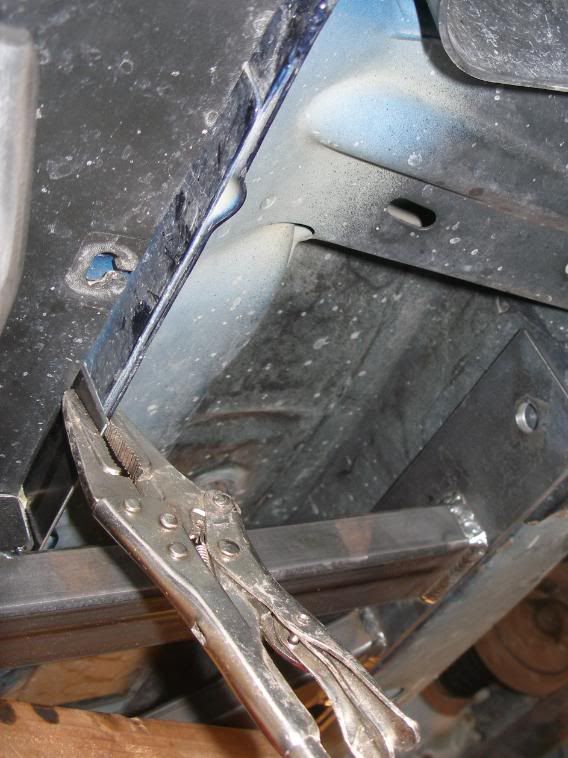
I clamped the pinch seam mount to the pinch seam with vice grips to be sure all was in place before clamping the template to the seam.
Image


When center-punching the pinch seam holes, remember to align the punch (front to back) with your scratched center lines and not the center of the template hole. Align with the template hole top to bottom.


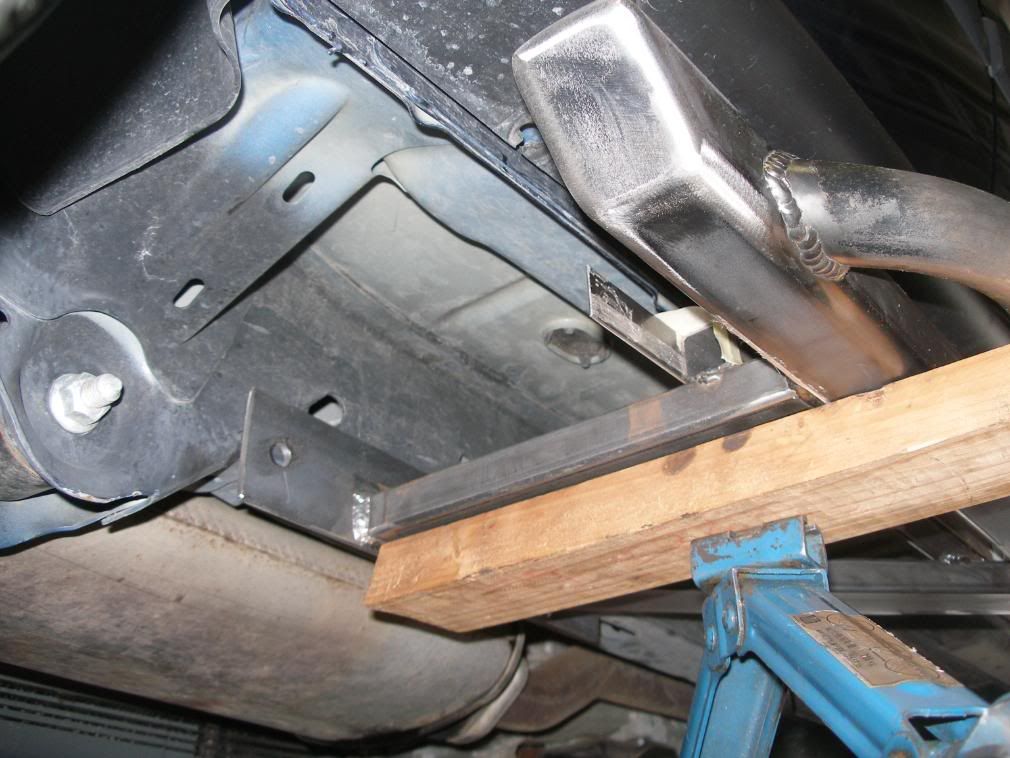
Drilling: I found starting the drill in the correct spot to be very difficult. The spring loaded center punch provided by RL worked great, but my 1/8th inch drill still wanted to wander. After trial and wander, I found that if I re-punched the indentation left by the spring loaded punch, using a hammer and punch and then used a much smaller drill to create a dimple, my 1/8th was less prone to wander. When drilling the pinch seam the plastic rocker cover was getting scarred by the drill chuck so I used a piece of 1x4 to wedge the cover up against the sheet metal.
Image


I soon found that, even with my new Titanium bit, drilling 5/16 inch holes in steel while laying on the garage floor is very difficult. You can hardly press the drill in to make it bite without pushing yourself backward and whatever you do, it’s very tiring – boy did I need a drill press. So I made one! Grabbed a piece of 1x4 about three feet long and drilled a hole in the end (used the 5/16 bit already in the drill). Hooked an adjustable tie-down strap in the board’s hole and hooked the long tie-down end under the jeep directly in from where I was drilling (using holes in the frame, skid plates or the frame rail on the opposite side). Then took the slack out of the strap, placing the board across the end of the drill (at 4 or 5 inched from the where the strap attached) and while holding/aligning the drill with both hands pressed the long end of the board with my knee, applying just enough pressure with my knee for the bit to cut and to slow but not stall the drill. This may sound cumbersome but after a hole or two it was like a production line.


Getting the Bolts In:
The instructions recommend starting from one end, I think it is better to start from the center and work out both ways – because the errors in my template got worse from where you start (your scratched center lines should have corrected most or all of this). In any event, the amount of error or amount you need to enlarge any hole should be reduced.

My Pinch weld holes were close enough that with a couple of the center bolts inserted, and with nuts on, I could force the un-chucked drill bit into the pinch weld hole, on into the slightly unmatched slider holes, turning the bit with my vice grips to cut enough to get all the way through the pinch and the back and front slider holes. If it’s not real close to start with you won’t be able to turn this by hand.

I was also privileged to have access to a right angle drill that I used to chucked up a short 5/16 bit and re-cut a couple that I couldn’t turn by hand. Otherwise follow the RL instructions to drill the Pinch weld hole larger, this is where starting with your pinch weld mount as high as possible pays off.


Replace the Fender Bolt:
The instructions state “remove furthest of the two fender bolts in the pinch seam from the front wheel well” to get it out of the way of the template, after the drilling is done is a good time to put this bolt back. This instruction was left out.


Paint:
I used the recommend Rust Reformer to paint the entire Sliders, it took 1 ½ spray cans. I bought one can each of the Dark Gray and the Hammered Black and then painted each foot of a slider, one color. When dry I held these feet up to the rocker cover to pick my color. The hammered black was my selection. The Rocker Covers were darker and matched the hammered black; the dark gray better matched the lighter finder flares. When painting the hammer black on the sliders I only painted the slider bars and the rock rail’s top, bottom and outside so one can was enough for the whole job.

_________________
Ed

2006 4X4
Full Jeep skids
Rock Lizard Super Sliders
OME Spring Lift
Al's A-Arms and Quick Disconnects
Cobra 75 WXST and Fire Stick
Garmin 580 GPS

LOST #EH075243
http://www.cardomain.com/ride/2934108


Top
 Profile  
 
 Post subject:
PostPosted: Tue Dec 11, 2007 8:07 pm 
Offline
LOST Addict
User avatar

Joined: Mon Jun 19, 2006 11:31 pm
Posts: 1203
Location: NE Ohio
awesome directions! looks like you did it the right way to prevent rust and all, by painting. and everything else as well. good job! i might have to get me a set of those eventually after i get my frankenlift and locker

_________________
2002 Cactus Green Renegade~OME HD/Rancho
235-85-16 Firestone Destination MT's~Detroit Locker~AL's 4.5 Arms
ARB bumper/Superwinch 9k~PIAA 540 driving lights/PIAA reverse lights~Crane 8.25 diff cover
Image


Top
 Profile  
 
 Post subject:
PostPosted: Tue Dec 11, 2007 8:46 pm 
Offline
LOST Addict

Joined: Sat Jul 09, 2005 1:46 pm
Posts: 1195
They look great. Looks like a lot of work, but definately worth it. Glad mine are getting installed Saturday.

_________________
June 2001 Liberty Limited 4X4
Frankenlift II Premium, Al's Upper Arms, 245/75R16 C Silent Armors on Moabs, RL Skink Super Sliders, Rear DTT, Riddler Diff Cover, Fastman Throttle Body, Profinish-Proglass Hood, Borla Dual Outlet Exhaust, TransGo Reprogramming Kit, APS Stall Converter, 4.10 Gears, B&G Chrysler PCM, Lots of Line-X, etc...


Top
 Profile  
 
 Post subject:
PostPosted: Tue Dec 11, 2007 8:54 pm 
Offline
LOST Addict
User avatar

Joined: Thu Aug 31, 2006 2:09 pm
Posts: 1297
Location: Minneapolis, MN
Those things are awesome, I have a pair myself. But they hold snow as well as a shovel.

_________________
"I'm the guy who does his job, you must be the other guy"
02 Black UNlimited Edition 4X4 Select Trac Liberty Towing/Off Road Packages 245/75/16 on black Moabs
RL diff cover/Super Skink sliders, Rusty's 2.5" Coil Lift w/ clevis lift, Roof basket W/Hella FF75...
On the prowl for an M416/M101/M100 trailer
L.O.S.T. Member 2877


Top
 Profile  
 
 Post subject:
PostPosted: Tue Dec 11, 2007 10:58 pm 
Offline
I live here
I live here
User avatar

Joined: Sun Jul 10, 2005 6:59 pm
Posts: 5839
Location: Aurora, CO
Did you try the template by flipping it to the other side to see if the holes aligned the other way? They won't align one way but should have aligned the other way.

Also note that we did a comparison on pinch seams, over a year ago, and everyone had different pinch seams. There is no quality control here by DC.

My drill bits tore through my seams so fast it was dangerous. I almost lost an eye and my face was at max arm length distance and elevated way above seam area (always wear eye protection). I had a chunk of hot metal fly into my eye (area where those nasty eye boogers congregate).

_________________
===
New KJ Gear - Desert Armor Flak

2004 Renegade Light Khaki - 4" JBA Lift - Rock Lizard Products: Komodo Dragon Rear Bumper, Prototype Winch-mount Front Bumper, Super Skink Sliders - All J's Super Tranny Skid II - 31" Firestone Destination AT's on Moab wheels - Cobra 75W CB w/ stock Antenna mod

[b]Retired, US Military


Last edited by Tokyojoe on Wed Dec 12, 2007 12:16 am, edited 1 time in total.

Top
 Profile  
 
 Post subject:
PostPosted: Tue Dec 11, 2007 11:02 pm 
Offline
Lifetime Member
Lifetime Member
User avatar

Joined: Wed Aug 02, 2006 5:38 pm
Posts: 39
Location: colorado springs
those look great!!!

_________________
'05 Renegade, Frankenlift ll Premium, Skink Super Sliders, Al's Control Arms, Moog LBJ& UBJ's, BFG AT KO 255-70-16, Tow Hooks, Lightbar, Roof basket, Receiver hitch, Magnaflow, Amsoil drop-in,CB, XM


Top
 Profile  
 
 Post subject:
PostPosted: Tue Dec 11, 2007 11:28 pm 
Offline
Lifetime Member
Lifetime Member
User avatar

Joined: Sat Feb 17, 2007 7:26 pm
Posts: 1325
Location: Casper, Wyoming
I mentioned this when I installed my step-skinks: I used a #2 center drill rather than a 1/8" drill. It can't flex so it won't wander. I had no trouble getting all of my holes drilled right where I wanted them with this. The center drill easily stays in the center punch hole and almost slides through the frame and seam.

Image

_________________
Ron


"There are few problems in life the liberal application of duct tape can't solve."


Top
 Profile  
 
 Post subject:
PostPosted: Wed Dec 12, 2007 1:55 am 
Offline
Lifetime Member
Lifetime Member
User avatar

Joined: Thu Apr 13, 2006 4:48 am
Posts: 401
Location: Newark, DE
aye snow shovel

it adds a layer between all the gaps, so if you drop something, it will catch it..... i think snow should be an additional option for the skinks

_________________
1998 Audi A4 1.8tQ

1990 Mazda Miata

"Remember when the platform was sliding into the fiery pit and I said 'Goodbye' and you were like 'NO WAY' and then I was all 'I was just pretending to murder you'? That was great."


Top
 Profile  
 
 Post subject:
PostPosted: Wed Dec 12, 2007 4:07 pm 
Offline
Lifetime Member
Lifetime Member

Joined: Thu Jun 07, 2007 6:50 pm
Posts: 133
Location: Long Beach CA
Tokyojoe wrote:
Did you try the template by flipping it to the other side to see if the holes aligned the other way? They won't align one way but should have aligned the other way.


Yes I tried it all ways. The distance hole to hole on the template was slightly less that the hole to hole distance on the sliders – no turning would make it longer.

_________________
Ed

2006 4X4
Full Jeep skids
Rock Lizard Super Sliders
OME Spring Lift
Al's A-Arms and Quick Disconnects
Cobra 75 WXST and Fire Stick
Garmin 580 GPS

LOST #EH075243
http://www.cardomain.com/ride/2934108


Top
 Profile  
 
 Post subject:
PostPosted: Wed Dec 12, 2007 4:11 pm 
Offline
Lifetime Member
Lifetime Member

Joined: Thu Jun 07, 2007 6:50 pm
Posts: 133
Location: Long Beach CA
Dje Ryu wrote:
I mentioned this when I installed my step-skinks: I used a #2 center drill rather than a 1/8" drill. It can't flex so it won't wander. I had no trouble getting all of my holes drilled right where I wanted them with this. The center drill easily stays in the center punch hole and almost slides through the frame and seam.

Image


I wish I had caught your post -- that sounds like what I needed. RL should add this to his instructions!

_________________
Ed

2006 4X4
Full Jeep skids
Rock Lizard Super Sliders
OME Spring Lift
Al's A-Arms and Quick Disconnects
Cobra 75 WXST and Fire Stick
Garmin 580 GPS

LOST #EH075243
http://www.cardomain.com/ride/2934108


Top
 Profile  
 
 Post subject:
PostPosted: Wed Dec 12, 2007 4:36 pm 
Offline
LOST Member

Joined: Thu Jul 28, 2005 12:29 am
Posts: 377
One thing that helped me install these rails besides measuring twice, drilling once was using a heavy duty 1/2" Makita drill and brand new carbide drill bits. "Like a hot knife through butter"

Image

_________________
2002 Liberty Limited
2.5" Rusty's Coil Lift + OME 927 springs + 1/4" spacers
265x70 Revos
Warn 4x Floods
ARB bumper
TeraFlex extended front bumpstops
Rock Lizard Skink Super Sliders
Bosch Size 86 battery
Jeepin by Al's 4.5 UC Arms
Kryptonite Differential Cover
JBA Bolt on KJ Tri-Angulated 4 Link


Last edited by USPLibby on Wed Dec 12, 2007 6:11 pm, edited 1 time in total.

Top
 Profile  
 
 Post subject:
PostPosted: Wed Dec 12, 2007 4:47 pm 
Offline
LOST Addict

Joined: Wed Mar 29, 2006 6:36 pm
Posts: 3143
Location: OKLAHOMA
looks great... can't wait until mine are here!


Top
 Profile  
 
 Post subject:
PostPosted: Tue Sep 02, 2008 10:15 am 
Offline
LOST Newbie

Joined: Tue Aug 26, 2008 8:43 am
Posts: 44
Location: nh
Good writeup, Thanks.

Quote:
I wasn’t prepared for the foot to not snug up to the frame for each bolt. The frame is reinforced where the ends of the feet set leaving a gap for the other two bolts. I would have liked to have been provided a shim that would slide under the foot, drilled for these two holes and fill the gap...

I was also surprised by this gap during my test fit. I have an '07, and thought something might have changed since the skinks were fabbed. But, seeing your writeup, I guess that's just the design.

Otherwise, all dimensions and fitment were right on.

_________________
2007 KJ Sport - Frankenlift


Top
 Profile  
 
 Post subject:
PostPosted: Tue Sep 02, 2008 10:50 am 
Offline
Lifetime Member
Lifetime Member
User avatar

Joined: Tue Aug 05, 2008 2:21 pm
Posts: 960
Location: Massachusetts
Looks great, may get a set for my Libby

_________________
One Life - Live It


Top
 Profile  
 
Display posts from previous:  Sort by  
Post new topic Reply to topic  [ 14 posts ] 

All times are UTC - 5 hours [ DST ]


Who is online

Users browsing this forum: No registered users and 18 guests


You cannot post new topics in this forum
You cannot reply to topics in this forum
You cannot edit your posts in this forum
You cannot delete your posts in this forum

Search for:
Jump to:  
Powered by phpBB © 2000, 2002, 2005, 2007 phpBB Group. Color scheme by ColorizeIt!
Logo by pixeldecals.com