Question/Problem
This document will help you in doing a brake job or Rotor replacment at home with a few simple tools.
DISCLAIMER: Your brakes are a vital safety feature of your Jeep and you should consider professional installation of these components. These instructions are being provided as instructional/informational and L.O.S.T, AZ L.O.S.T., and any officer or member associated is not responsible for your decision to use these directions. We do however strive to make sure that these instructions are as accurate as possible and are specific to a Jeep Liberty.
Answer/Resolution
Before your begin:
Tools Needed
Standard 3/8" Drive Socket wrench
Standard 1/2" Drive Socket Wrench
12mm socket 3/8"
13mm socket 3/8"
22mm socket 1/2" (can be done with 3/8" drive Socket wrench I found this gave me more force to get the bolt loose)
Rubber Mallet
Brake Caliper Compression tool / or a large C clamp
Small Flat Head Screwdriver
Floor Jack
Jack Stands
Parts Needed:
New front brake Pads
New Rear brake Pads
New Front Rotors (if changing)
New Rear Rotors (if changing)
3 - 4 Cans of brake Cleaner (more or less depending on how dirty the components are)
Front brake/Rotor replacement
1. Take Cap off of the brake reservoir so that it will allow the break fluid to go back into the reservoir while compressing the piston on the caliper
2. Jack the front of the jeep up so that both front tires are off the ground, place Jack stands under front of jeep on the frame (don't put them on the lower A ARM for this application)
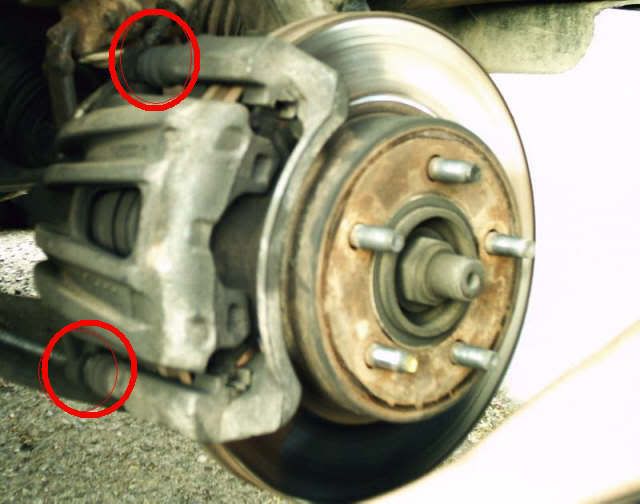
3. Remove both Front Tires to expose brake assembly (see figure 1)
4. Using 12mm Socket and 3/8" drive socket wrench remove the two bolts from the rear of the caliper (see figure 1)
FIG 1
5. Pull up on Caliper to remove from the Rotor (after removing the caliper, take care not to allow the brake line/hose to support the weight you can temporarily tie them off to the steering knuckle, etc. with a small piece of rope)
6. Remove old pads (take care to not remove metal clips or replace them if they come out during the brake pad removal. These are on the end of each brake pad)
If you are only replacing your brake pads now skip to Step 12
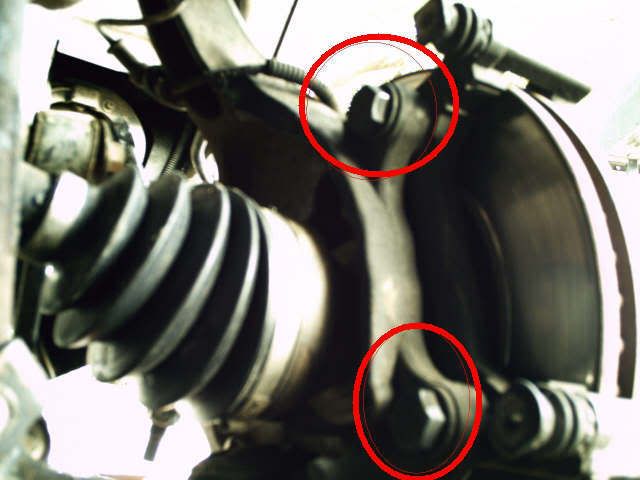
7. Using the 1/2" drive Socket wrench and the 22mm socket remove the two bolts that hold the caliper bracket to the jeep. (See figure 2)
Fig 2
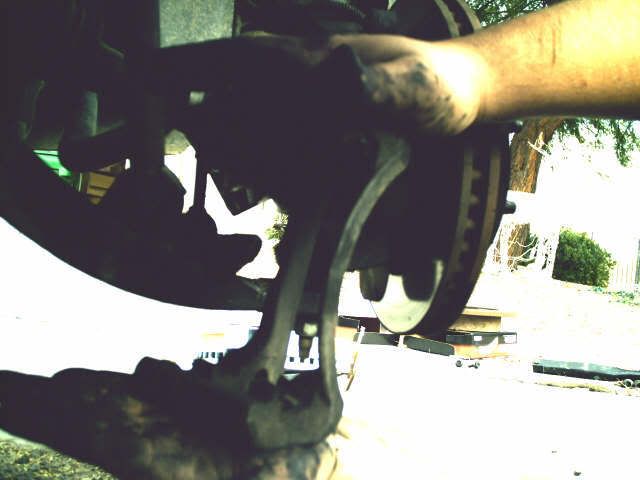
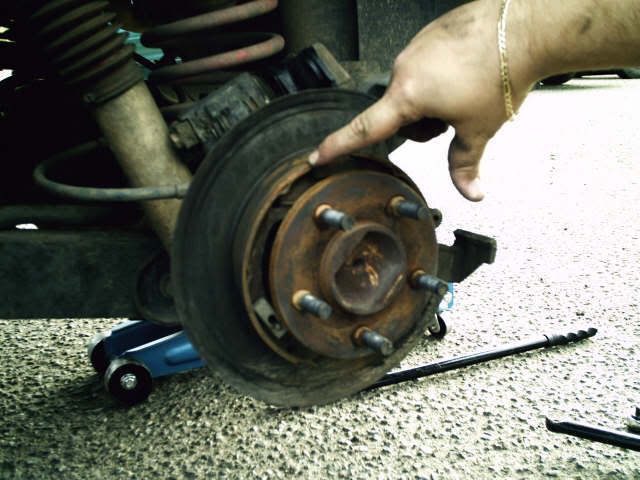
8. Remove Caliper bracket from jeep (see figure 3)
Fig 3
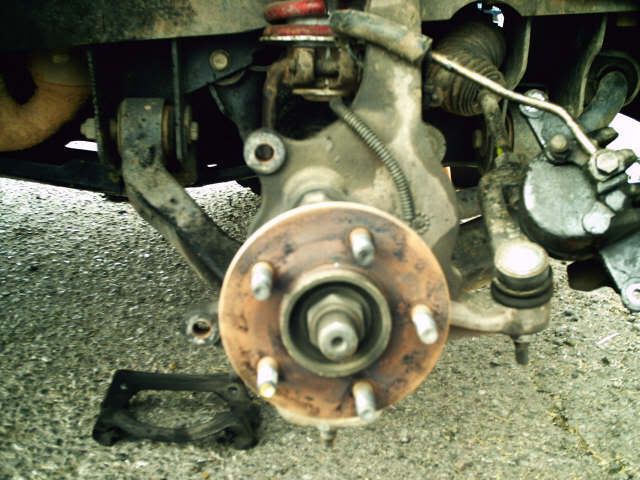
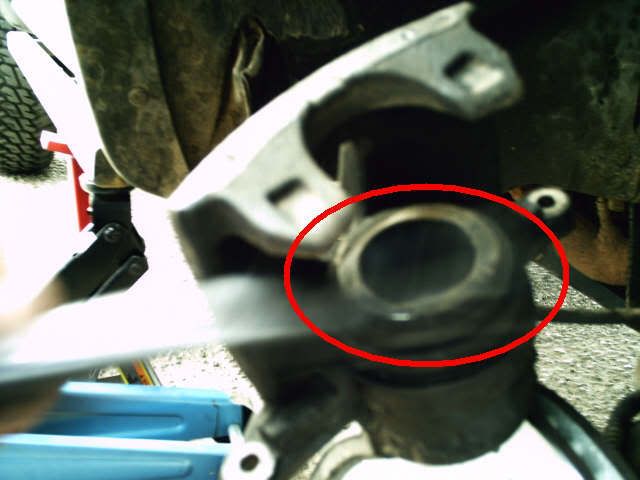
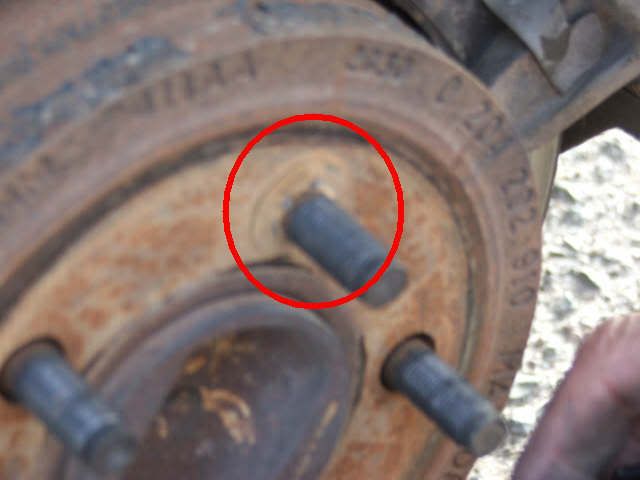
9. Remove metal clips that may be present on the wheel studs I used a flat head screw driver to remove them (they dont need to be replaced)(see figure 10), then using rubber mallet tap gently on the rear of the rotor and it will pop loose (heavy part so remove slowly and don't drop) (the Center Nut does not hold the rotor on) (see figure 4)
Fig 4
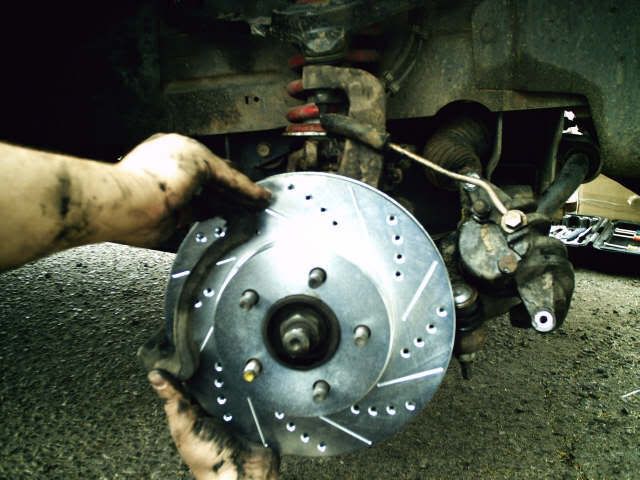
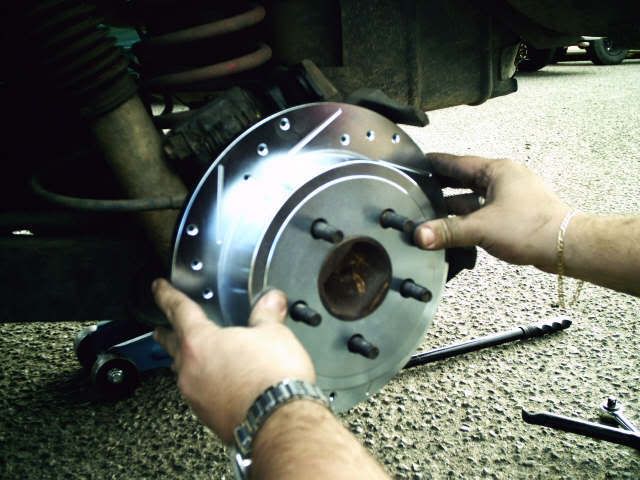
10. Slide new rotor on (if using slotted or cross drilled rotors as I did consult manufacture for proper direction for installation, I had mine installed so that they appear to be rotating towards the rear) (see figure 5)
FIG 5
11. Replace caliper bracket by placing the 22mm Bolts back in and tighten them back down
12. Using the Caliper compression tool or C Clamp compress the piston completely into the caliper (see figure 6 for what the piston looks like)
FIG 6
13. Insert the new brake pads into the caliper bracket and then slide caliper back into place
SPECIAL NOTE: if you are not replacing your rotors before putting your new pads in you should first take off the rotors and take them to a local brake/machine shop and have them resurfaced.
14. Insert 12mm bolts and tighten them back on.
15. Once everything is reassembled use the brake cleaner to completely clean the entire area rotate rotor slightly to get behind the new pads.
16. Redo Steps 4 - 15 for other side of jeep.
17. Place front tires back on.
Rear brake/Rotor replacement
1. Jack rear of jeep using rear pumpkin jacking point and place jack stands onto frame or rear axel tubes of the jeep (take care to make sure that you are always looking out for safty even with jack stands in place)
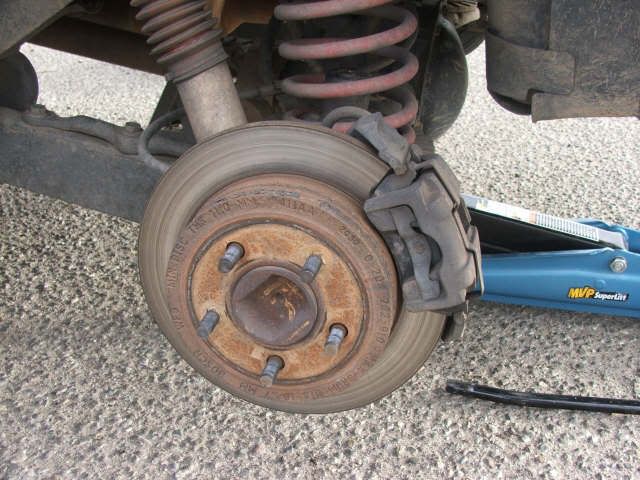
2. Remove rear tires on both sides to expose rear brake assembly (see figure 7)
FIG 7
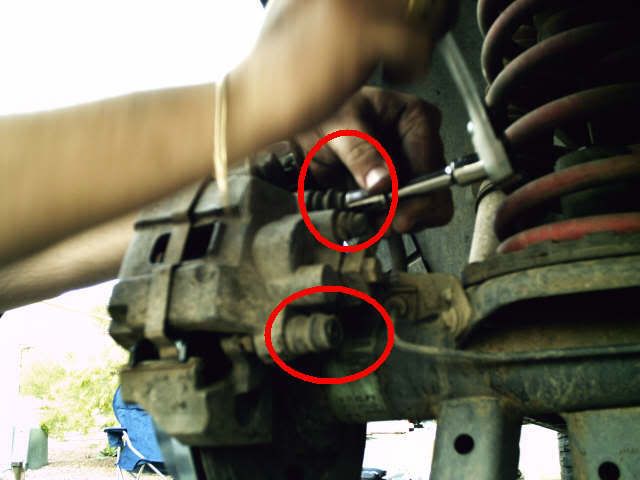
3. Using 13mm socket and 3/8" drive socket wrench to remove both bolts on the rear of the rear caliper (see figure 8 )
FIG 8
4. Remove Metal clip that is on top of the rotor by pressing ends inwards (SEE FIGURE 9)
FIG 9

5. Slide up and remove caliper from rotor. (after removing the caliper, take care not to allow the brake line/hose to support the weight you can temporarily tie them off to the steering knuckle, etc. with a small piece of rope)
If only replacing brake pads skip to step 9
6. Remove metal clips that may be present on the wheel studs I used a flat head screw driver to remove them (see figure 10)
FIG 10
6. Using rubber mallet tap gently on rear of old rotor to loosen up remove slowly as this is heavy part.
7. This will expose the E-brake Pads (see figure 11)
FIG 11
8. Place new rotor on to wheel studs (If slotted or cross drilled rotors are used consult manufacture for proper direction) I installed them with the pattered pointing towards the rear of the Jeep (see Figure 12)
FIG 12
9. Remove old brake pads you will have to push forward and up to remove the first one (see figure 13)
FIG 13

10. Using rotor compression tool or large C Clamp compress rotor piston completely in.
11. Place new pads into placement
12. Slide caliper and pads onto the rotor by first putting the bottom of the rotor in and sliding the top into place.
SPECIAL NOTE: if you are not replacing your rotors before putting your new pads in you should first take off the rotors and take them to a local brake/machine shop and have them resurfaced.
13. Replace 13mm bolts and tighten on.
14. Replace metal clip on top of rotor (see fig 9)
15. Once everything is reassembled use the brake cleaner to completely clean the entire area rotate rotor slightly to get behind the new pads.
16. Repeat steps 3 - 15 on other side.
17. Put rear tires back on.
FINAL STEPS
1. Place brake reservoir lid back on.
2. Start Jeep and pump brakes several times until the pressure is back to what you are used to.
3. Start off by going very slow applying the brake to make sure that you have complete brake control
4. Once satisfied with braking power drive jeep normally.
Edited by corwyyn to update image locations