|
If you have the car back from them, GOOD! That is the first step to getting this fixed properly. We can walk you through the rest. It isn't mechanically very difficult if you can follow procedures, but it will take time and precision.
Since you will be taking the valve cover off as well, DO NOT WORRY ABOUT THE TIMING right now. You can disassemble everything as happy as you please without any special tools at all. Reassembly will really only require 3 special tools, 2 of which can be purchased from members here. The third, is the counter-hold tool that you can either make or purchase from IDparts.com. Look for the VW timing tools, it is a long bar named (i think) Cam generic counter-hold bar. There is a special VM tool, but I have used that with the counter hold as a double-safety, and I like using either both together or just the counter hold bar. The VM tool still allows the pulleys to rotate a little when presented with the 80 ft-lb of torque that you will need to use to lock the cam pulleys onto the cams.
You can reset the engine timing very easily with everything disassembled. To start deciding if you have the tools and skills to do this, I would download and read the Timing Belt Replacement how-to guide. I believe that GreenDieselEngineering.com has it on their website, or it may be here in the Noob thread sticky. That is the bulk of the process. Once the timing parts are ALL removed as if you were replacing the water pump (if you do, just replace the front half, it is much easier) then the rest of the work is relatively easy.
The injectors are ONLY held down by a single 10mm bolt into a crows' foot clamp, and a dirt-seal o-ring that is probably covered in filth. Just gently rotate the injectors side-to-side (leave the high pressure line connected to the injector end) until they work loose. Be VERY gentle on the return lines on top of the injectors. They are fragile plastic. Remove the metal clip, and use a tiny flat screwdriver to gently pry them straight up until the o-ring releases. It will take some time and effort, but they WILL come out.
Keep them in order, it matters to the computer. Unplug the electrics from the injectors, the temp sensor, the 2 connectors on the airbox, and the viscous heater, the camshaft sensor (back left) the 2 fuel rail sensors (back right), the MAP... And LEAVE EVERYTHING ELSE. If you use a small hook and some string, you can lift the harness straight up and tie it out of the way to the hood.
You may find it helpful to put a little tape tag on each of the injector cables, as the #4 is the same as the fuel rail sensor, and they do NOT belong reversed.
Pull the fuel return line out of the way, but leave everything connected to it. The plastic is too weak to mess with. The large fuel rail comes off as one piece with the sensors in place. DO NOT REMOVE THEM. They are one-time-use-only if they are removed, and will be just fine staying where they are on the rail. The fuel line from the main pump can just be loosened at the pump and rotated out of the way.
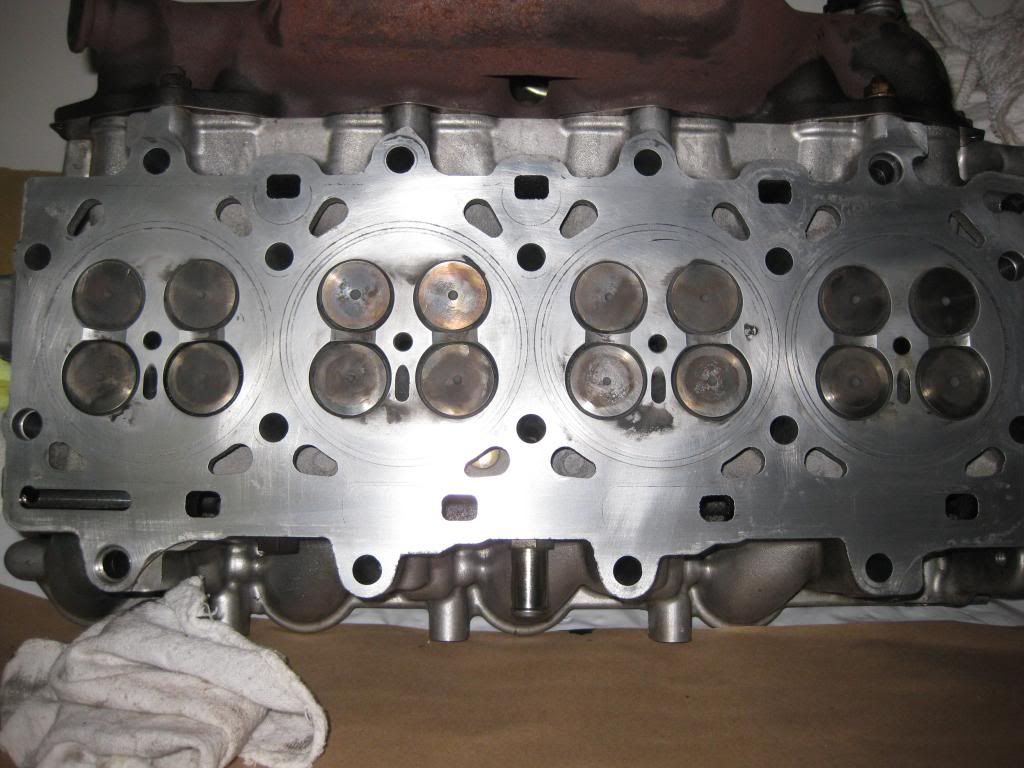
Now you are in the position to remove the CCV puck, and the remaining bolts are all for the valve cover. Once that is off, the head bolts are next, and if you are creative, you can lift the head just enough with an engine crane and some chain (bolted to the valve cover holes) so you can get your hands into the cylinder and get that piece out.
Then just reverse the process and put everything back where you found it. Head bolt torque: 130 lb-ft for the center rows, 120 or 125 for the outer rows. IGNORE THE BOOK with the "turn this many degrees" method, it is crap.
Good luck!
_________________
Proud supporting vendor of LOST Jeeps
TRAVELING CRD TECH. I come to you!
Need help? Just ask! I've taken it apart more than most.
Email jeep [at] maincomputer [dot] com - BOARD MESSAGING IS BROKEN
Over 225 CRDs currently driving with my valves, timing belt, rockers, or ARP Studs.
Bad noises = REALLY bad things.
|

 Login
 Register
 FAQ
 Search


 If you want it done right, do it yourself. If you cannot, then I suggest that you hire either Sir Sam or Geordi to do the job for you. Either of them will do a better job for less money. While you are at it, I'd put studs in, too.